Showing posts with label p: POTD. Show all posts

Friday, July 3, 2015

Patriotic NOTD

I have a very good reason for not posting this week until now: Tuesday was my last day at work and now I am officially retired! Monday and Tuesday I was packing up my office, wrapping up last minute tasks, and celebrating the end of my working life while riding an emotional rollercoaster that had me sad to be leaving people I'd built relationships with over 16 years but excited about the next stage in my life. The past two days I've been busy at home as Mr. K and I have been planning our adventures for the next couple months and readying the house to host his family's reunion. But I did take time out yesterday to put 4th of July inspired polish on my tips and toes, so figured I'd take a little more time out to share while it was still timely. Those photos in my backlog will just have to wait a while longer.

For the featured polish in my mani, I chose the most recent red, white, and blue glitter to join my stash: L'Oreal Raise the Flag, which is so new I haven't even had a chance to get it into a display post yet. It has tiny bar glitter in the colors of the US flag packed in a clear base.
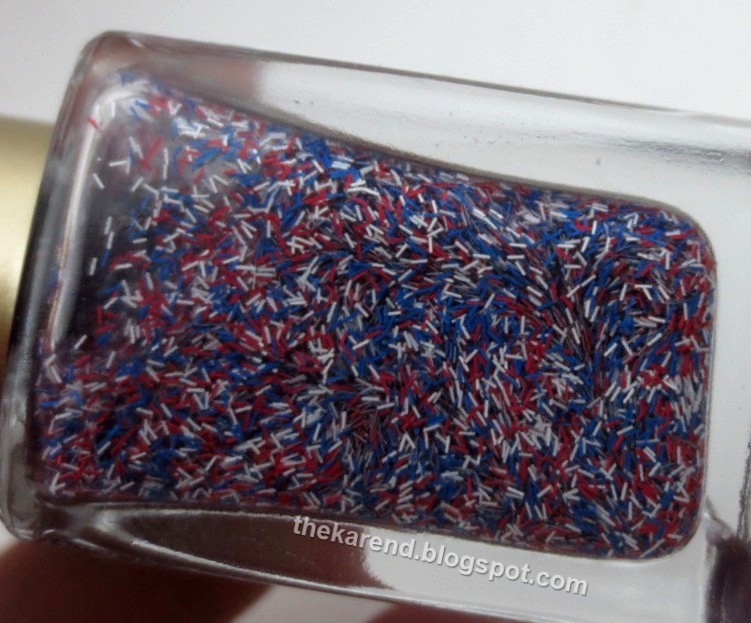


Choosing a base for these sorts of polishes can be challenging. Too light, and the white blends into the background. Too dark, and the blue disappears. I went with a medium blue creme, High Tide, from the same L'Oreal display that I found the glitter in. I used two coats of High Tide over a base of Duri Rejuvacote and Salon Sciences Instant Artificials, then topped with one coat of Raise the Flag. The glitter needed a light hand to prevent dragging the bars to and even off the tip of the nail but otherwise was easy to apply. Diamond Dry topcoat finished the look.
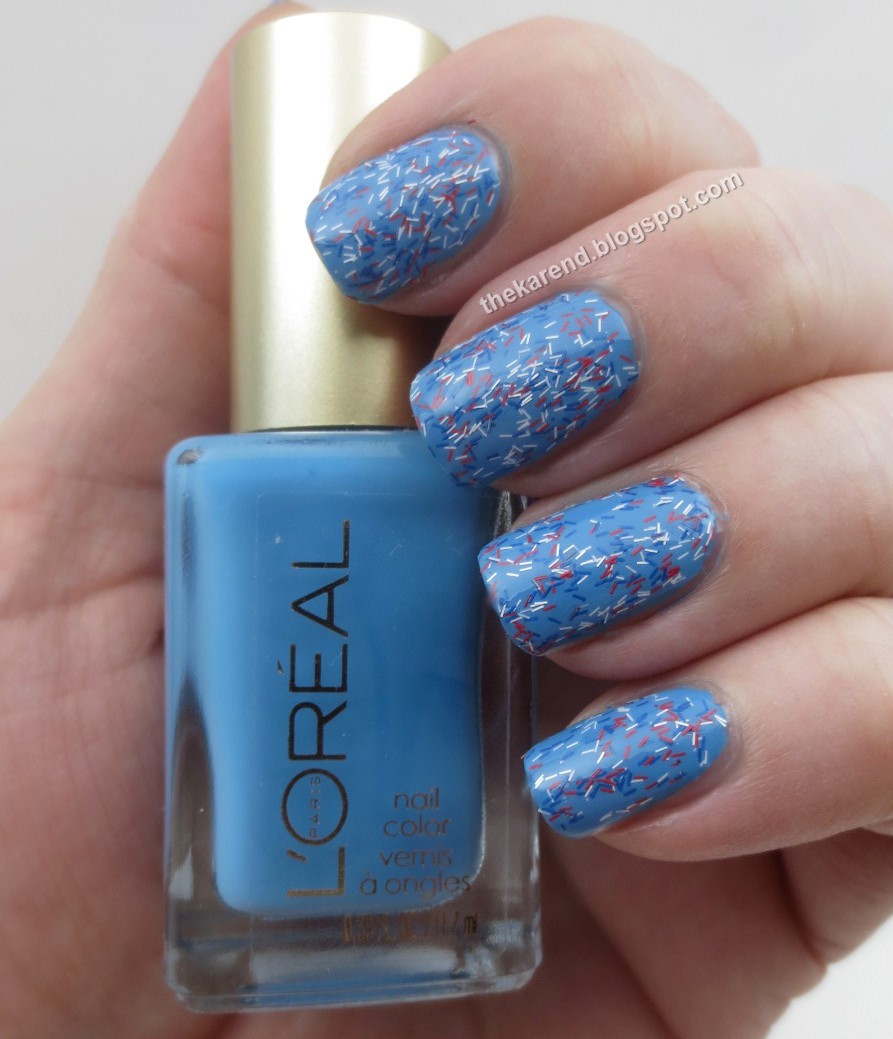


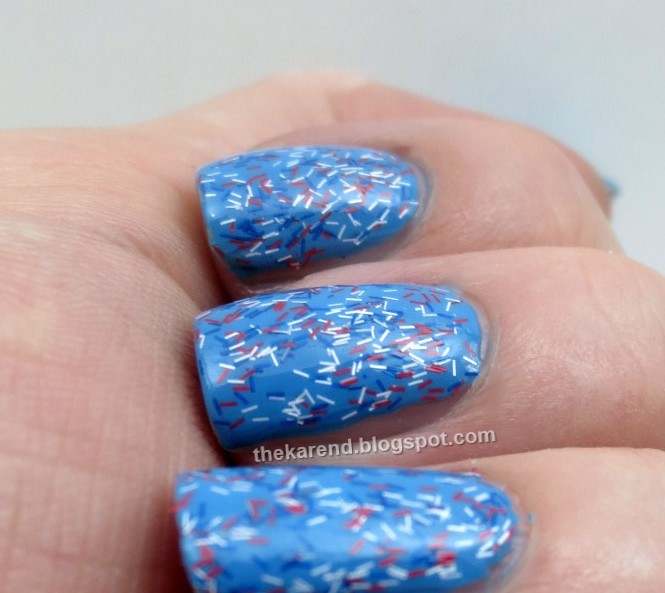
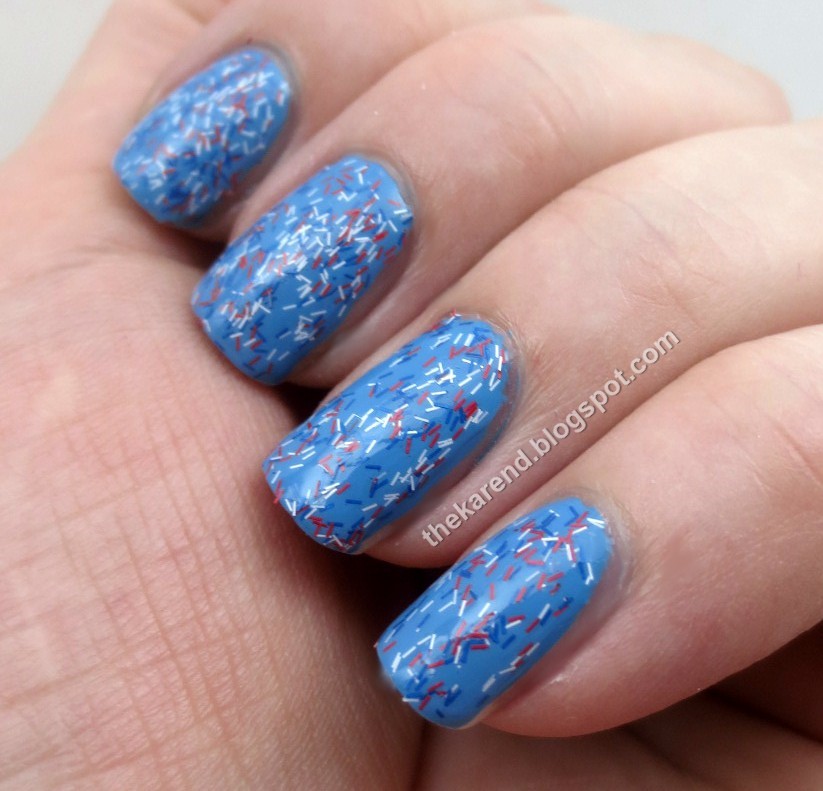
In ideal lighting conditions, the base/glitter contrast for this combination is good. Much of the time in real life, though, the blue glitter blends into the base visually, but since the overall effect is still red, white, and blue, that's okay.


For my toes, which I won't redo as soon after the holiday as my tips, I chose to go with a simple classic red creme. This is also from, but from an earlier era: Big Apple Red, in the elegant subtly curved bottle with the dark purple cap. I think this particular bottle actually joined my stash in the 1980s rather than being something I picked up via swap or dollar store later, as I remember putting this shade on my nails for a vacation with my mom during the time when I only wore pale neutrals on my tips to work, so bright bright red was a signal I was truly off work and ready to have fun.


In deference to those of you with foot phobia, I'll make these next two photos smaller than usual (as always, click for bigger). First, a progress shot; I wear these ratty old sandals while I paint my toes so I can walk around while they're drying and not get my feet dirty (out of deference to Mr. Sensitive Nose, when the weather is nice I usually do the polish part of my pedis on the patio, sitting on the back steps).
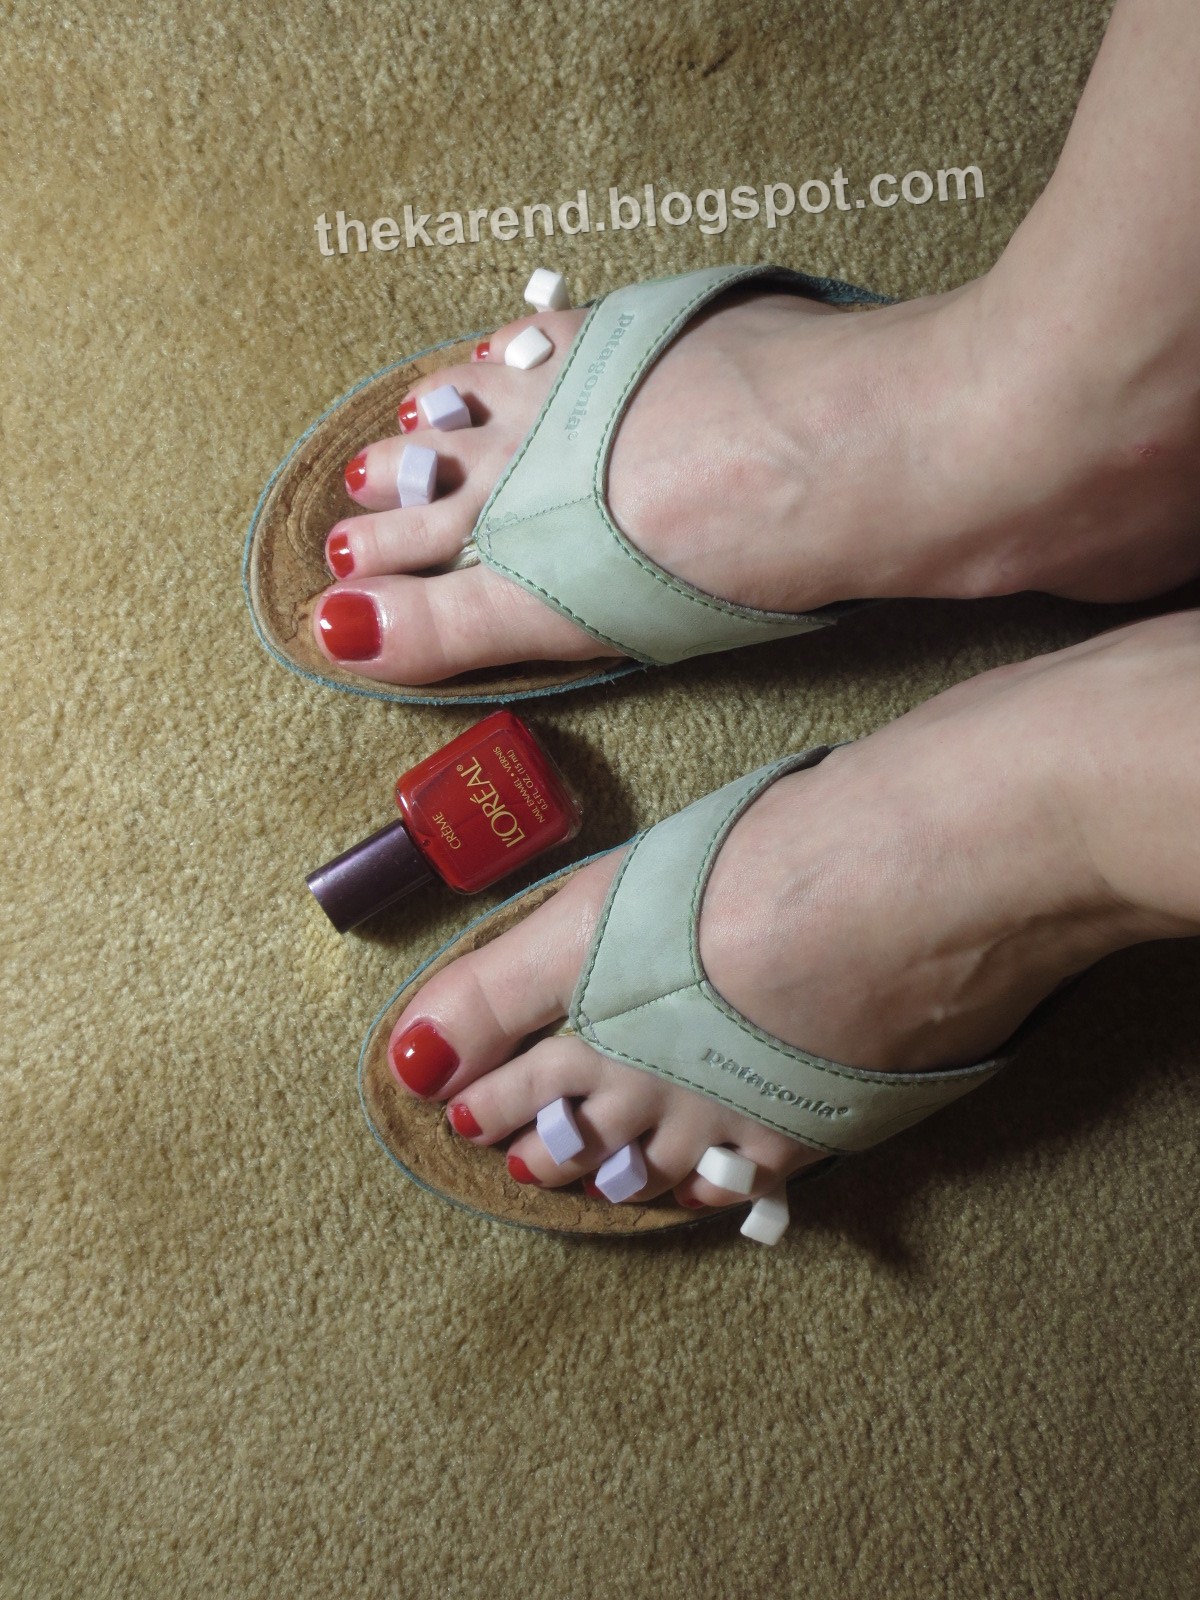


Tips and toes ready to celebrate:
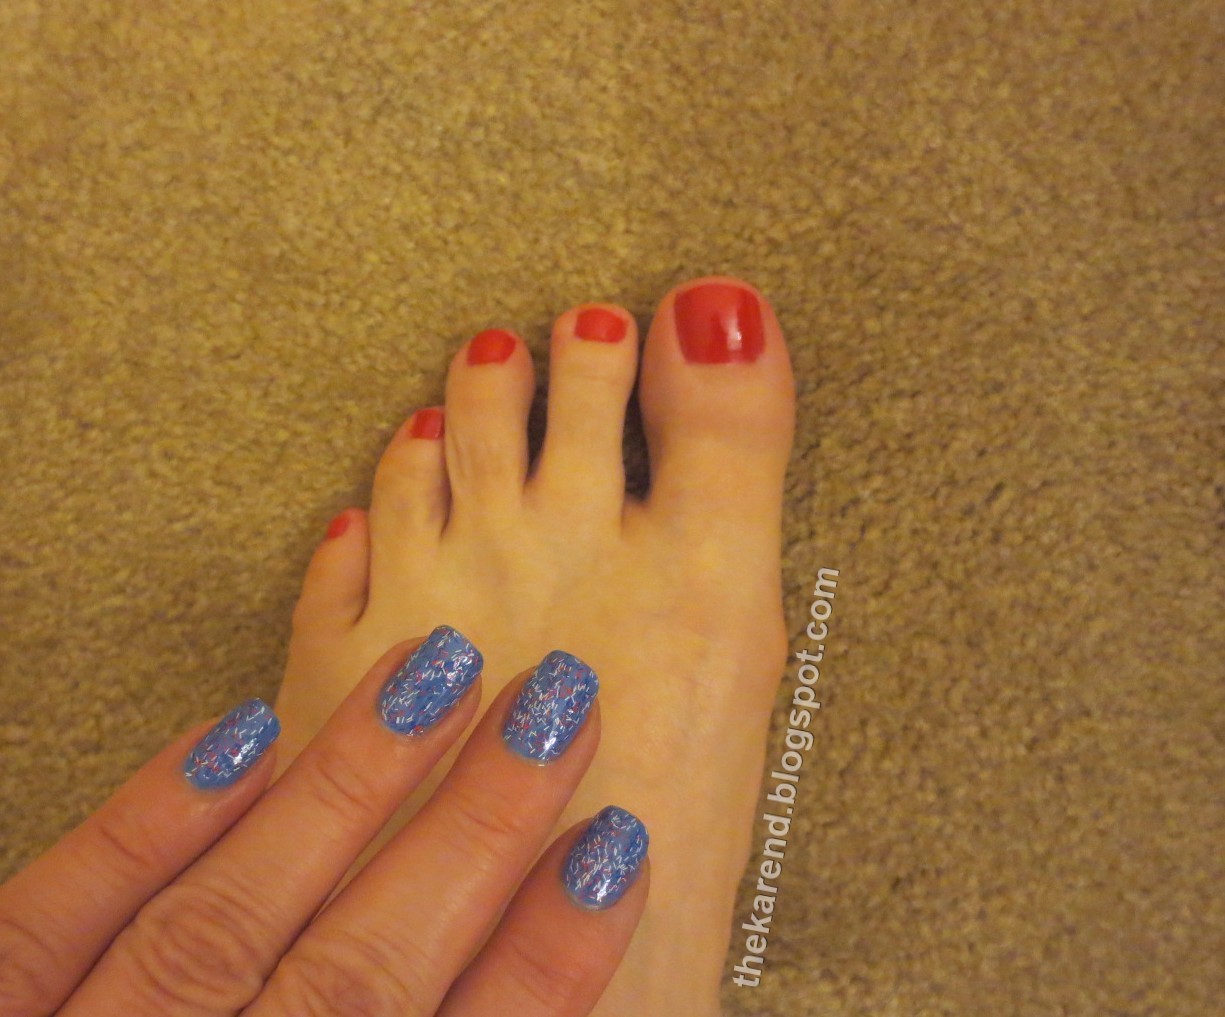


I hope those of you have a long holiday weekend have lots of fun and stay safe!

Monday, June 18, 2012

Recent NOTD: Butter London Lillibet's Jubilee

I happened to catch some of the BBC America coverage of the Thames Diamond Jubilee pageant at the beginning of June, so when I saw Butter London Lillibet's Jubilee in my untrieds while looking for my next mani color, it seemed a fitting choice. Butter London's website describes this as "a silvery, lavender metallic foil that boasts the perfect amount of sparkle". I don't know about perfection, but this does boast a lot of sparkle, that's for sure—I had trouble cleaning it off my skin and my camera had trouble focusing on it.


I used two coats of Lillibet's Jubilee but it's quite possible I could have gotten by with only one; I just wasn't prepared for that so wasn't especially careful lining up the brushstrokes on the first coat so needed a second to straighten things out. The abundance of sparkle does soften the appearance of the brushstrokes that foils are known for but I still like to get them as straight as I can.


At first glance, the color wasn't as purple-leaning as I'd hoped; mostly it just looked silver to me. When I held it next to the true silvers on Wheel U: Silvers and Friends, I could definitely see the purple in it.


This wore pretty well. My base under was Barielle Pro Nail Rebuilding Protein plus Salon Science Instant Artificials, and I topped with my usual Sally Hansen Insta Dri Anti-Chip Top Coat. Here's what it looked like in the sun almost five full days after I put it on, all of those work days, when I pound a keyboard eight or nine hours at a time and then come home and often type some more. There's some tipwear, but no chips to speak of.


Two days later, a few chips had started to show up. Before I took it off, I just had to try L'Oreal Silver Sparkle over the top of one nail to see what it could add to this sort of base. My verdict: pretty. In the background, you may be able to see one of the chips that meant Lillibet had to come off (it would have anyway because by then I was ready for something new).


All in all, I'm happy with Lillibet's Jubilee, though I do wish it were just a touch more purple.

*****


In other news, I wore the Sally Hansen Pedicure Salon Effects strips as long as I could stand them, which turned out to be six full weeks. Not one of them even partially peeled off in all that time; I'm sort of thinking they might have grown off instead of chipping or peeling off if I'd let them go that far, but it's summer and I couldn't wear sandals with this action going on (ensmallened for the sensitive but as always clickable for full size):


I'd be interested to see how the pedi strips would do on a beach vacation, but since I don't have any such vacation planned, I don't know when I'll be able to do that experiment.


Friday, May 11, 2012

Recent NOTD and POTD: Sally Hansen Pedicure Salon Effects Strips

Unlike all the hemming and hawing and delaying I did when the Salon Effects strips for fingers first came out, when I saw the Pedicure Salon Effects, I bought some the minute I could get them on even a tiny sale. For my first venture, I chose the dusty purple and black snakeskin design called Snake Rattle & Roll.


Unlike the nail strips, which are individual and come in two sealed packages inside the box, these come attached to each other on two strips that are sealed into one package. The strips themselves are shaped differently, with a flatter curve at one end and no curve at all on the other. Like the nail strips, they come with a mini orange stick and a file/buffer; the file is a bit larger than the one that comes with the nail strips.


I could see right away that these strips were way, way longer than my toenails. I decided I'd try to save enough to do a manicure with them, too; since they're all packaged together, I couldn't do my usual trick of saving half for another application. So I cut the strips down closer to the length of my toenails before I removed the clear top sheet and backing and applied to my toes. The application was pretty easy; of course by now I've had lots of practice putting these on my fingers. My baby toes were the hardest, just because the nails are so tiny. I don't keep much free edge on my toenails, so when it came time to use the file to remove the excess strip material from the ends that was a bit more difficult than on my nails but I managed. Here's how they turned out:


When it came time to do my fingers, I had to trim the ends of the strips to better fit the curve at the base of my nails; I didn't always manage to do a good job at this. I found I didn't have quite enough strips to cover all my nails, so I did accent nails with a base of Wet 'n' Wild Wild Shine Black Creme topped with one of the skinny baby toe strips, then sealed with topcoat. I quite liked the effect.


This was the first time in a very long time that I've had matching fingers and toes. I took the strips off my fingers after a week; I'd had only one "chip", where the strip peeled off part of my nail (probably because I hadn't smoothed it down quite well enough). As I worked with the remover, it was clear some areas were thicker than others—at one point I had a fishnet effect going on. Next time I wear these perhaps I'll get a black striper and fill in the design then top with a jelly to make my next mani.


The strips are still on my toes as of right now; that's been almost two weeks. I haven't noticed any wear or peeling. I'll try to remember to let you know how long they eventually last.

Monday, August 29, 2011

Recent NOTD: Bright Purple Candy Plus POTD

Sorry, I didn't mean to be gone from here for three days. I know you're all used to my weekend posting being sporadic, but there should have been something on Friday. I was planning to do that entry in Maryland that day, during a gap in my schedule between finishing up a business meeting and getting together with some friends for dinner. That would have worked fine except I didn't realize how much time I'd need to spend that afternoon researching and pondering my options for leaving town to avoid Hurricane Irene. I'd originally planned to stay over the weekend so I could spend some time with a friend from New Jersey but instead ended up changing my flight to get home well before Irene showed up in the area. I did still get to have dinner with my friends Friday night, so that was good. Anyway, I am back now.

Today's feature is a recent mani inspired by all the jelly sandwich looks currently showing up on the MUA nail board and other places in the nailosphere. A jelly sandwich is glitter polish (the sandwich filling) layered in between coats of a jelly/sorbet (the bread). Instead of doing exactly that, I did the candy mani variation (which I think I first saw on Nailderella, though it could have been on one of the sites she links), where a less sheer polish is the bottom slice of "bread" and the jelly is the top slice. I applied my treatment and base coats, then two coats of Sally Hansen Complete Salon Chocolatte, 2 coats of OPI Show It and Glow It, 2 coats of OPI Houston We Have a Purple, and finally one layer of top coat. Did I absolutely need that many layers? Probably not, but I liked the result.


This wore really well; I put it the Sunday before I left for my Idaho vacation, wore it through a week of work and packing for the trip, and it was still going strong nine days later. I did have some tip wear and a chip on one of my thumbs (I keep saying I'm going to stop using my thumbnails as tools and then I keep right on doing it).


I liked it this so much I tried a variation on my toes, with Nicole by OPI Give Me the First Dance (1 coat), Rescue Beauty Lounge Frugalista (3 coats), and Zoya Vegas Freeze (2 coats). That was less successful; I think the base was too blingy and the Zoya too sheer to give the proper squishy effect. It's still pretty and silvery, though, so I'm leaving it on. I didn't manage to get a good photo of it, but will share the one I took of my hotel carpet, which I found quite soothing to look at while I was stressing out about avoiding the hurricane.


Unfortunately, this sandwich experiment has made me want to go find the OPI sorbets that I passed on. Perhaps I can distract myself from that urge with something shiny.


Monday, October 25, 2010

NOTD: OPI Mad as a Hatter

I'm back from vacation but still wearing the polish I put on before I left, so this will be an actual Nails of the Day post for a change. This trip was in celebration of mine and Mr. Karen's 24th wedding anniversary, and we decided to go to the theme parks in Orlando. On our honeymoon lo so many years ago, we'd spent time in Disneyland and Knott's Berry Farm, so going to Walt Disney World and the Universal parks seemed fitting. I didn't want to spend time fussing with my nails on the trip since the point was to be together as a couple, and Mr. Karen is not particularly interested in nail polish. I considered trying Shellac, but never got around to making an appointment, so very late the night before we left, I put on OPI Mad as a Hatter, since I figured a dense multi-colored glitter like that would be easy to touch up, plus it pleased me that we were going to Disney and Mad as a Hatter is from a collection inspired by a Disney film. I didn't take any formal lightbox photos of this polish; instead, I snapped candid shots as I went along.

Here it is just after I applied it late Friday/early Saturday, in the dim indoor light that prevails at my house in the middle of the night:


On the plane on the way down to Florida Saturday afternoon (the 16th):


Under the colored lights in one of the ride queues (I think this was Dr. Doom's Fear Fall) on the 17th:


At Walt Disney World, on Main Street in the Magic Kingdom waiting for the parade to start on the 18th:


At the EPCOT Food & Wine Festival on the 20th, with my gift card wrist band so I can pay faster and get on with the eating and drinking. At this point, the effects of too much sun and public bathroom soap are starting to show on my hands, but the polish is still holding up nicely:


Holding a bottle of pumpkin juice in the Wizarding World of Harry Potter at Islands of Adventure on the 21st.


In the lobby of Disney's Polynesian Resort before dinner on the 23rd. It's our favorite Orlando hotel, but we stayed elsewhere this trip, because while we do love it, it's hella expensive. I really need a "glitter fill" by now but was having too much fun doing other things to do a touchup, and since I hadn't gotten any chips, I didn't need to dig the polish out of the protective wrapping I'd put it in for travel.


I did finally get a chip yesterday, but it's along the side and barely noticeable so I haven't bothered to fix it yet. If we'd gotten home earlier last night I might have taken it off and put a new color on, but now I'm thinking I might keep itand try a crackle polish over it, inspired by jaljen.

Oh, and so Universal wouldn't feel slighted, I wore OPI Funky Dunkey on my toes. It survived through water rides that got us completely soaked and so much more walking than I usually do.


I've got a lot of catching up at work to do so might not be posting quite as frequently as usual this week, though I do have the two NOTD before Mad as a Hatter to post and some comparisons I did before we left so even if I don't get time to swatch this week I can still write entries.