Showing posts with label t: gel. Show all posts

Tuesday, May 25, 2021

Nails of Some Days: Sally Hansen Troublemaker and Purple Prisms

I truly meant to post at least once or twice last week, but obviously that didn't happen. Instead, I left my house overnight. Not just overnight but for five full days and four nights, going to visit family in western Washington now that we are all vaccinated against COVID. I took my laptop but didn't get it out once, so distracted was I by the novelty of travel after all this time. I am rather concerned that I've forgotten how to do all the things I used to do before shutdown started. Guess I'll just have to work my way back up to whatever my new normal turns out to be. I have been doing my nails and playing with my polish throughout, so that's a good through line. What I have to share today is a manicure I did with Sally Hansen Salon Effects strips in Troublemaker, a deep purple that still reads as purple instead of black, topped with Sally Hansen Salon Gel Polish in Purple Prisms, a glitter topper with silver, silver holo, and purple metallic hexes. I was pleasantly surprised that the gel polish wasn't all goopy as old as it was. It applied fine and cured hard under a gel topcoat. (If the bigger glitters shown on the cap of Purple Prisms were in the bottle, they sure didn't come out on the brush.)


Here's the glitter sparkling in the sun against a backdrop of one of the few remaining patches of snow up on my mountain.
 

And here it is after five days wear ... I used the gel because I wanted durability and that worked out. Plus no having to carry around nail glue to use if a fake popped off.
 

As I start to get out in the offline world more, posts here might be a bit sporadic for a while as I adjust to a new routine. Seems silly that it should be so hard but this has been a traumatic time and that takes its toll in different ways on different people.

Monday, April 13, 2020

Social Distancing Nails of the Month

I last left the county I live in on March 11th because I'd read enough news about the coronavirus to make me think that cutting way back on my activities to reduce exposure was prudent. On March 12th, I decided to stop wearing fake nails because though I hadn't seen any guidance on it, I felt that the crevices around and under them could be good places for germs to hide from handwashing ... and even if they weren't, I was washing my hands way more often than usual and have found that can weaken the adhesive on some of the press-on tabs.

I kicked off this new regime with Zoya London, one of the textured Pixie Dust polishes. I chose it because textures are easy to touch up and grey is a neutral that would be appropriate in any situation and wouldn't clash with any of my clothes (why I thought this was a concern I do not know, given that at that point I'd pretty much decided to stop going anywhere people would be noticing that sort of thing). I put this on on my front porch instead of in my studio where my lightbox lives so the photos are not up to my usual standard (and that standard is far short of perfection to start with).


The Zoya was looking a bit ragged after a week, so I decided to got the strips plus light-cured gel topcoat route with Sally Hansen Salon Insta Gel Strips in Pinkies Up, a rose and silver glitter I'd gotten on clearance when Walgreens stopped carrying the line. The glitter on the strips is chunkier and less pink than that shown on the box, but that's okay; I like glitter regardless.


After a week, the gel topcoated nails still looked pretty good, so I stuck to that strategy for my next manicure, though this time I used regular Sally Hansen Salon Effects strips rather than ones packaged with the gel topcoat, as I'd never been able to see any difference between the regular strips and the ones in the Insta Gel line. These are Queen Cobra, a brown and gold snake design with tiny pops of holo glitter that only show up in certain lighting conditions (none of which I managed to capture on camera).


I went back to Insta Gel strips for my next manicure, the one that's still on my nails as I type this, a solid brownish rose called Plum's the Word. The gel topcoat makes them nice and shiny, for sure. You can see that my nails are getting shorter by the mani ... polish and strips just don't provide the same protection as fakes, plus there's all that exposure to extra handwashing and alcohol based hand sanitizers (which yes, maybe I'm overdoing given how rarely I'm going out). I cannot recall why I decided to leave such large gaps on my index and middle fingers; maybe I just got extra distracted by one of the podcasts I listen to and wasn't paying attention to my mani.


I'll wear fake nails again in the future I'm sure, definitely once the pandemic is over and perhaps before then if I can reassure myself I can sanitize around them sufficiently to ease my anxiety (or wear them only during stretches when I know I'm not going to be in higher risk situations). In the meantime, I've got my strips and regular polish, and that's working out just fine. I'm hoping to do a fresh manicure this afternoon ... choices, choices.

Monday, January 7, 2013

Recent NOTD: Sally Hansen Salon Insta Gel Strips Take the Stage

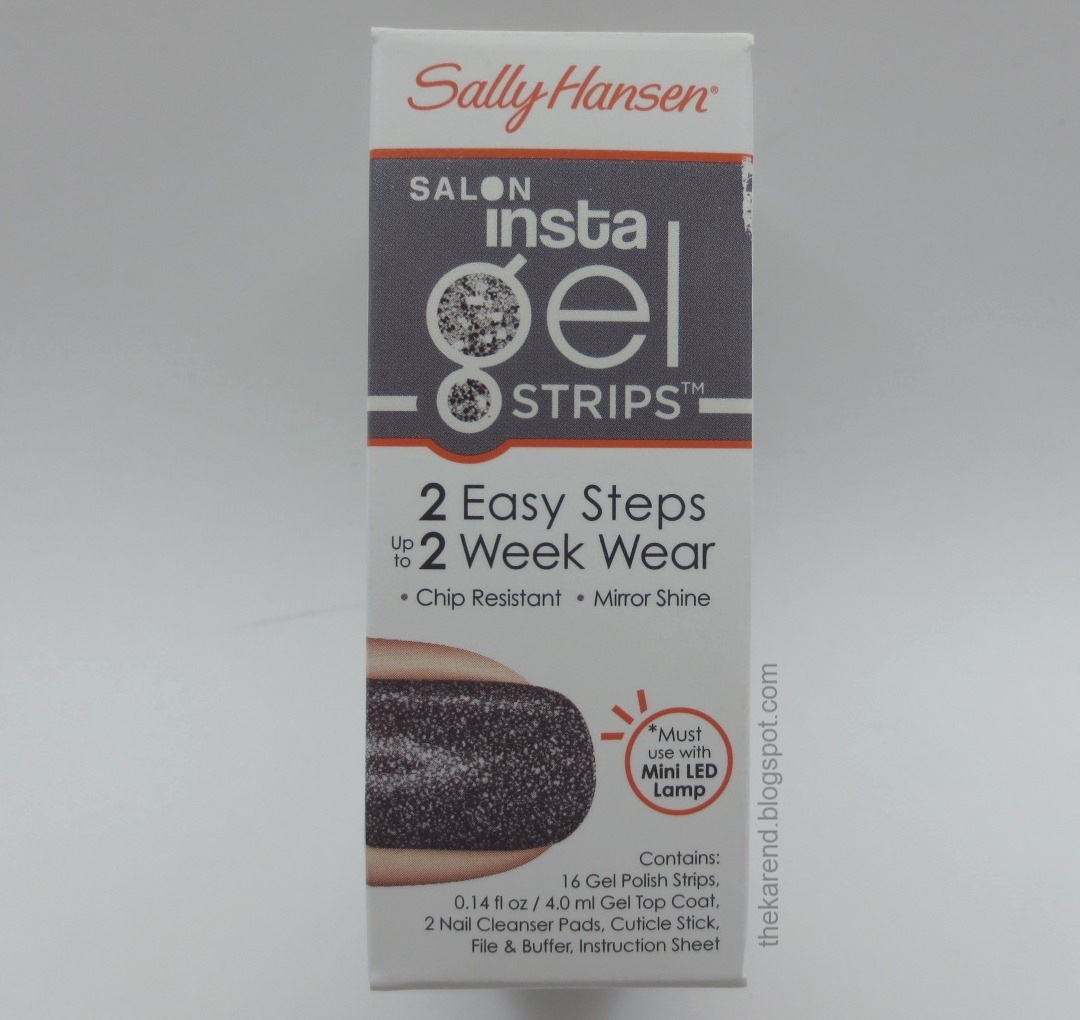
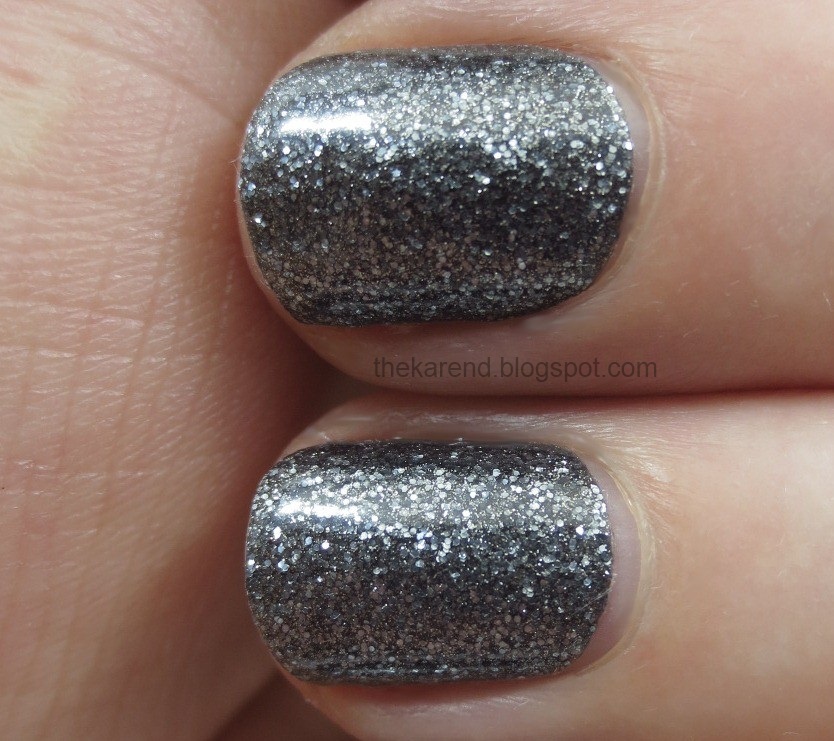
As I mentioned when I got back from my recent holiday, I used my time away to do another wear test of the Sally Hansen gel strips. Today I'm finally ready to do a review. I'd been very happy with the gel strips when I tried them the first time, in a very light pink called Shell We Dance. This time, since I was pretty confident they wouldn't chip, I chose a dark color, a charcoal glitter called Take the Stage. (These look quite a lot like the regular strips of the same name that came out with the limited edition Avril Lavigne collection early last year.)


With my nails still being short, I was easily able to get a full mani out of only one of the two packs of strips in the box. Rather than open up the bottle of get top coat that came with them, I used the one from the starter kit and there was plenty left to do this mani. I had no issues with the strips; they apply just like the regular ones, and I've used those so many times by now that I don't even think about it. I do wish I'd taken more care to get them really, really close to my cuticle; usually I change my nails so often that the gap isn't a big deal but I really should have thought ahead this time about how long I'd have these on. (We'll get to that a few paragraphs from now.)


I continue to find the mini LED lamp just adorable.


A full seven days later, the strips were still looking pretty good, with minimal tipwear.


I did manage to chip a few nails; below is my left thumb. I don't blame the strips for this, though, since I was a bad Karen and used my ungloved hands to scrape slush out of the track of our sliding glass doors at the ski condo. I am ashamed to admit I did this more than once. I touched the chips up with a polish that was close in color (Milani 2.0). I had to touch up my touch ups later because the polish was wearing off, but the strips held firm.


Here they are a few days later, so ten days in (you can see my skis blurred out in the background; this was at the end of our last day of skiing for the trip). There is some tipwear and the gap at my base is getting a bit wide; overall, things are looking really good for this many days, including more dishwashing and snow shoveling than usual.


A full two weeks after I'd applied them, the strips looked like this:


Normally, I'd file to get rid of the tipwear, but the directions for these say don't file, and I actually followed directions this time. Next time, maybe I won't and see what happens.

Because that gap at the base was really sort of horrible at this point, I experimented with turning this into a Ruffian with the help of a Sally Hansen Nail Art Pen in Hot Pink. I filled the gap with the pen, then topped the whole thing off with some clear Nails Inc. polish I had stuffed in my topcoat box. The beauty of using the Nail Art Pen for this is I could clean up stray pink that got on the strips with water, which didn't affect the strips in the least.


Since I was just messing around before taking the strips off, I didn't try to lay down a base coat in the gap under the Nail Art Pen. If I were planning to wear the look for a while, I would have, as the pen is really pigmented and I could see it staining (also the strips have a thickness and filling the gap with base would help even that out under the Ruffian accent color).

Next time I have a chunk of time when I think I won't want to change my nails, I want to try the gel topcoat and lamp with regular Salon Effects strips and see how that works. I do usually get more than decent wear from the strips on their own, but if the gel topcoat works with them that'd be even better.

Monday, November 26, 2012

Recent NOTD: Sally Hansen Salon Insta Gel Strips

It is finally time for my long promised review of the Sally Hansen gel strips. Before my Hawaii trip, I bought a starter kit, which includes a cute little LED lamp, gel polish strips, gel top coat, two cleanser wipes, a mini cuticle stick, and a mini buffer/file. The starter kits come in a choice of three colors: light pink, red, and wine. I chose the light pink, Shell We Dance, since I'd never used these before and if they were going to chip, I wanted a color that wouldn't show it too much.


Because this was my first time, I read and mostly followed the directions (I skipped the part about buffing my nail surface because I don't think that helps my peelies one bit). Applying the strips was just like applying the non-gel ones. The one surprise was how sheer these were; I expect that's a function of the color rather than a characteristic of all of the gel strips. Like the regular strips, these are packed in two sealed packs; my nails were short enough that I could cut them in half and get a whole mani out of just one of the packs. The instructions say to apply the strips to all nails, doing the thumbs last, before moving on to the next step. That next step is the gel top coat, which you apply to one nail, including wrapping the tip of the free edge, then put your finger in the lamp (which is only big enough for one finger anyway) and press the button on top. The light comes on and feels a little bit warm, then shuts off by itself after 30 seconds. After all nails have been in the lamp, they're oddly sticky, but that's where the cleanser pad comes in. A swipe of that takes away the sticky feeling. When I was done, I could see a few spots where it looked like I hadn't smoothed the strip down quite firmly enough, and another couple where I'd gotten the product on my skin‐the color blended in so well with my palesness it was hard to spot the problems, though. Overall, it just looked clean and shiny, and so much more conservative than my usual nail looks.


On the first full day I wore these strips, I lost control of my pen at work and drew an ugly black line on one of my nails. When it didn't rub off with a tissue, I was annoyed that I'd have to redo that nail, but then I remembered there were alcohol wipes in the first aid kit and one of those took the ink right off. Whew!

After 6 days of wear, I was seeing what looked like tipwear on a few fingers, but on closer inspection, that was due to my old nemesis Mr. Peelies. The strips that were on nails that weren't peeling looked just fine.


After 12 days of wear, the most noticeable issue was the widening gap at the base of my nail due to growth. The strips themselves were hanging in, not lifting or chipping (except where the nail underneath them was flaking off due to the aforementioned peelies). Considering I'd spent some of those days swimming around in salt water or pool water, I was even more impressed.


After 14 days, I couldn't make myself wait any longer to take them off; the gap was really starting to bother me. Here's my right hand just before I removed the strips; I'm showing this because you may be able to see some fine cracks in the strip on my middle finger, which I got when I jammed that nail into something (a wall?, a suitcase handle?—I don't recall what exactly) hard enough to bend it and the strip on top so much that it broke. Still, it didn't chip off.


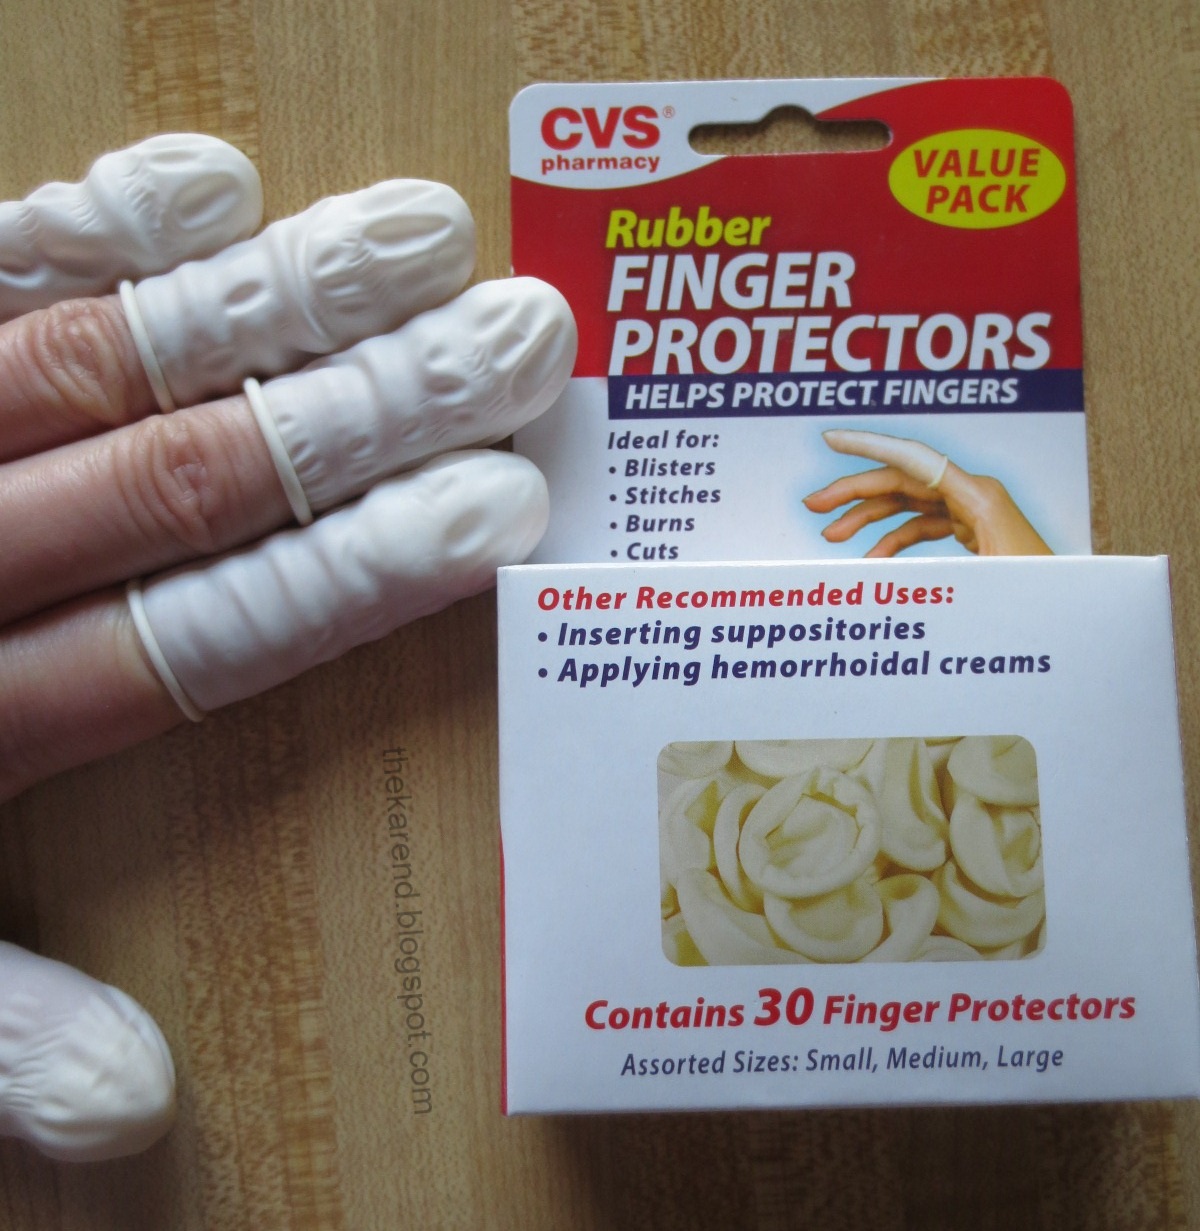
The directions actually recommend the foil method for removal; they don't call it the "foil method", but that's what it is. I went with something new I've read about: the finger cot or finger condom method, which uses rubber finger protectors in place of the foil to hold the acetone-saturated cotton pieces against the nail. It worked great; I let them soak for about five minutes and most of the gel wiped right off. (And the finger condoms didn't disintegrate, either.) The directions talk about pushing the softened gel off with the cuticle stick, but I didn't find that was necessary; I just used a cotton pad and remover clean up the bits that were left after the condoms came off.


Overall, I was very impressed with the wear time on these. They are more expensive to buy and somewhat less convenient to apply than the regular strips (I have put the regular ones on in public places but wouldn't try that with the gel top coat), but for some situations, like a long trip, I'll use them again, as I think they hold up better than the regular strips. Now I'm interested to try some of the designs they have in the gel strips.

Thursday, October 25, 2012

Fall Break

I'm going to be taking a short break from posting and also will be pulling way back on my internet usage in general for the next little while. I'll still be doing stuff for the blog, though, namely a wear test on these babies—Sally Hansen Insta Gel Strips:


I had a coupon for Bed Bath & Beyond and just decided to go for it. I waited so long to try the regular strips and found I really liked those when I eventually did take the plunge, so I'm getting in early on these. Surely a sign how strip crazy I am that I've not really been super tempted by gel polish until it showed up in this form.

I plan to be back on November 7th. In the meantime, if you really need to get in touch with me, e-mail the.karend @ gmail.com.