Showing posts with label f: sheer. Show all posts

Wednesday, April 14, 2021

Wheel M14: Toppers from Revlon and Essence

I took a break from greens for this week's Nail Wheel Wednesday and pulled out some sheer toppers, swatching them over tips I painted the ends of black before I started.
 

1. Revlon Color Beam Sheer Starlight
2. Revlon Color Beam Sheer Beam of Pink
3. Revlon Color Beam Sheer Sunstruck
4. Revlon Color Beam Sheer Lavender Light [yeah, I didn't notice the flash on some of these tips before I started painting]
5. Revlon Color Beam Sheer Night Light
6. Revlon Color Beam Sheer Bright Sky
7. Revlon Color Flip [the $3.28 price sticker still hanging on to the cap made me smile so I left it]
8. Revlon Transforming Effects Pink Glaze
9. Revlon Transforming Effects Gold Glaze [cap of this got covered in a Zoya topper in a breakage incident; I gave up on cleaning it off]
10. Revlon Transforming Effects Matte Pearl Glaze [this seems to have evaporated quite a bit; I know I haven't used it that much]
11. Revlon Glimmer Gloss Piña Colada Pop
12. Revlon Glimmer Gloss Banana Blaze
13. Revlon Glimmer Gloss Apricot Freeze
14. Revlon Glimmer Gloss Grapefruit Glimmer [this showed more colors over black than I expected]
15. Revlon Glimmer Gloss Strawberry Sizzle
16. Revlon Glimmer Gloss Cherry Fizz [not much glimmer in this one; doesn't look like it settled so maybe the particles dissolved?]
17. Revlon Glimmer Gloss Grape Shimmer
18. Revlon Glimmer Gloss Blueberry Burst [another very low glimmer one]
19. Essence Colour 3 Stop for an Ice Cream [as I like to do, I separated the double ended bottle; where the other halves are now is a mystery ... in a box somewhere most likely]
20. Revlon Glimmer Gloss It's Just a Little Crush

Bottles 1 through 5:
 

6 through 10:
 

11 through 15:
 

16 through 20:


Monday, May 14, 2018

Road to Recovery

Winter is hard on my nails, and up here on the mountain where I live, winter lasts a long time (as I type this, I can glance out the window and still see snow that hasn't melted, several feet of it in some spots). I'm always looking for the next great treatment that works with my body chemistry, hoping to someday find something as good for me as the 80s version of Orly Nail Defense was.

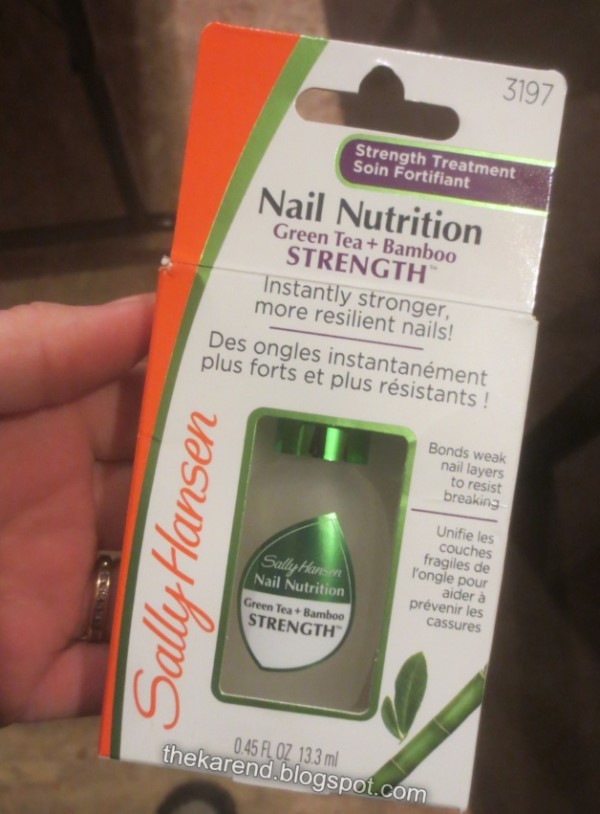
For a couple/few months, I used two Sally Hansen products together: Nail Nutrition Green Tea + Bamboo Nail Strengthener and Nail Rehab Strength Treatment.

The Nail Nutrition box says it "bonds weak nail layers", so I used that as my base coat, right on those layers that want to peel.


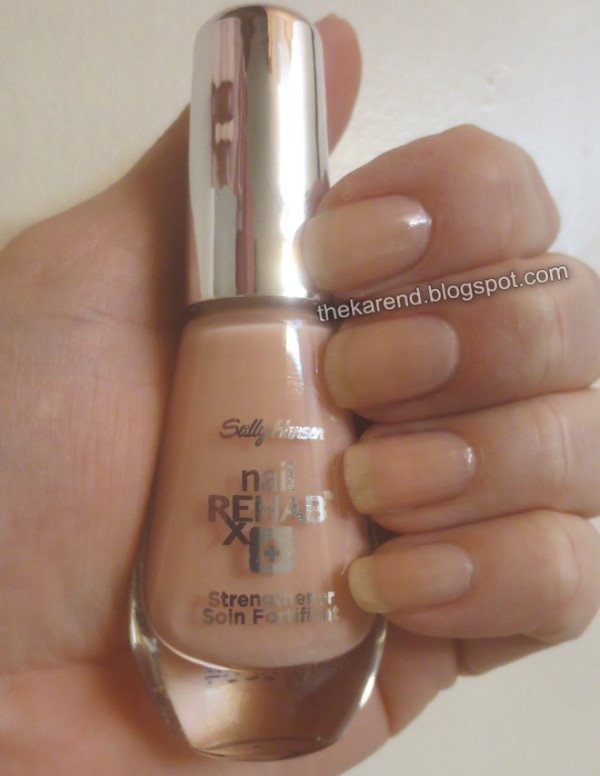
The Nail Rehab claims that it "instantly hides imperfections", so that went on top, usually two or three coats. Below is the the first time I used it; it did make my nails look better, and the tint blended well with my skintone. It also self leveled nicely, at least over the base of Nail Nutrition.


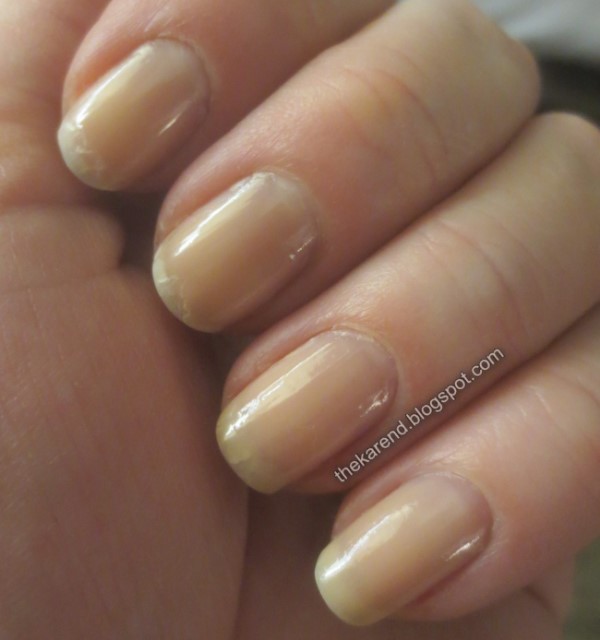
Much as I liked how my nails looked when I applied the two strengtheners, they didn't seem to make my nails stronger. After six weeks of pretty consistent use, I still had pretty much the same level of peelies:


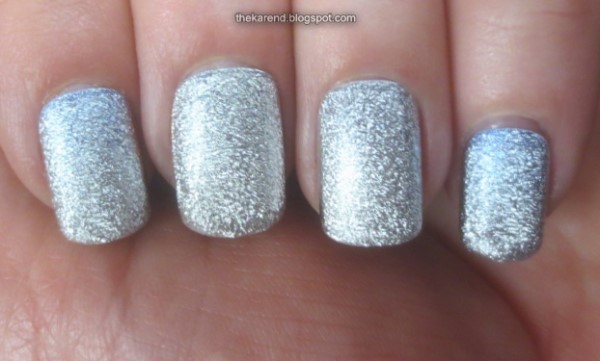
When I didn't want to obsess about the state of my nails, I resorted to fakes as I have in the past, like these MOB silvery blue textured ones.


Or I'd use strips, like these Sally Hansen Bling It On ones (someday I will run out of my hoard of Salon Effects strips, or maybe they'll degrade so far I can't use them anymore, but that seems like it's a long ways off).


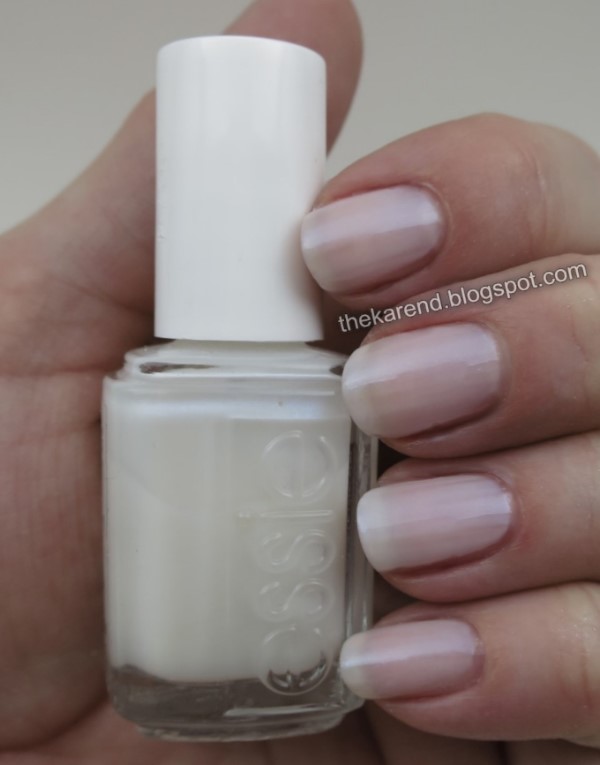
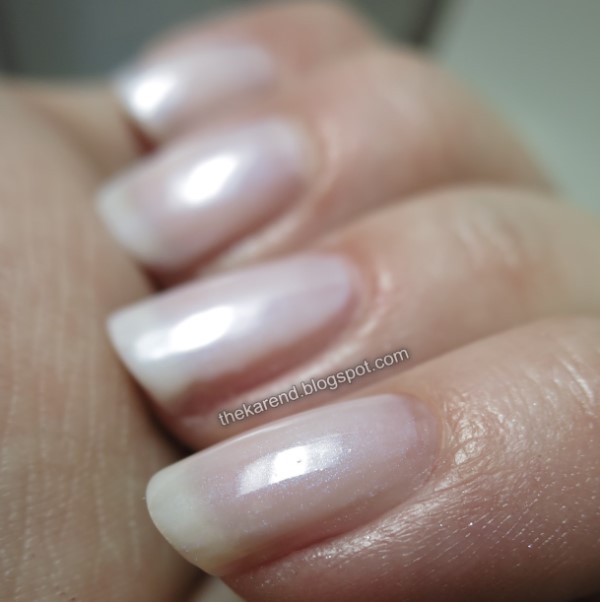
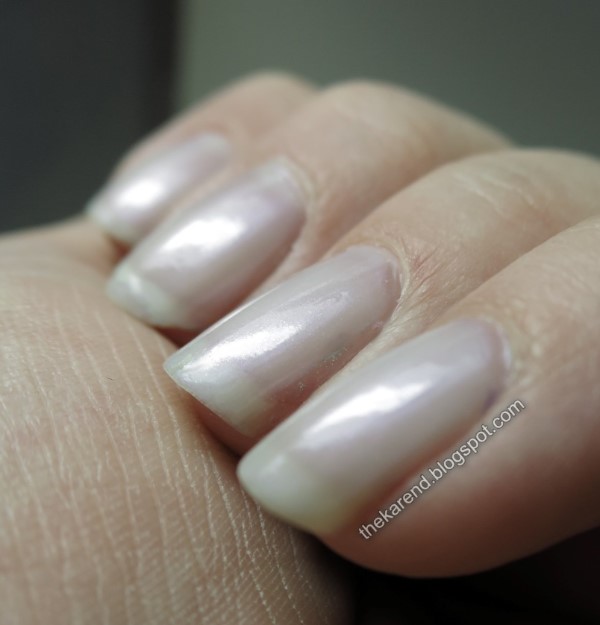
I decided I'd given the Sally Hansens enough time, so lately I've been trying Essie TLC. I picked up a bottle of Treat Me Bright on clearance (not sure why it was there half off, as the store still carries the TLC line). Treat Me Bright is a milky white with very subtle shimmer. I did three coats of it by itself; it didn't self level as well as I'd hoped but it was less noticeable in person than in these closeup photos.


So far my nails feel stronger with the Essie, or at least they did until I helped some friends with their spring cleaning (I wore rubber gloves but worked up such a sweat that I might as well put my hands in the wash water). I'm going to keep using it for a while yet and see how it goes. Of course with the end of winter they'd likely get better regardless. It's so hard to know sometimes. I wish there were some decoder ring to tell me what will work with my body chemistry.

Tuesday, April 24, 2018

NOTD: Essie TLC and Sally Hansen Salon K-Design Diamond

I had a different post planned for today, but unfortunately lost my camera this past Friday with some display and swatch photos on it that I hadn't yet downloaded. I've looked everywhere I can think of and checked several businesses near where I think it went missing to see if it had been turned in, but no luck. I think it's really gone. I felt really down about it that day and the next day but am sort of okay with it now. At least I only lost a little more than one day's pictures. At least I didn't lose something more difficult to replace. I can redo the swatches. I can hunt down those displays again (though they'll have fewer polishes in them). I did already retake some non-polish photos I lost with the camera. It'll be okay.

I do have photos today, though, ones I took of my nails of the day after I dug out my backup camera (which I'd gotten as a service award gift from my former employer) and bought a memory card for it. This is the first manicure I've done in ages which is more than just treatment or treatment covered in strips or fake nails. There's nothing wrong with any of those things, of course; I'm just happy to be breaking out of my rut.

This manicure did start with treatment, though, because my nails are still in bad shape from the rigors of winter. It is a new to me product, though, so that's still sort of rut-busting. I found some shades of Essie Treat Love & Color on clearance at a Walgreens, so picked up the super pale purple Laven-dearly. It's a one-step product, so I just did two coats and called it good. It's designed to be sheer, so it self levels pretty well even at two coats, though I did see some issues on the two of my nails that are naturally more ridged, as I haven't been buffing them down lately so as not to risk weakening them further. I have been buffing down my peelies when I just can't bear to lose more length, and this sheer formula didn't cover that quite as well as I'd hoped.
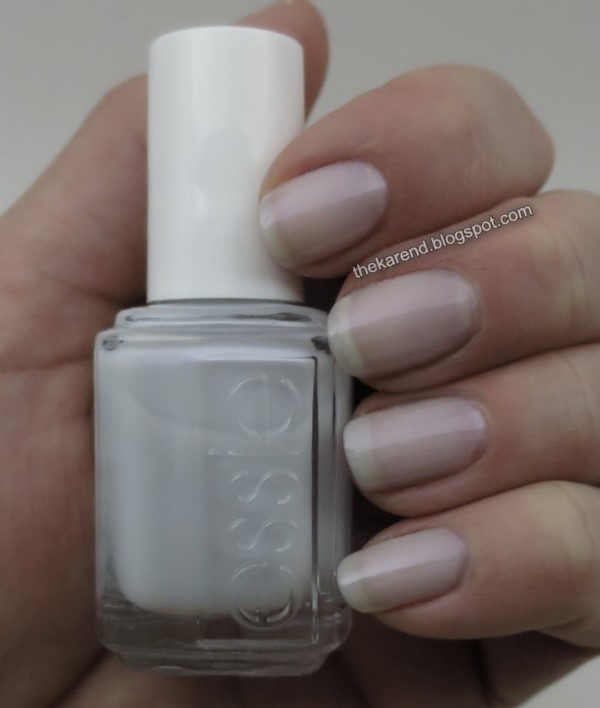


This does have some very fine, subtle pink shimmer in it, but I didn't manage to get it to show up in any of the photos I took.


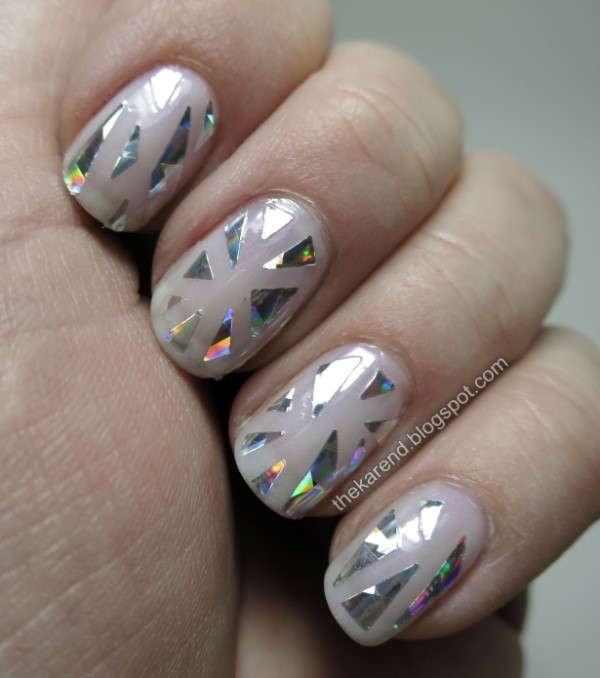
After a couple days with just the TLC, I decided to add one of the Sally Hansen Salon K-Design nail art stickers I'd picked up from that display. I thought the silver holo of the Diamond design would go well with the pale purple.
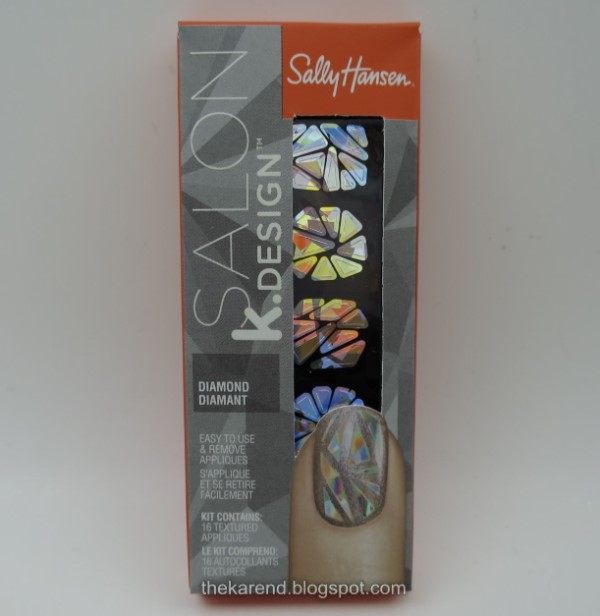


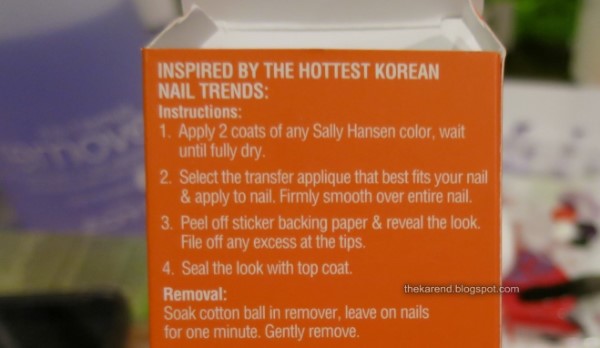
The directions seemed straightforward:


Inside the package there are two folded strips with eight decal sections a piece (the sections are perforated):
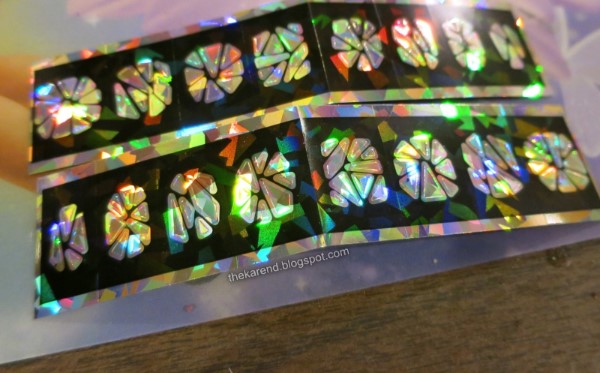


The directions in step 2 don't explicitly say to remove the decal from the plastic backing, but you've got to in order to free the very thin decal to put it on the nail.
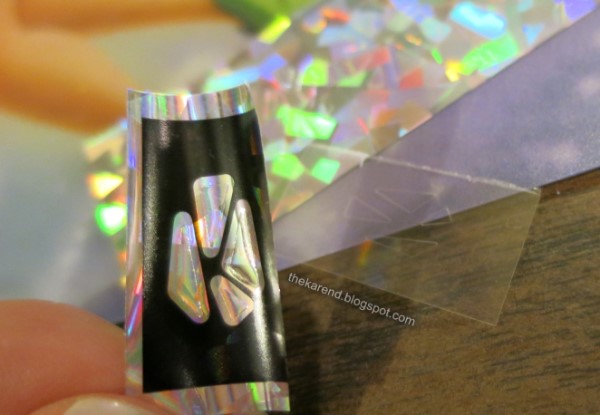


Because these aren't see through and the black area around the design is rather wide, I had trouble judging where to place the decal. On my first nail, one of the segments extended beyond the end of nail, so I had to lift it off with a manicure stick and move it to a better location.
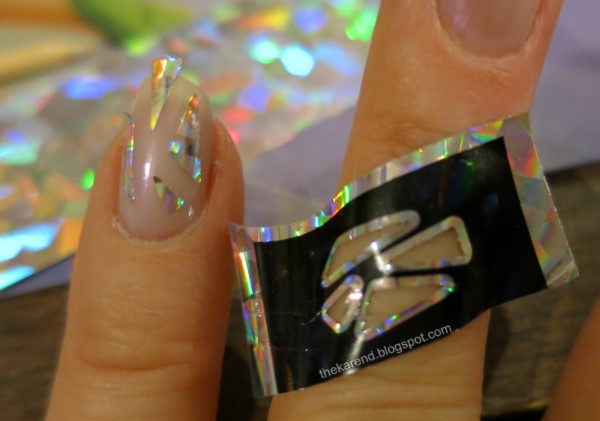


After that struggle, I hit on the idea of trimming one end of the decal so it would better match the curve at the base of my nail, which made it easier to put in the right place. I found it easiest to do the trim before I peeled the decal off the plastic backing.
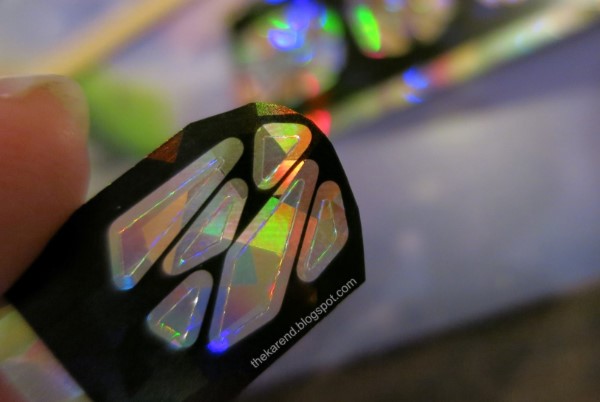


Peeling the background off was generally pretty easy. I had a few individual shards either get stuck in the background or have the sticky layer separate from the holo foil layer but was able to remedy by trimming my own shapes from the margin left around the black section on the strips.

I used one coat of Sally Hansen Diamond Flash topcoat to seal these; that seemed sufficient to smooth over the decal shapes.

I was pretty happy with the finished look, though the gaps between segments were wider than I'd like.
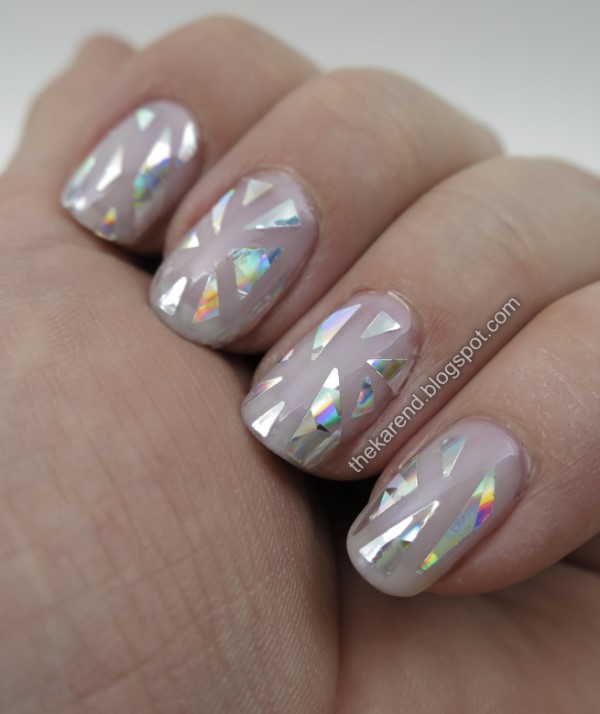


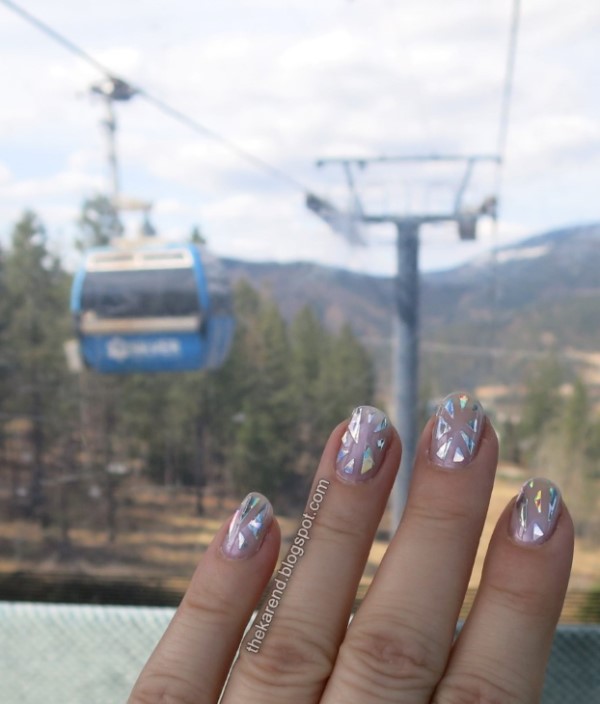
The rainbow colors sparking off the holo were good in indirect light as above, but were better in direct light (below).


I wore this look for what is probably my last day of skiing this past Sunday, and it was warm and sunny enough that I took my gloves off a few times to admire the colors.
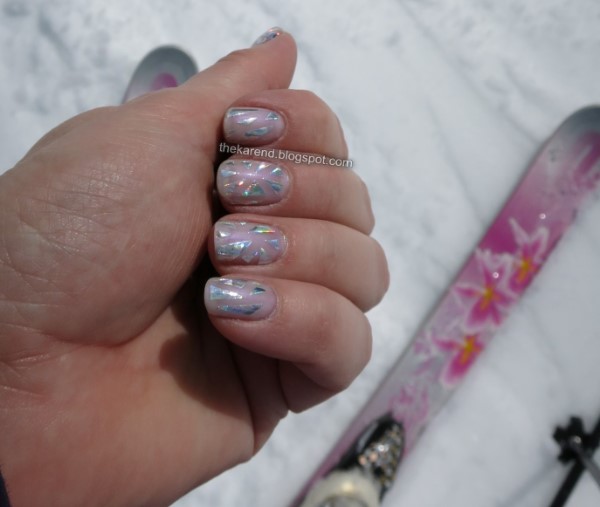


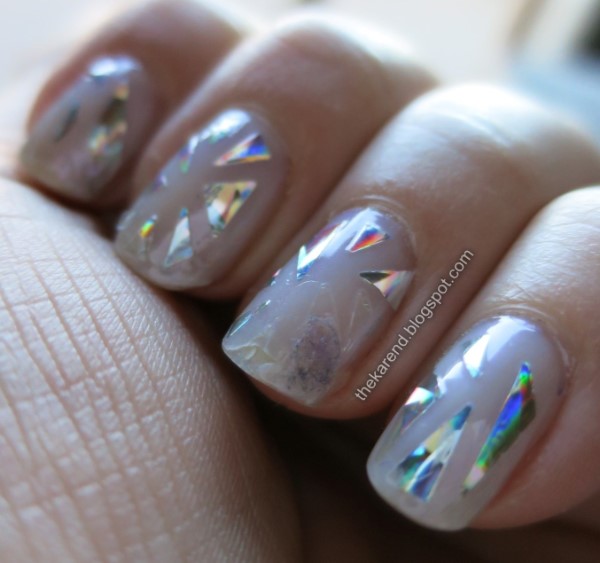
After a couple days of wearing these, I was rethinking the single layer of topcoat, as some of the decal sections were lifting (sometimes entirely, sometimes just the foil, leaving the sticky layer to pick up lint—not a good look). The worst were ones that were close to the edges of my nails, so when I use the leftovers for accent nails, I'll take care to place them so they are farther away from my tips and sides if I can. Of course it doesn't help that my peelies are still a factor, and that's not the decals' fault.


I didn't realize until I was putting this post together that the Korean nail artist who popularized these looks had been discussing collaborating with Sally Hansen before these products came out but was not part of creating them nor was she compensated in any way for inspiring these products. There's more on the controversy over on Racked. Now that I do know, I probably won't buy more of these kits, but I will use up the ones I already have.

Wednesday, March 29, 2017

Wheel I9: Water Polishes

It's Wednesday, and since I'm back now, that means a nail wheel. Today it's water finish polishes, the sheerer siblings of jelly polishes. Some of the ones on this wheel are classics, like the Maybelline Express Finish bottles from the gold cap era, while some are recent, like the Essie 3D Pop Tints.


1. Sally Hansen Triple Shine Vitamin D-Light (3 coats)
2. Sally Hansen Triple Shine Water Melon (3)
3. Sally Hansen Triple Shine Jell-ous (3)
4. Sally Hansen Triple Shine Grape Jelly (3)
5. Sally Hansen Triple Shine Ice Tint (3)
6. Sally Hansen Triple Shine Sea Through (3)
7. Maybelline Express Finish Clear Seas (3)
8. Maybelline Express Finish Emerald Water (3)
9. Maybelline Express Finish Blue Water (3)
10. Maybelline Express Finish Violet Water (3)
11. Maybelline Express Finish Plum Water (3)
12. Maybelline Express Finish Berry Water (3)
13. Maybelline Express Finish Orange Water (3)
14. Maybelline Express Finish Lemon Water (3)
15. Wet 'n' Wild The Nail Zone Berry Crush (4) [I sure hope this had more pigment when it was new, as it's barely tinted now; I think I got this in a swap or blog sale, so didn't have it when it was fresh]
16. Essie Burgundy Syrup (4)
17. Essie Grape Crush (4) [this one and the one above are part of the Glaze Her's collection; there are four others I've never run across—Apricot Fizz, Cherry Pop, Night Cap, and Raspberry Seltzer]
18. Essie Gel Setter 3D Pop Tints 01 (3)
19. Essie Gel Setter 3D Pop Tints 03 (3)
20. Essie Gel Setter 3D Pop Tints 02 (3)


Bottles 1 through 6:


7 through 10:


11 through 14:


15 through 20:


Tuesday, February 28, 2017

Funky Fingers Sheers and Fresh Paint Solids

We had some rain up on the mountain, which was not at all good for the snow conditions but did mean I felt fine taking some time off the slopes to do some swatching. The Funky Fingers and Fresh Paint colors I bought the last time I was in Michigan have been languishing in my to be swatched box since then, pushed aside in favor of newer acquisitions like the holiday Sinfuls. Finally it was their turn. I am not sure if these are still available at Five Below; I'm guessing at least some stores still have them since turnover varies among locations.

I don't know if this was intentional, but the colors of the three Fresh Paint mattes really coordinated nicely with the colors of the three Funky Fingers sheers, so I had to swatch them together. Fresh Paint left to right on top: Matte with Love, Don't Get Matte Get Even, Matte Me Blush. Funky Fingers on the bottom: Turn Tint Up, Tint for Tat, Tinted Love.


I tried the coral shades first: Fresh Paint Matte with Love and Funky Fingers Turn Tint Up. My index finger (top) got three coats of Matte with Love; this dried more satin than matte, and had a very slight texture to it. On my other digits, I did a French tip with Matte with Love, then used Turn Tint Up to complete a funky French look. Middle finger got one coat of Turn Tint Up (which was not quite enough to perfectly smooth out the texture in Matte with Love), ring got two coats, and pinky got three. I liked that the sheer behaved well with one coat and was also buildable.


The purple pair consists of Fresh Paint Don't Get Matte Get Even and Funky Fingers Tint for Tat. I did the same pattern as for the corals. The finish on these was similar, with the matte drying to a slightly textured satin finish and the sheer working at one coat as well as building nicely.


I finished up with the pinks: Fresh Paint Matte Me Blush and Funky Fingers Tinted Love. The matte in this pair didn't have as much texture to it when it dried as the first two had, and the sheer seemed a little less sheer than the others, which was most noticeable at three coats.


I've got my stash organized in its new home to the point where I was actually able to find enough of my other sheers to compare to these Funky Fingers; that made me happy as I've missed doing comparison posts.

Corals/oranges: Funky Fingers Turn Tint Up, Sally Hansen Triple Shine Vitamin C-Light, Maybelline Express Finish Orange Water, Maybelline Express Finish Berry Water.


On the nail over a white base (all two coats), same order as bottles above:


Purple sheers: Funky Fingers Tint for Tat, OPI Don't Violet Me Down, Essie No Shrinking Violet, Sally Hansen Triple Shine Grape Jelly.


On the nail over white; two coats of all but for the Sally Hansen, which I did three of trying to build it up more:


And the pinks: Funky Fingers Tinted Love, OPI Be Magentale with Me, OPI Pen & Pink, Essie Love Sheen.


Over a white base, two coats except for Pen & Pink which was only one:


I'm glad I got these; it's nice to see different finishes at the drugstore price point. When I find my Wet Paints jellies, I may discover that I have dupes for the coral and pink sheers but that's okay (the purple is already pretty close to Essie).