Showing posts with label p: NOTD. Show all posts

Thursday, October 12, 2023

OPI xPress/On Nails

For the second week of my trip, I wore a set of OPI fake nails, my first time trying this brand's offering. I chose 100% That Scorpio from their zodiac collection (I'll share other signs from that in a future display post). I'm not a Scorpio, but I really liked the purple/green/blue multichrome effect. This set's shape is Classic, which I'd call oval.
 

After I opened the package, I struggled to find sizes that fit my nails. The assortment was very much skewed toward the smaller end. Other brands I've used have had a more even distribution, and my hands are not small, so I wasn't sure I'd be able to make this work.
 

I did the best I could with the sizes, but it wasn't great, especially the over large nail I had to put on my middle finger. As with the Ardell nails I shared in my last post, these came with glue but I used adhesive tabs.
 

The shift in these was strong and fun to look at.
 

The shape of these at the tips did expose some of my natural nails, which wasn't ideal, but the shiftiness of the fakes was distracting enough that I could ignore that after a while.
 

These nails did not like the adhesive tabs. I had the first nail pop off only a couple hours in, leaving the adhesive tab on my natural nail. Fortunately I found the nail, which is important as it was one of the larger ones and I didn't have a replacement for it. A few more instances of that, and I started using glue between the adhesive tab and the fake nail. That helped them stay on longer, though I still lost several even with the glue. That issue and the sizing make me less excited about trying other sets of these, though they have a lot of attractive ones and other shapes so I'll probably give them another chance or two.

Tuesday, October 10, 2023

Ardell Nail Addict Sun Kissed Nails

As usual, I had the best of intentions for posting more here now that I'm home, except I've been sick. I spent the first week after I got home thinking I was just tired from travel. Then I woke up with a swollen, red, goopy eye and decided I needed to get that checked out. I also had some bug bites that were not healing well, so I had the doctor look a those too. She gave me some antibiotics for the infection she diagnosed, and I took those for almost another week, feeling worse and worse rather than better. I went back to the doctor's this past Friday and saw a different professional and got some different drugs and have slowly been feeling better. Still don't know exactly what I've got, as the first sample they took wasn't usable when it got to the lab. Hoping to hear on the second sample when I go back on Wednesday. I have enough energy now to do more than huddle on the couch under a blanket, so today I've got one of the sets of fake nails I wore on my recent trip, the Ardell Nail Addict Sun Kissed in Color Cadet.
 

These came with nail glue only, but I used adhesive tabs instead since I continue to think they're less damaging to my nails. The fit and base shape of these worked pretty well with my own nails, though they were a tiny bit too square at the base. The pinky peach color indoors went nicely with my skintone, if maybe being a bit unexciting. The nail material was a bit on the sheer side, which meant some air bubbles between the adhesive tabs and the nails showed through, as well as my nail tips, which were shorter than the fakes. It bothered me at first but after a while I stopped noticing it, and I don't think anyone else saw those details the way I do.
 

In filtered sun, hints of pink showed up.
 

In full sun, they went to a light magenta.
 

I kept hoping I'd see the deeper purple shown on the box, but I never caught them doing that in the week I wore them. Here they are at a rest area somewhere along the road.
 

These stayed on pretty well with the tabs and the color change aspect was fun. I'd wear this style again.

Tuesday, August 29, 2023

Across the Ocean and Back Again

Hello! I am back from my month-long vacation which took me to/through 15 states plus one country outside of the U.S. It was a journey with a lot of different events and modes of transportation which took me and Mr. Karen to places both familiar to us and new. I put neutral (but a tiny bit sparkly because I'm me) polish on my toes and packed fake nails for my fingers and off I went. A few days before we left, I put on this set from imPress called Wash Away. It has light blue solid nails, light blue with tiny iridescent glitter nails, and light blue with a turquoise and navy flower and butterfly design nails. These started out medium length and square, but I cut and shaped them so they felt more comfortable and practical for me, as I often do with the longer fake nails.
 

Still looking good on day 6 (with the limited edition "XP Flavored" Coke limited edition).
 

I had a few nails loosen and need new adhesive tabs during the week I wore the blue set, so pretty standard. The next set of nails I used were from the Kiss Gel Fantasy Allure line. The box didn't have a name on it, but I looked online and these appear to be called How Dazzling. They have multi-sized iridescent glitter on a translucent ivory base. (The box was a bit worse for wear after being stuffed in a pocket of my suitcase for a week at that point.)
 

I used adhesive tabs for these, not the glue that came with them. I clipped and shaped them as I had the blue set. On the left, as they came from the box. On the right, how I wore them.
 

I wore the glittery nails for the whole second week of the trip. When it was time to change, I reached for a set I'd gotten off the Temu app, where they were described as "Press On Nails, Short Square Fake Nails, Beige French False Nails with Glitter Design, Glossy Clear Full Cover Acrylic Nails for Women and Girls; Color: Beige Cat Eye, Style: Gentle". The picture didn't appear to match a lot of those words, but for $3.48 I was willing to risk it.
 

These came with adhesive tabs. They were not short, so I clipped and filed them. They were a bit sheer, so before I shortened them, a hint of my natural nail tips showed through the fake nails in strong light.
 

Six days later, I hadn't lost a single nail. Those adhesive tabs were strong. I'm sure it helped that I didn't have my laptop with me, so wasn't banging my nails on a keyboard for a few hours a day like I tend to do at home.
 

I'd planned to change my nails again before the next phase of our trip, a seven-night transatlantic cruise, but they were holding up so well, I still had them on the day we boarded, a week after I'd applied them.
 

I figured I'd change to the last set I'd packed when I started to lose the beige cat eye ones as the adhesive got weakened, but they just kept hanging in there, so I ended up wearing them for the whole cruise and the multi-day drive home from New York to Idaho. There was definitely a gap at the base of my nails by that time, but given the neutral color of the nails it wasn't too noticeable.
 

On the trip, I was really trying to focus on experiences rather than buying things, so even though I saw polish and fake nails I don't have easy access to at home, I bought none of them. I'm kind of amazed at my self-control. I will have a display post up once I get through all the photos; hoping that won't take too long.

Tuesday, June 27, 2023

Sally Hansen Salon Effects Perfect Manicure Nails, Part 2

I shared a while back about my experiences with the oval and square shapes of the Sally Hansen Perfect Manicure fake nail. Today I have a set of the almond shaped ones called Sweet as Candy, which has nails in five pastel creme shades: lavender, peach, yellow, blue, and pink.
 
Sally Hansen Salon Effects Perfect Manicure Nails in Sweet as Candy
When I got to selecting nails that fit me, I was surprised to see that nails in the same size weren't necessarily the same color as each other. I noticed it with the three or four biggest sizes. That's a bit unusual; in most sets, if there are only two of a size, they'll match. So I couldn't make my hands match each other, which is fine, especially for a Skittles set like this. Here's my right hand (the thumbnail is lavender):
 
Sally Hansen Salon Effects Perfect Manicure Nails in Sweet as Candy
And my left (the thumbnail is peach):
 
Sally Hansen Salon Effects Perfect Manicure Nails in Sweet as Candy
I wish I'd swapped the middle and thumb colors left to right, so there would have been more warm/cool balance on my non-thumb digits, but that probably wouldn't bother most people. As far as fit goes, these were pretty good for me, though I wished the bases were a bit narrower especially on the size that was the closest match to my middle finger. The shape is not my favorite, what with the scratchy point (even after I smoothed with the included file). The tip also curves down, maybe to make the point less likely to stab something.
 
Sally Hansen Salon Effects Perfect Manicure Nails in Sweet as Candy
I know I could probably get used to the shape and the length—indeed, I did type on my laptop with them on—but after a few hours, I clipped and filed them into more of an oval shape. Ah, much better for my lifestyle.
 
Sally Hansen Salon Effects Perfect Manicure Nails in Sweet as Candy
As with the previous sets, I used the adhesive tabs, and the nails stayed on decently well. What they didn't do was wear well. The colors don't go all through the nails but are applied on a white base, and after four days, the color was wearing off the tips of the nails and letting the white show. This was most noticeable on the fingers I use the most for grabbing things and such, but it was there on on all them to some extent by day five. Perhaps this was caused or at least made worse by my clipping and filing them to a new shape, except the color scraped off a small section of my index nail nowhere near the edge, so maybe not.
 
Sally Hansen Salon Effects Perfect Manicure Nails in Sweet as Candy
So far I've liked the solid color oval nails from Sally Hansen the best. Those didn't need clipping and filing to fit my life or nails and they wore well. I'm glad I tried these almond ones but I don't see myself getting more of them.

Tuesday, May 16, 2023

Hip Chic Semi-Cured Gel Nail Strips

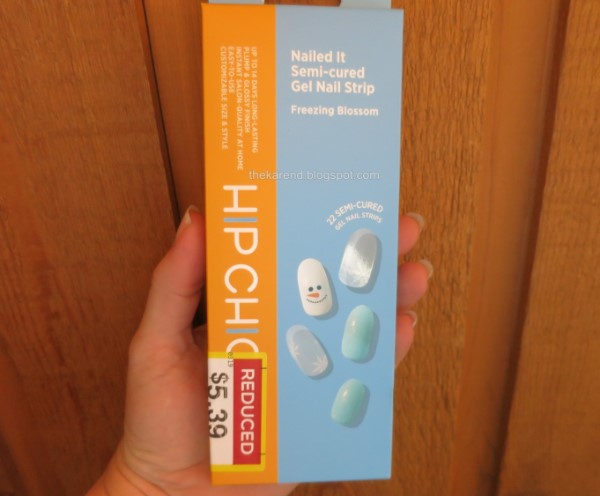
I haven't made display hunting a priority for a while, what with so many mainstream beauty brands no longer putting out seasonal collections meaning there's not much to find and thus no dopamine hits for me. Still, habits are hard to break, so whenever I'm in a store that carries nail polish, I tend to drift to that section regardless. On a trip to Fred Meyer, I stopped at the clearance bins and found a whole bunch of boxes with Hip Chic Semi-Cured Gel Nail Strips in them. I'd never seen them at full price, so that's a sign I am shopping way less often than I used to. I figured it was a sign I should try them, so I bought a starter kit with the LED lamp in it (despite having at least two other LED lamps somewhere in my stash) and several sets of strips. I've now used these strips three times over the past two months so felt it was time to share. 
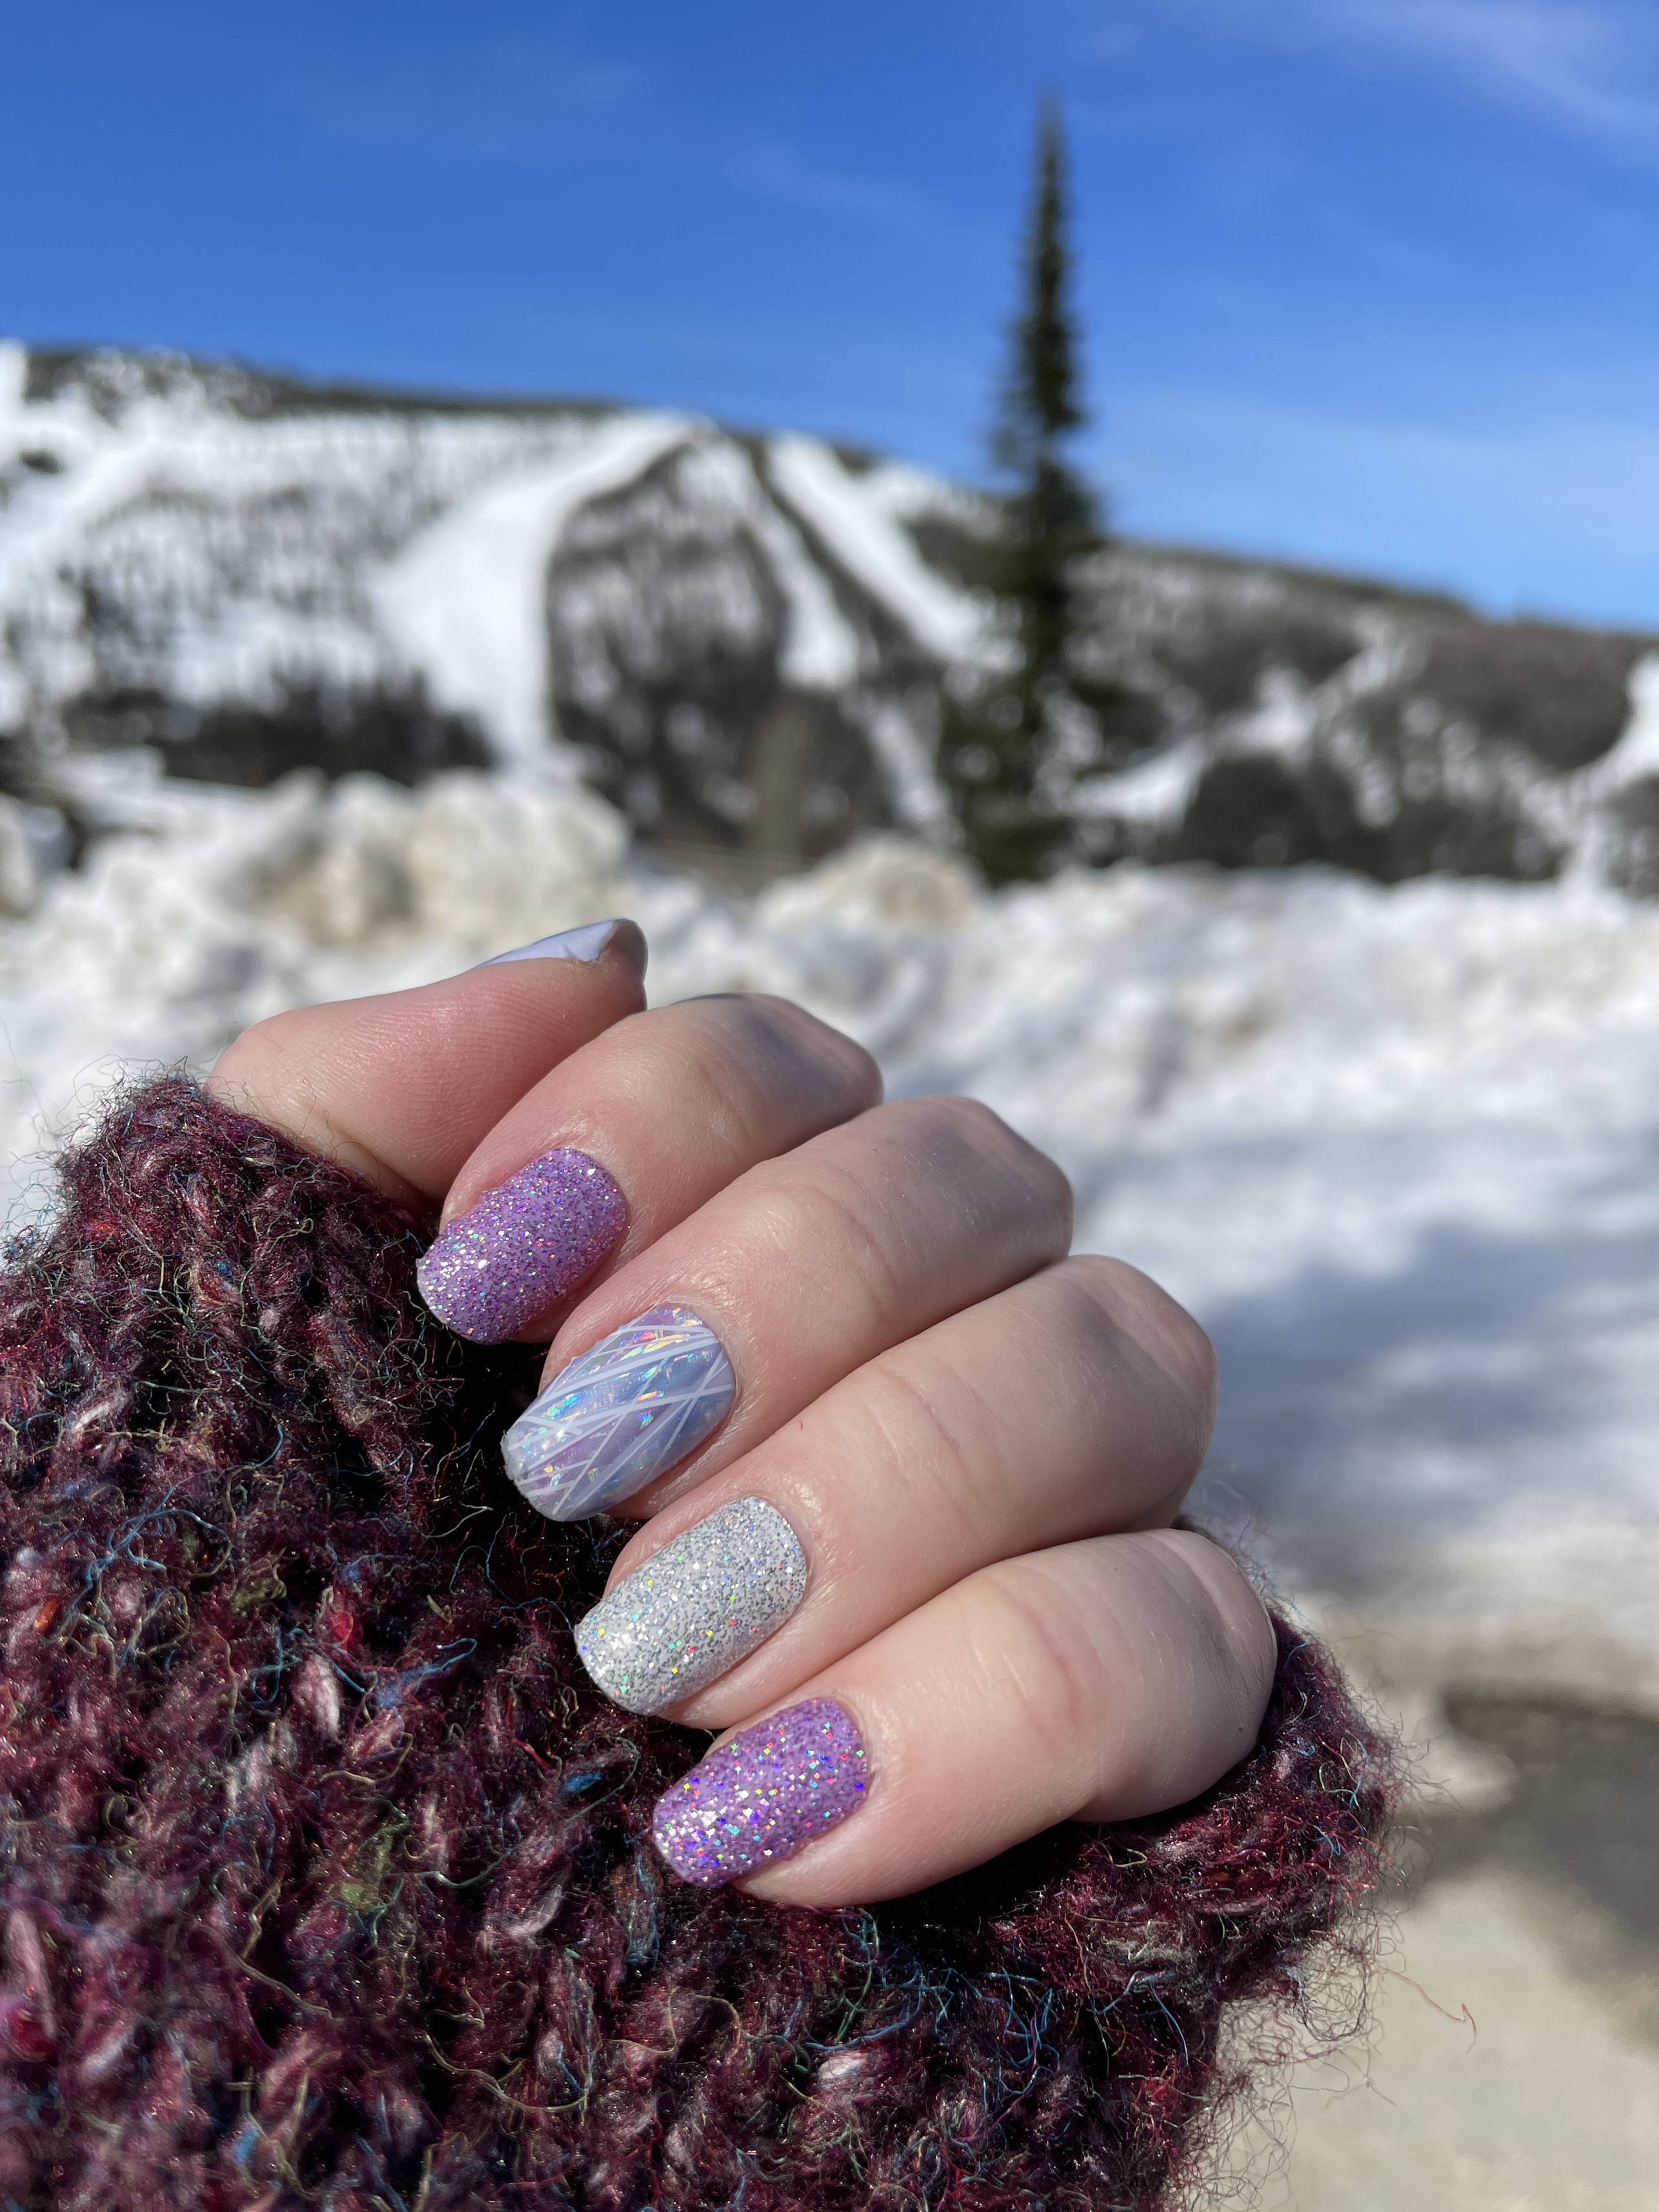
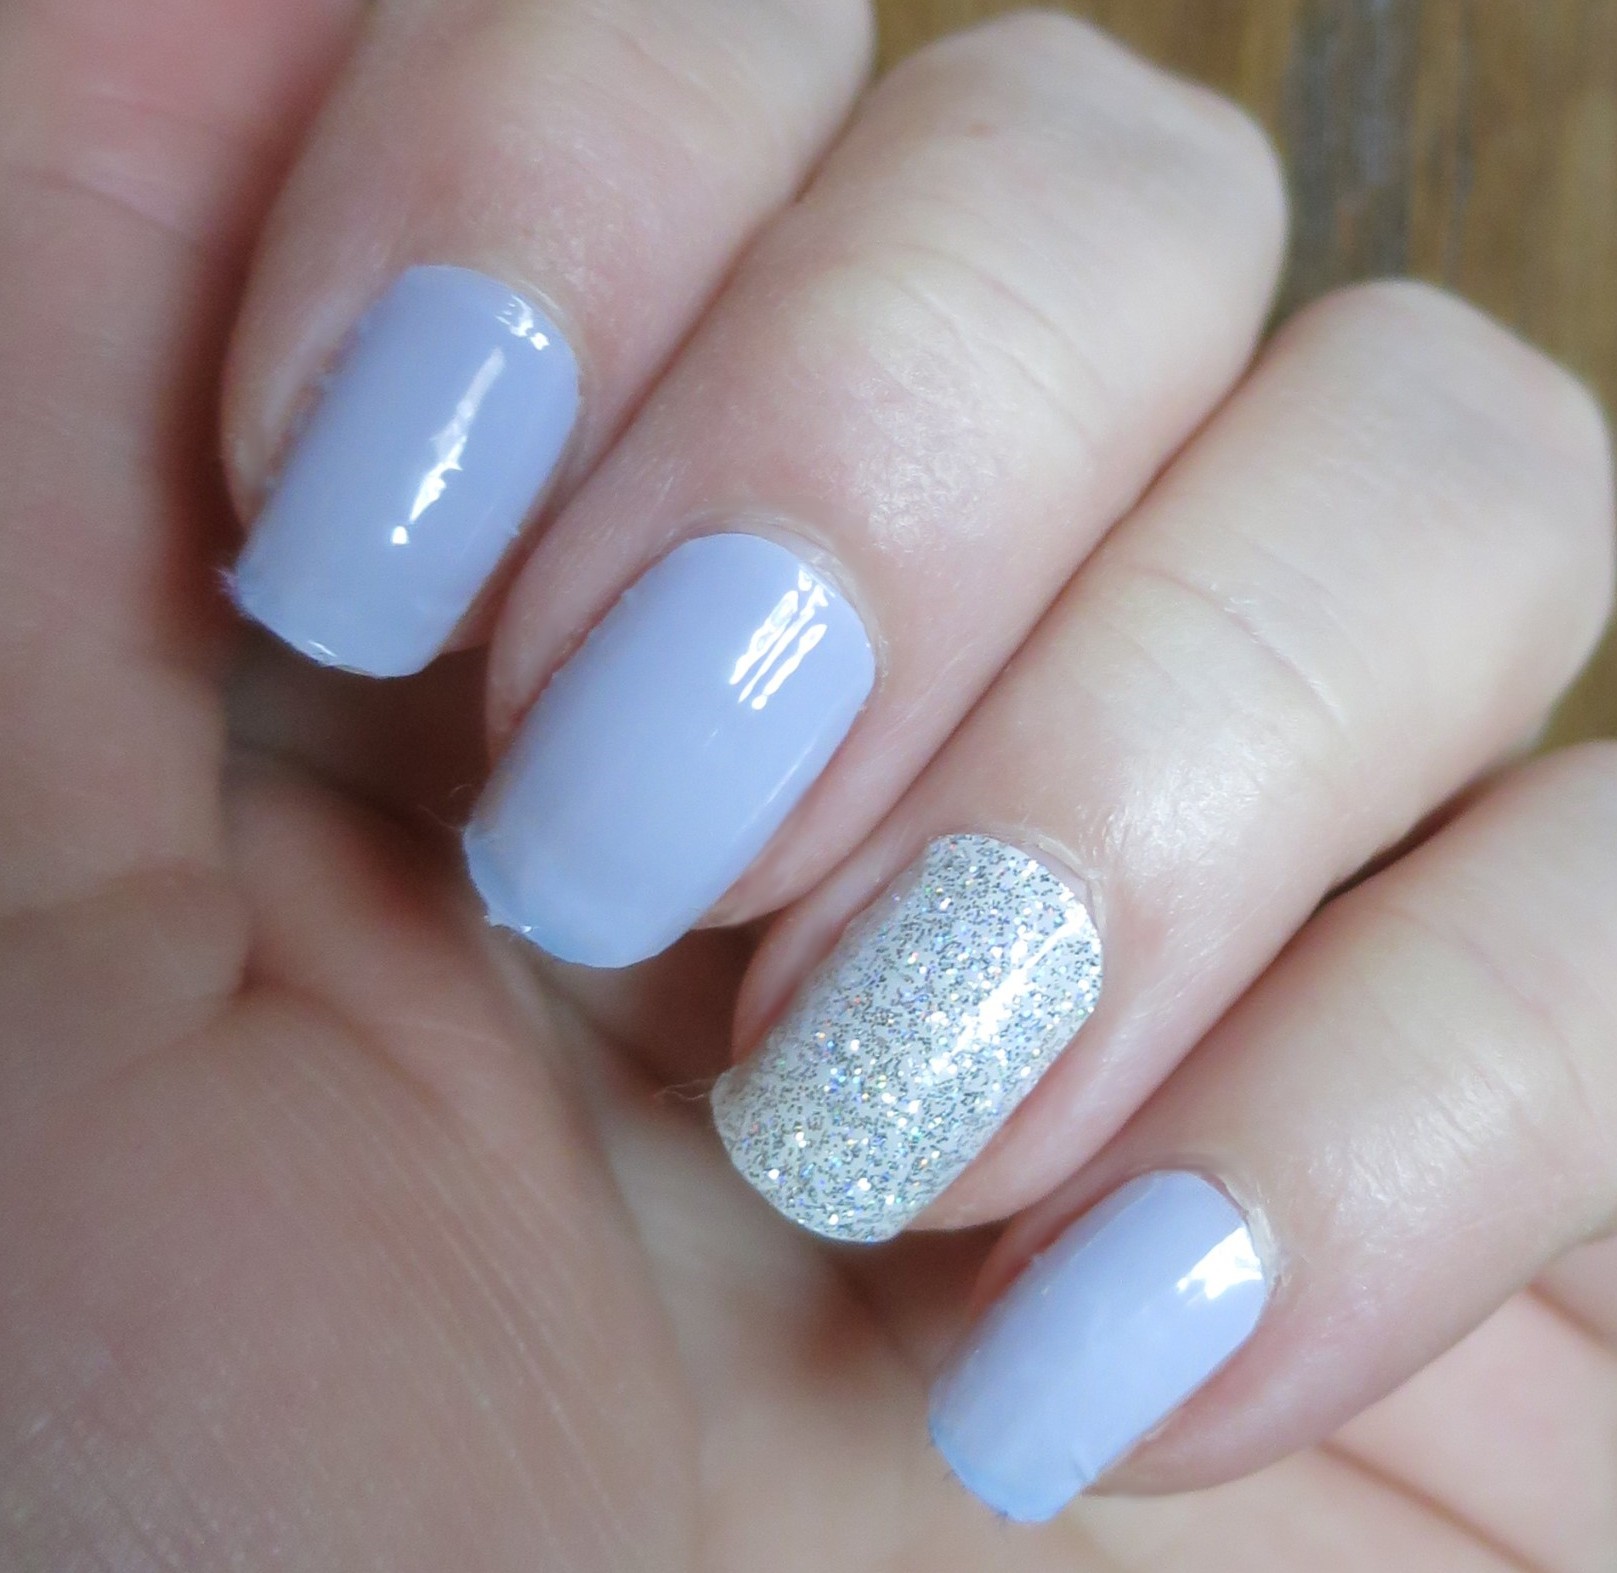
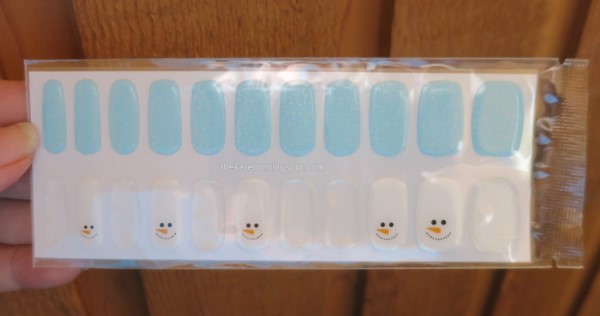
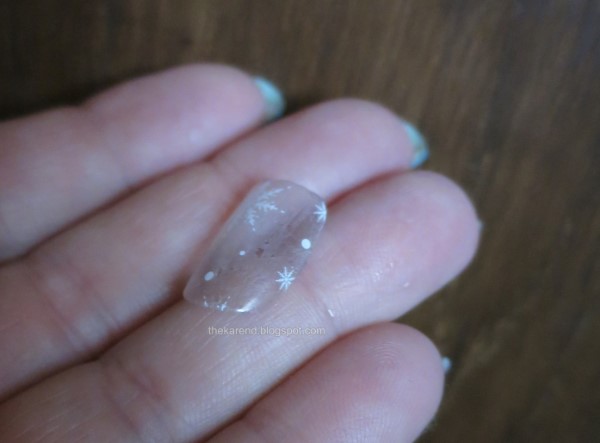
There was still plenty of snow around when I tried these the first time, so I chose the Freezing Blossom set, which has light blue with silver microglitter strips with two kinds of accent nails: white with snowperson faces and clear with white snowflakes.
 
Hip Chic Semi-Cured Gel Nail Strips
 
Hip Chic Semi-Cured Gel Nail Strips
The lamp that came with the starter kit was wide enough to get four nails at a time in, then my two thumbs side to side. The legs fold flat for storage.
 
Hip Chic Semi-Cured Gel Nail Strips
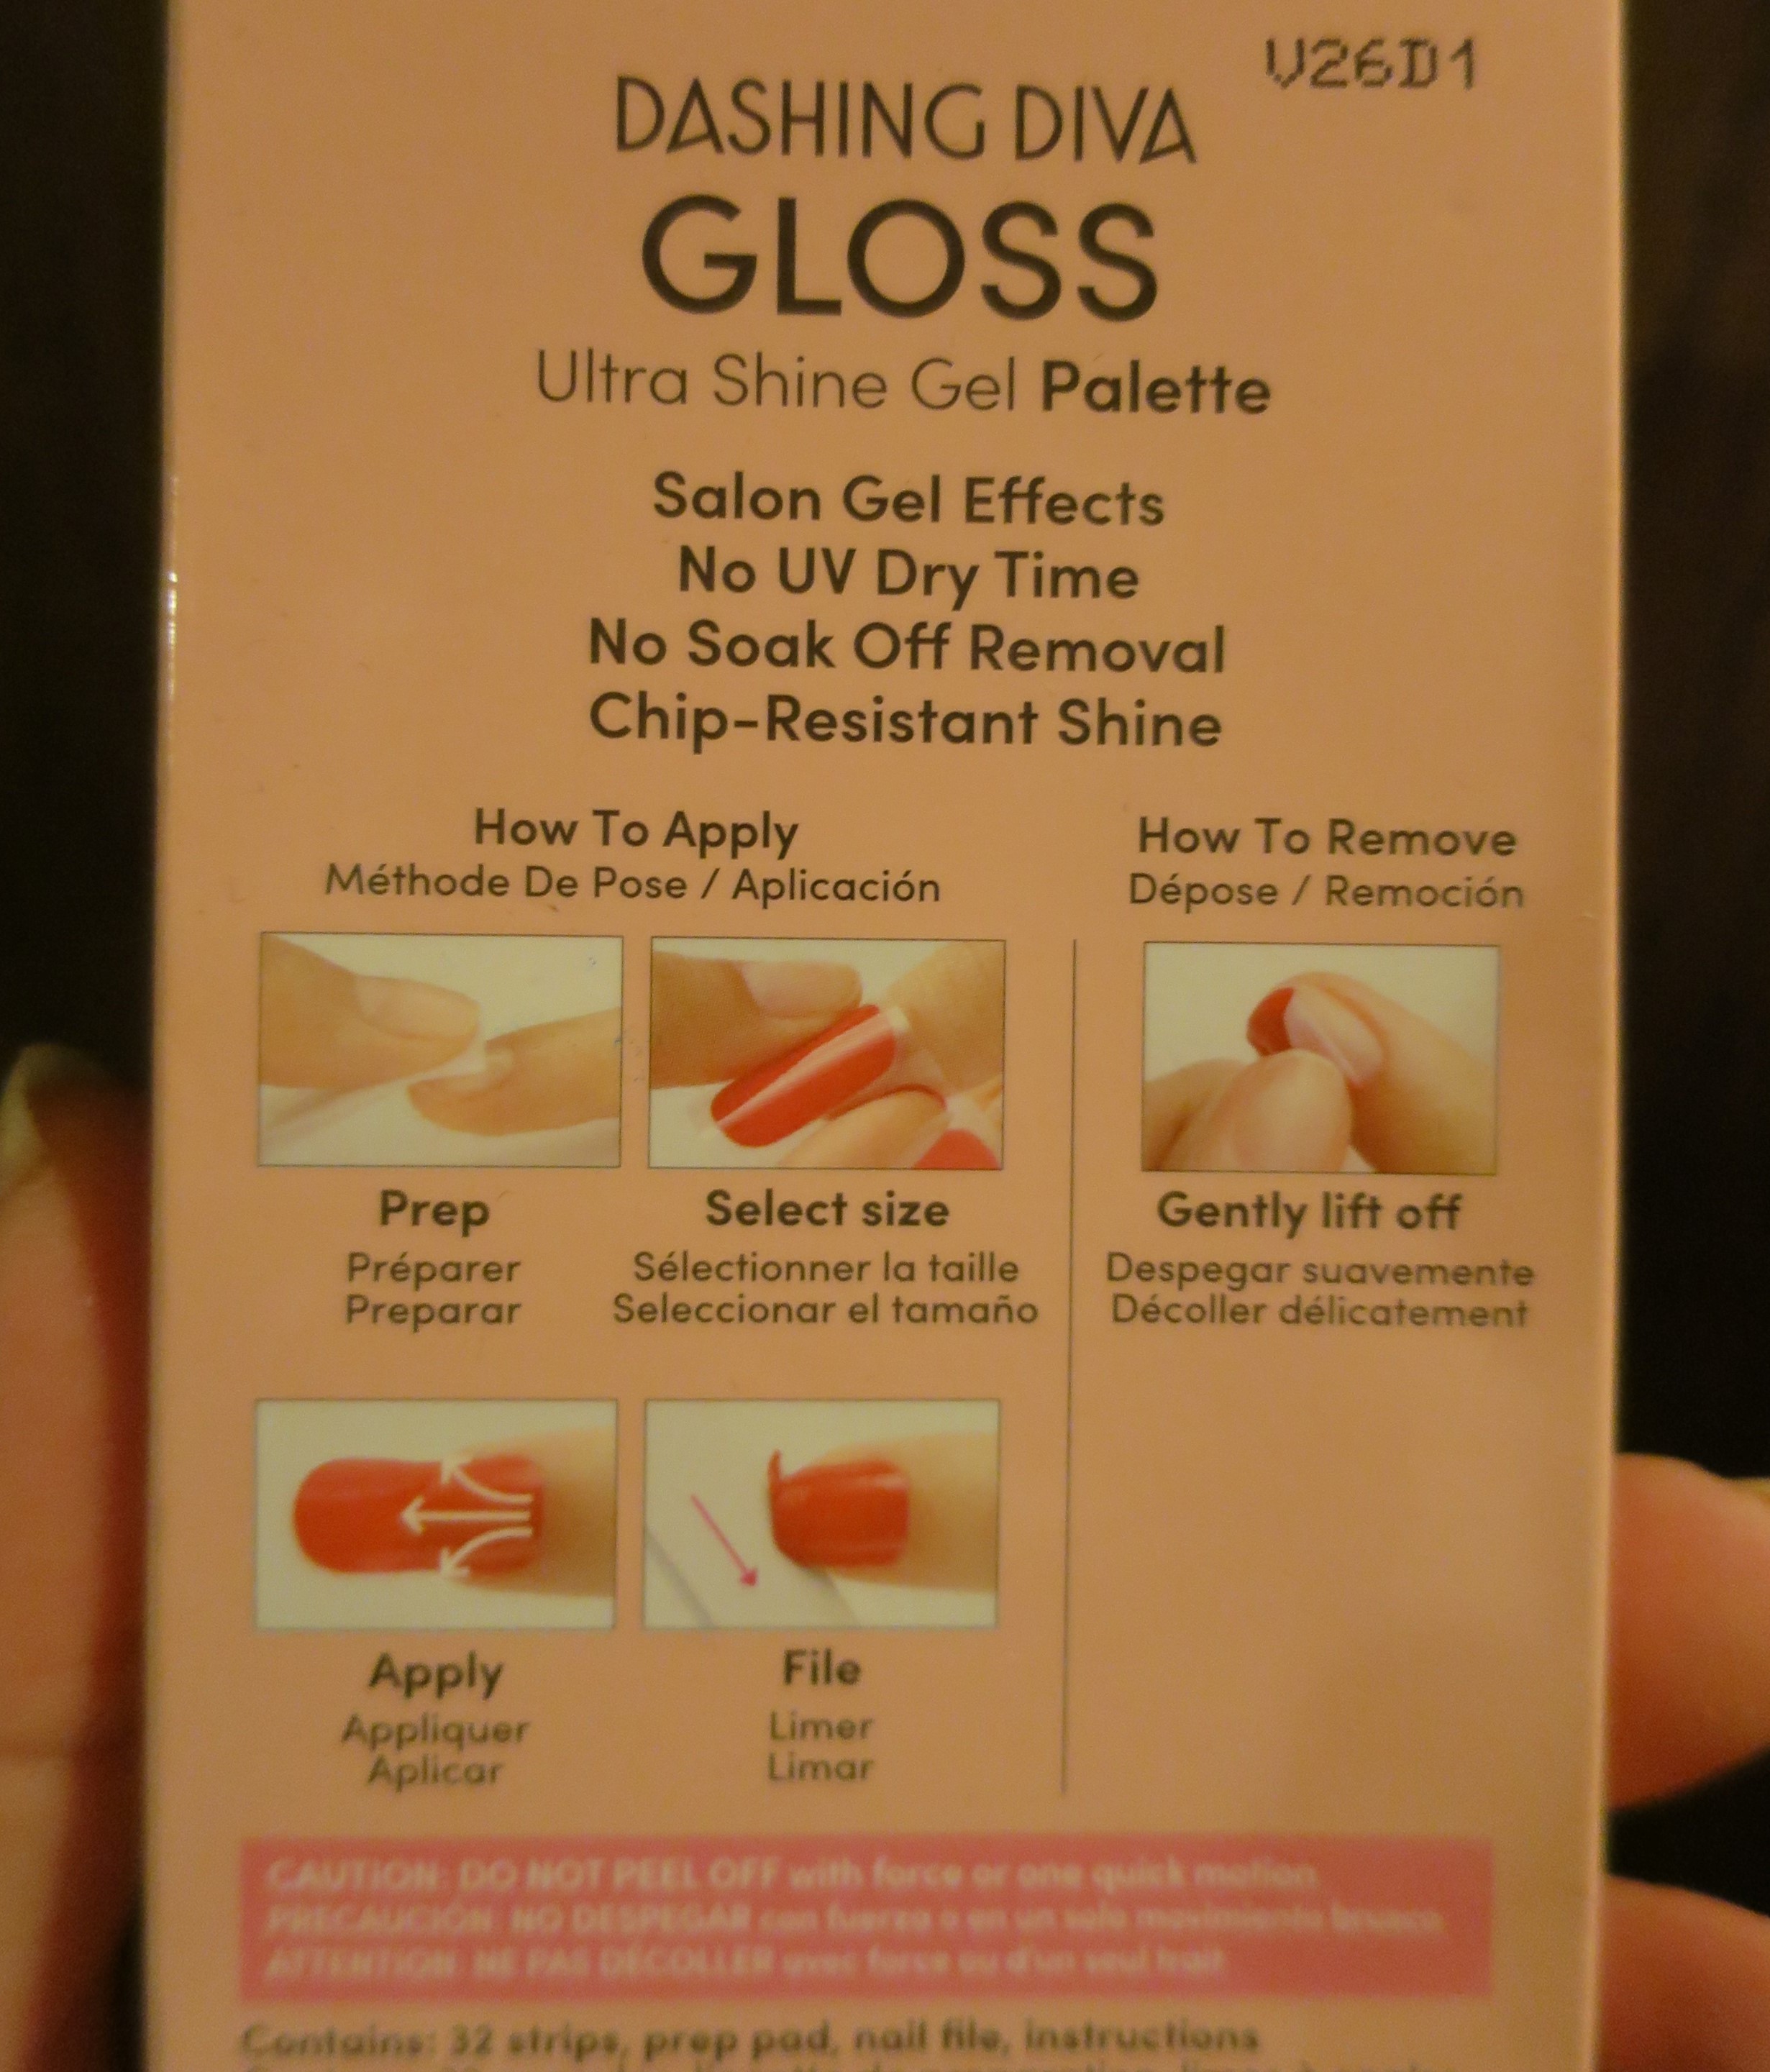
These strips were even thicker than the Dashing Diva Gloss Gel strips I used earlier this year. That was good for covering the ridges in my nails but made it more difficult to remove the excess length of the strips. Rather than folding and filing as I usually do with strips, with these clipping as close to the end of my nails as I could and then filing worked better. I used only the blue and clear strips for my look, mostly because I didn't like the placement of the snowperson faces on the white strips.
 
Hip Chic Semi-Cured Gel Nail Strips
 
Hip Chic Semi-Cured Gel Nail Strips
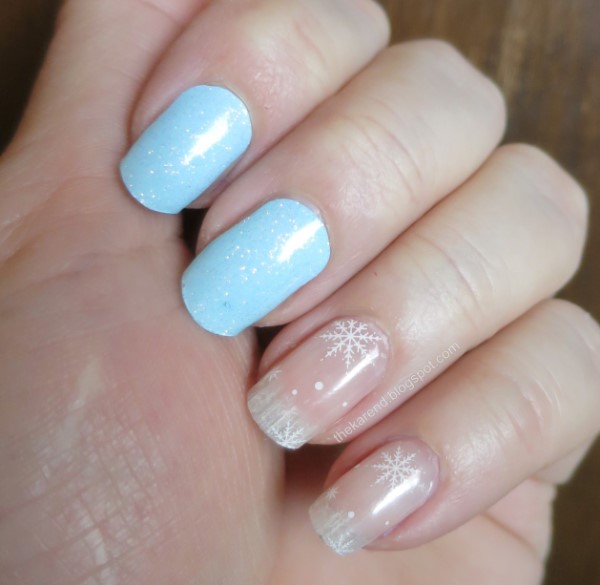
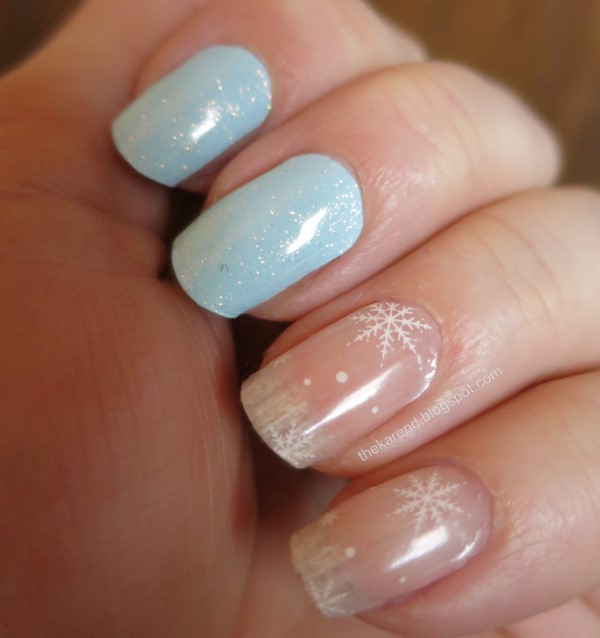
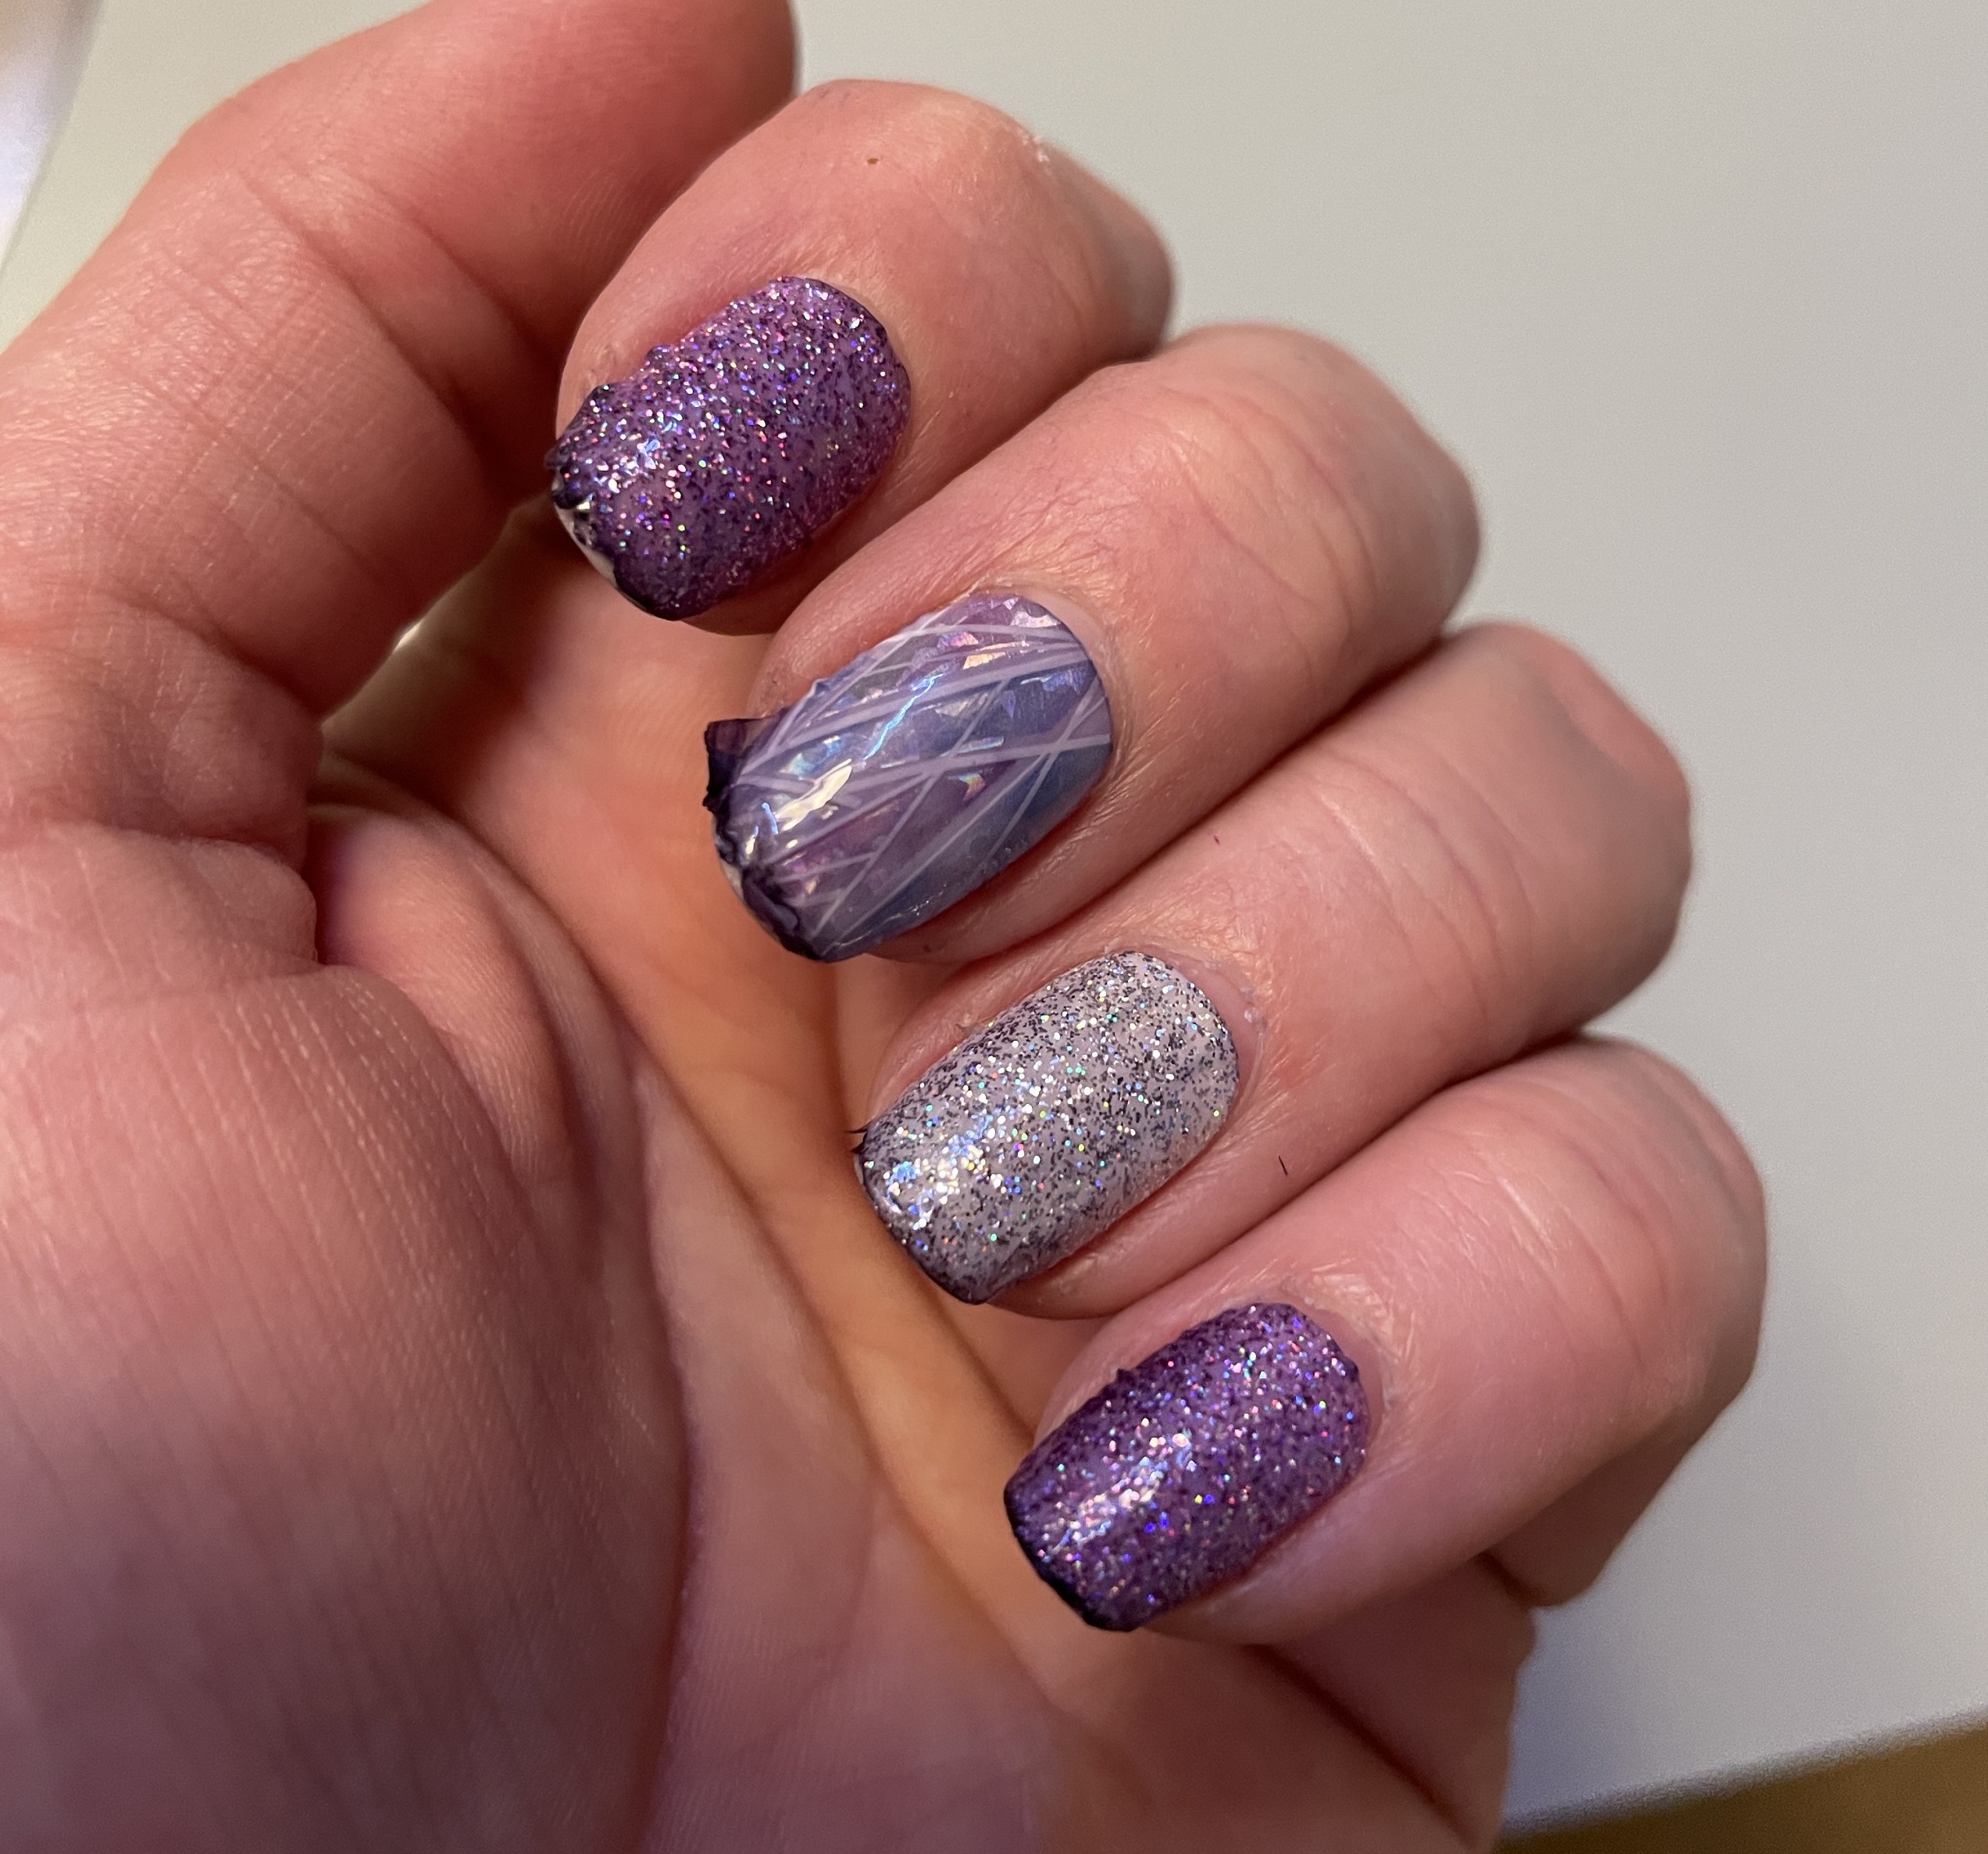
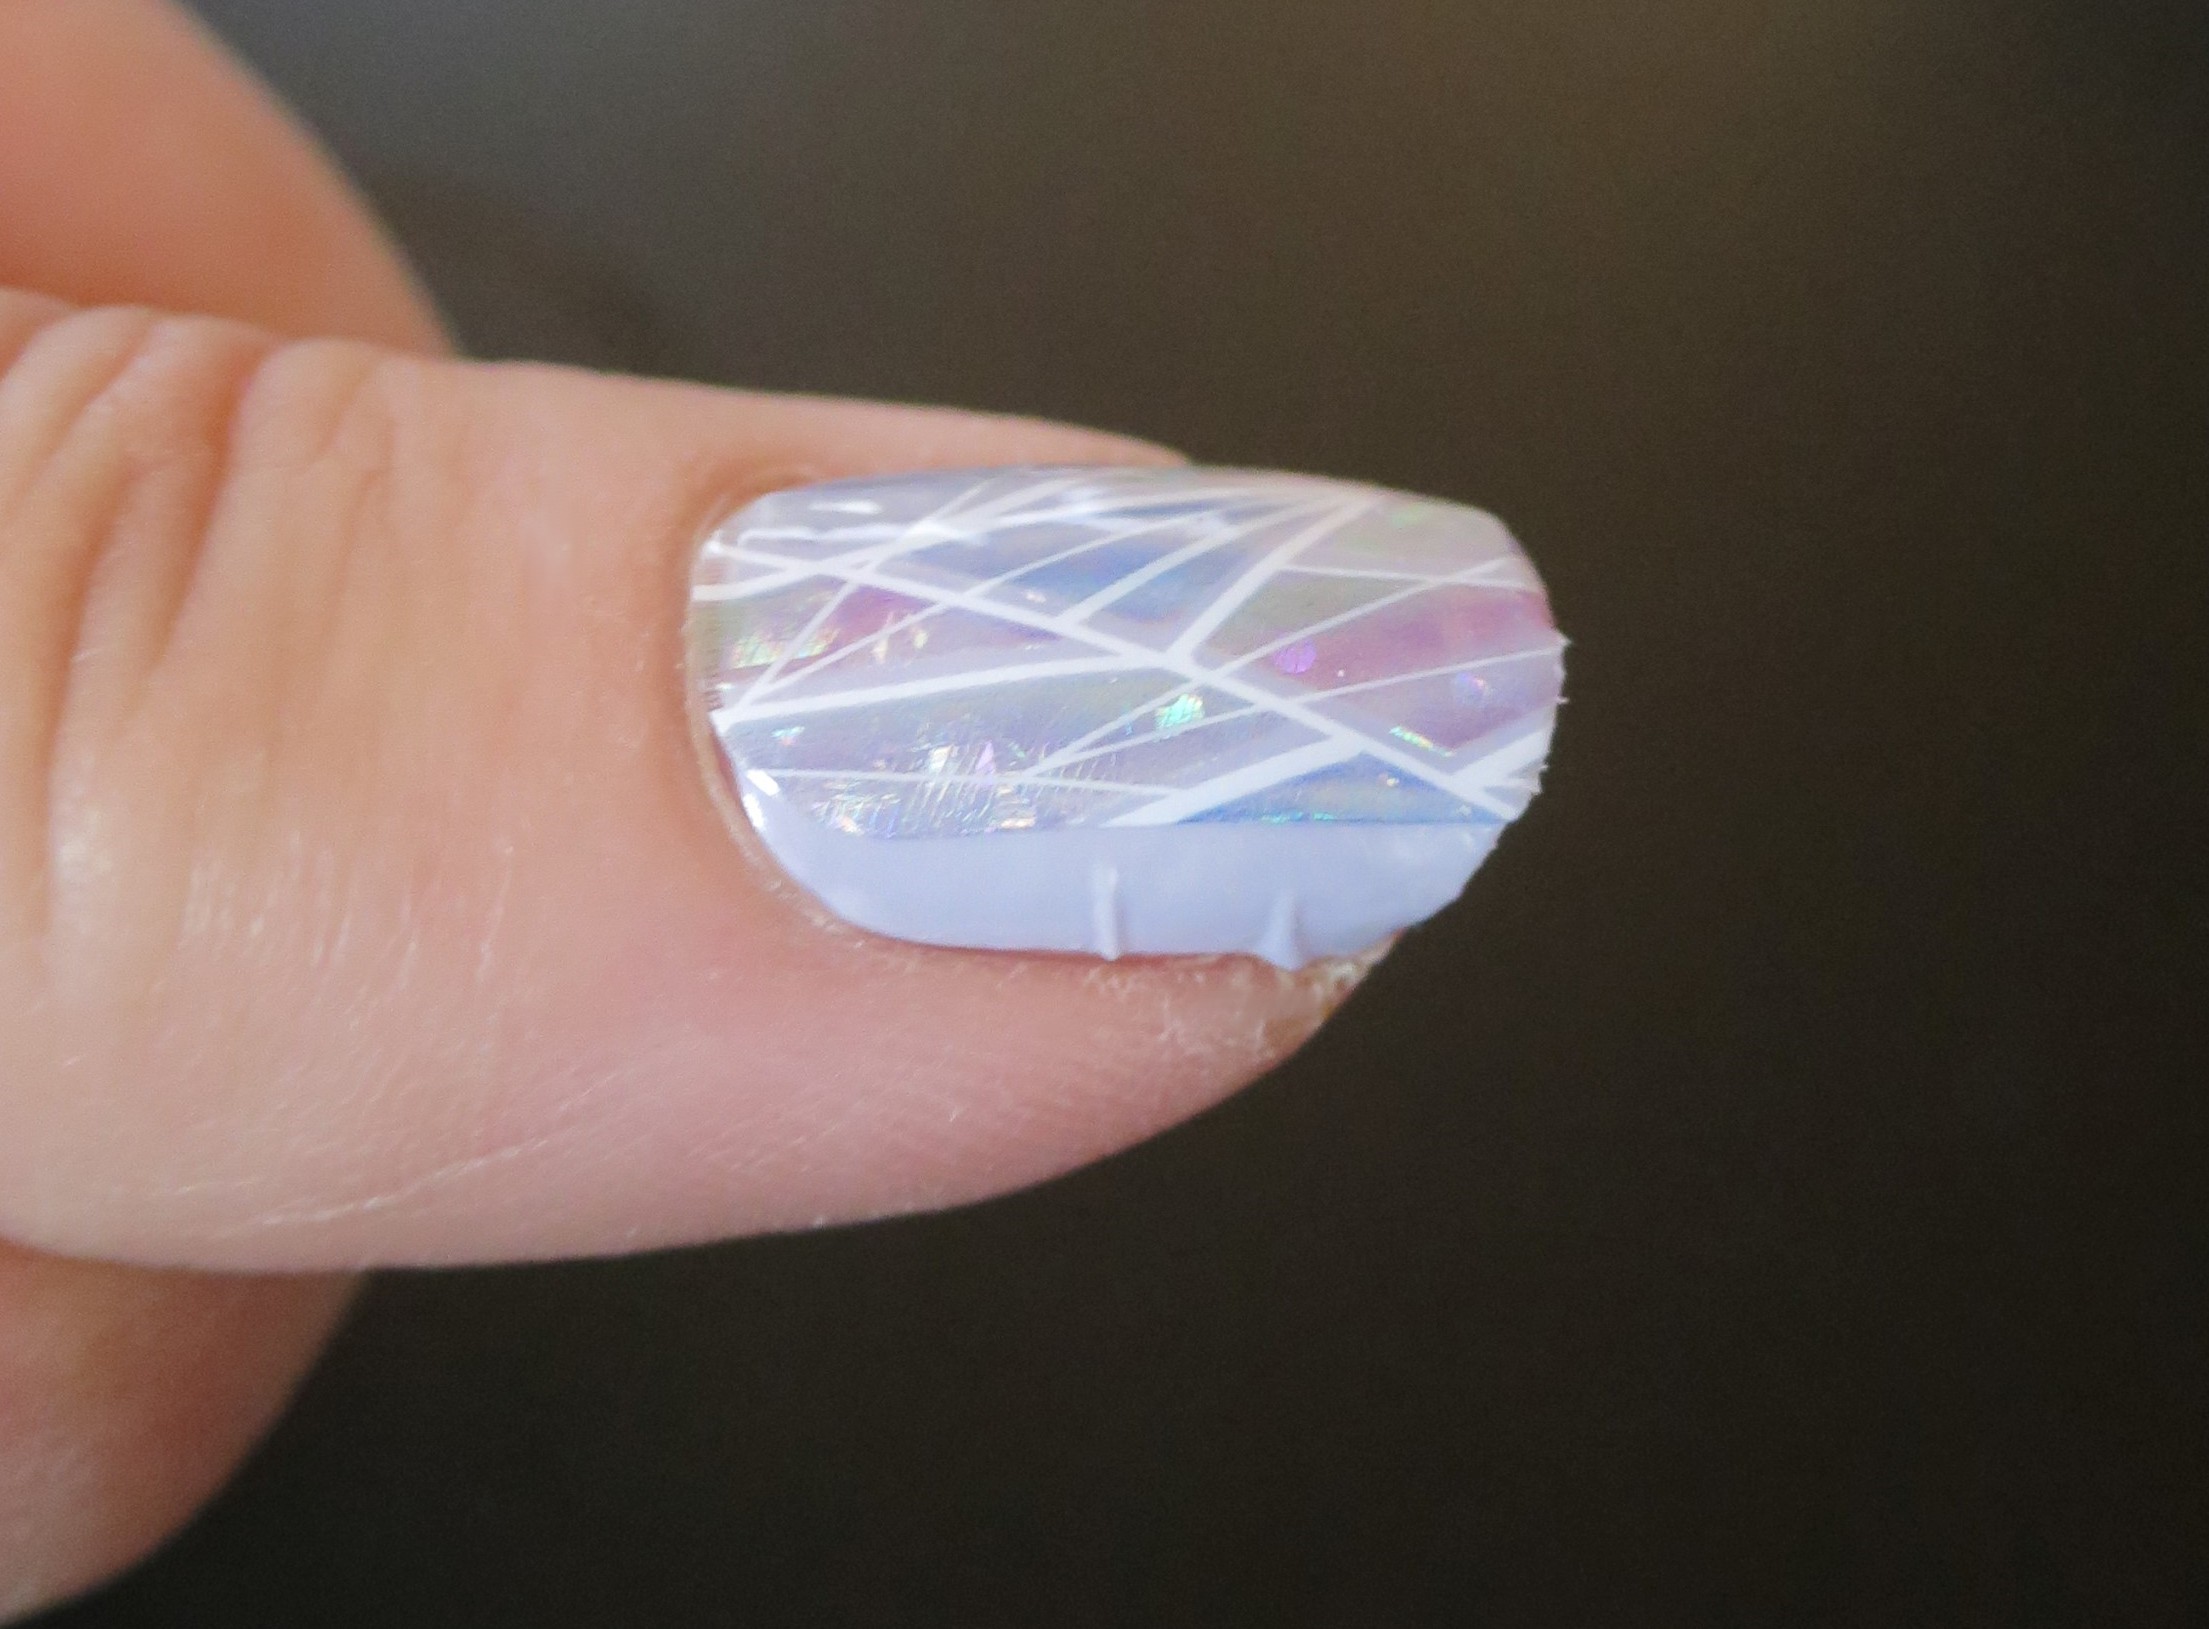
I liked the look of these, and after they were cured felt almost as hard as fake nails. Unfortunately, they also popped off like fake nails. I lost the first ones just a few days after I'd applied them. The clear strips seemed most likely to pop off. With the first one, I tried reattaching like I would a fake nail, but that didn't really work, as they just popped off again. Fortunately there were enough extra strips that I could just put a new one on and cure it.
 
Hip Chic Semi-Cured Gel Nail Strips
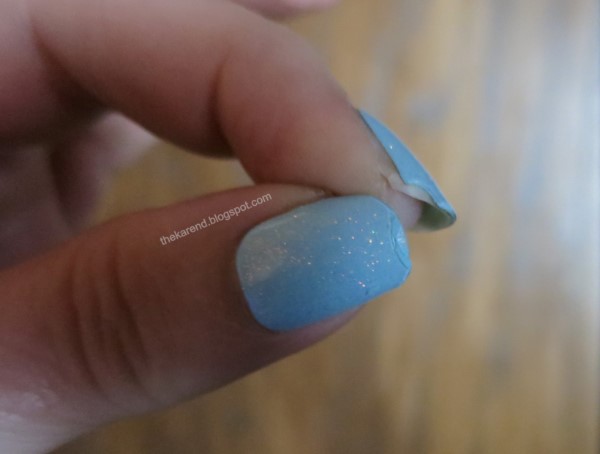
A few days after the popping off started, I got some chips, like sometimes happens with traditional polish. Here you can see one on my thumb that I'd tried to disguise with liquid polish and one on my index finger. I removed these shortly after I took these pictures, using oil to loosen the bond of the strips and then gently prying them off with a manicure stick per the instructions. Six days of wear wasn't too bad, I suppose.
 
Hip Chic Semi-Cured Gel Nail Strips
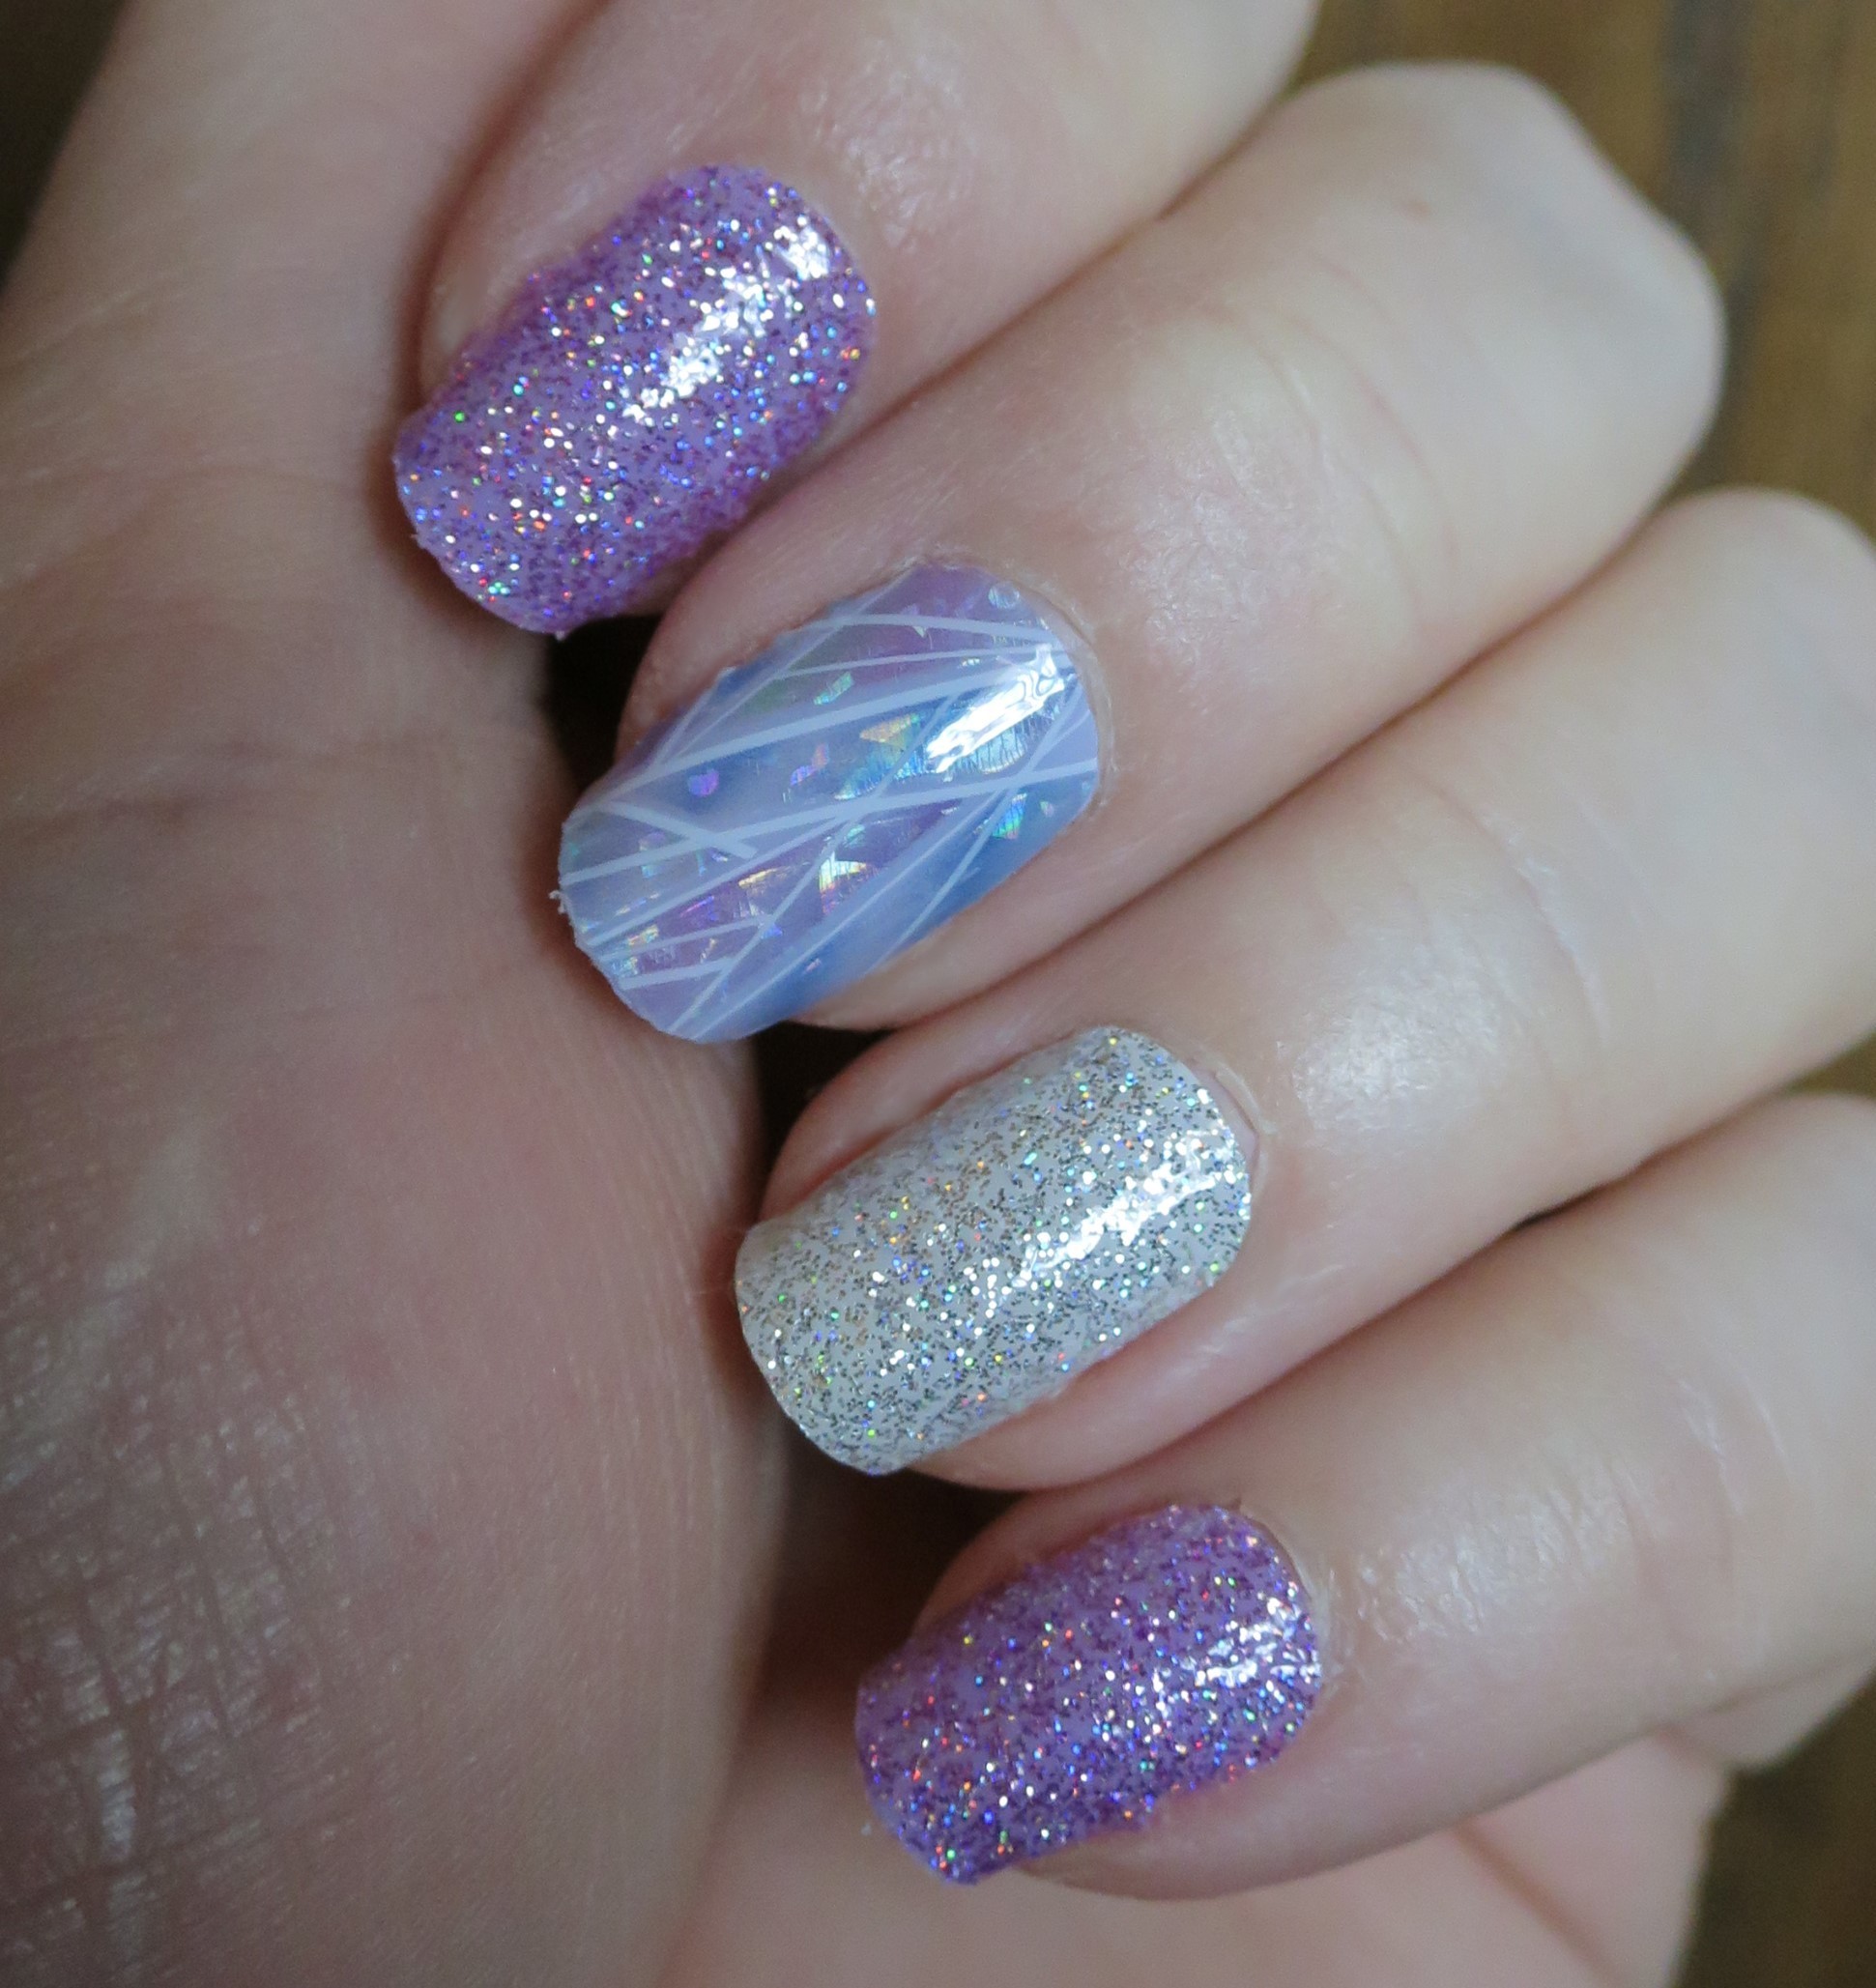
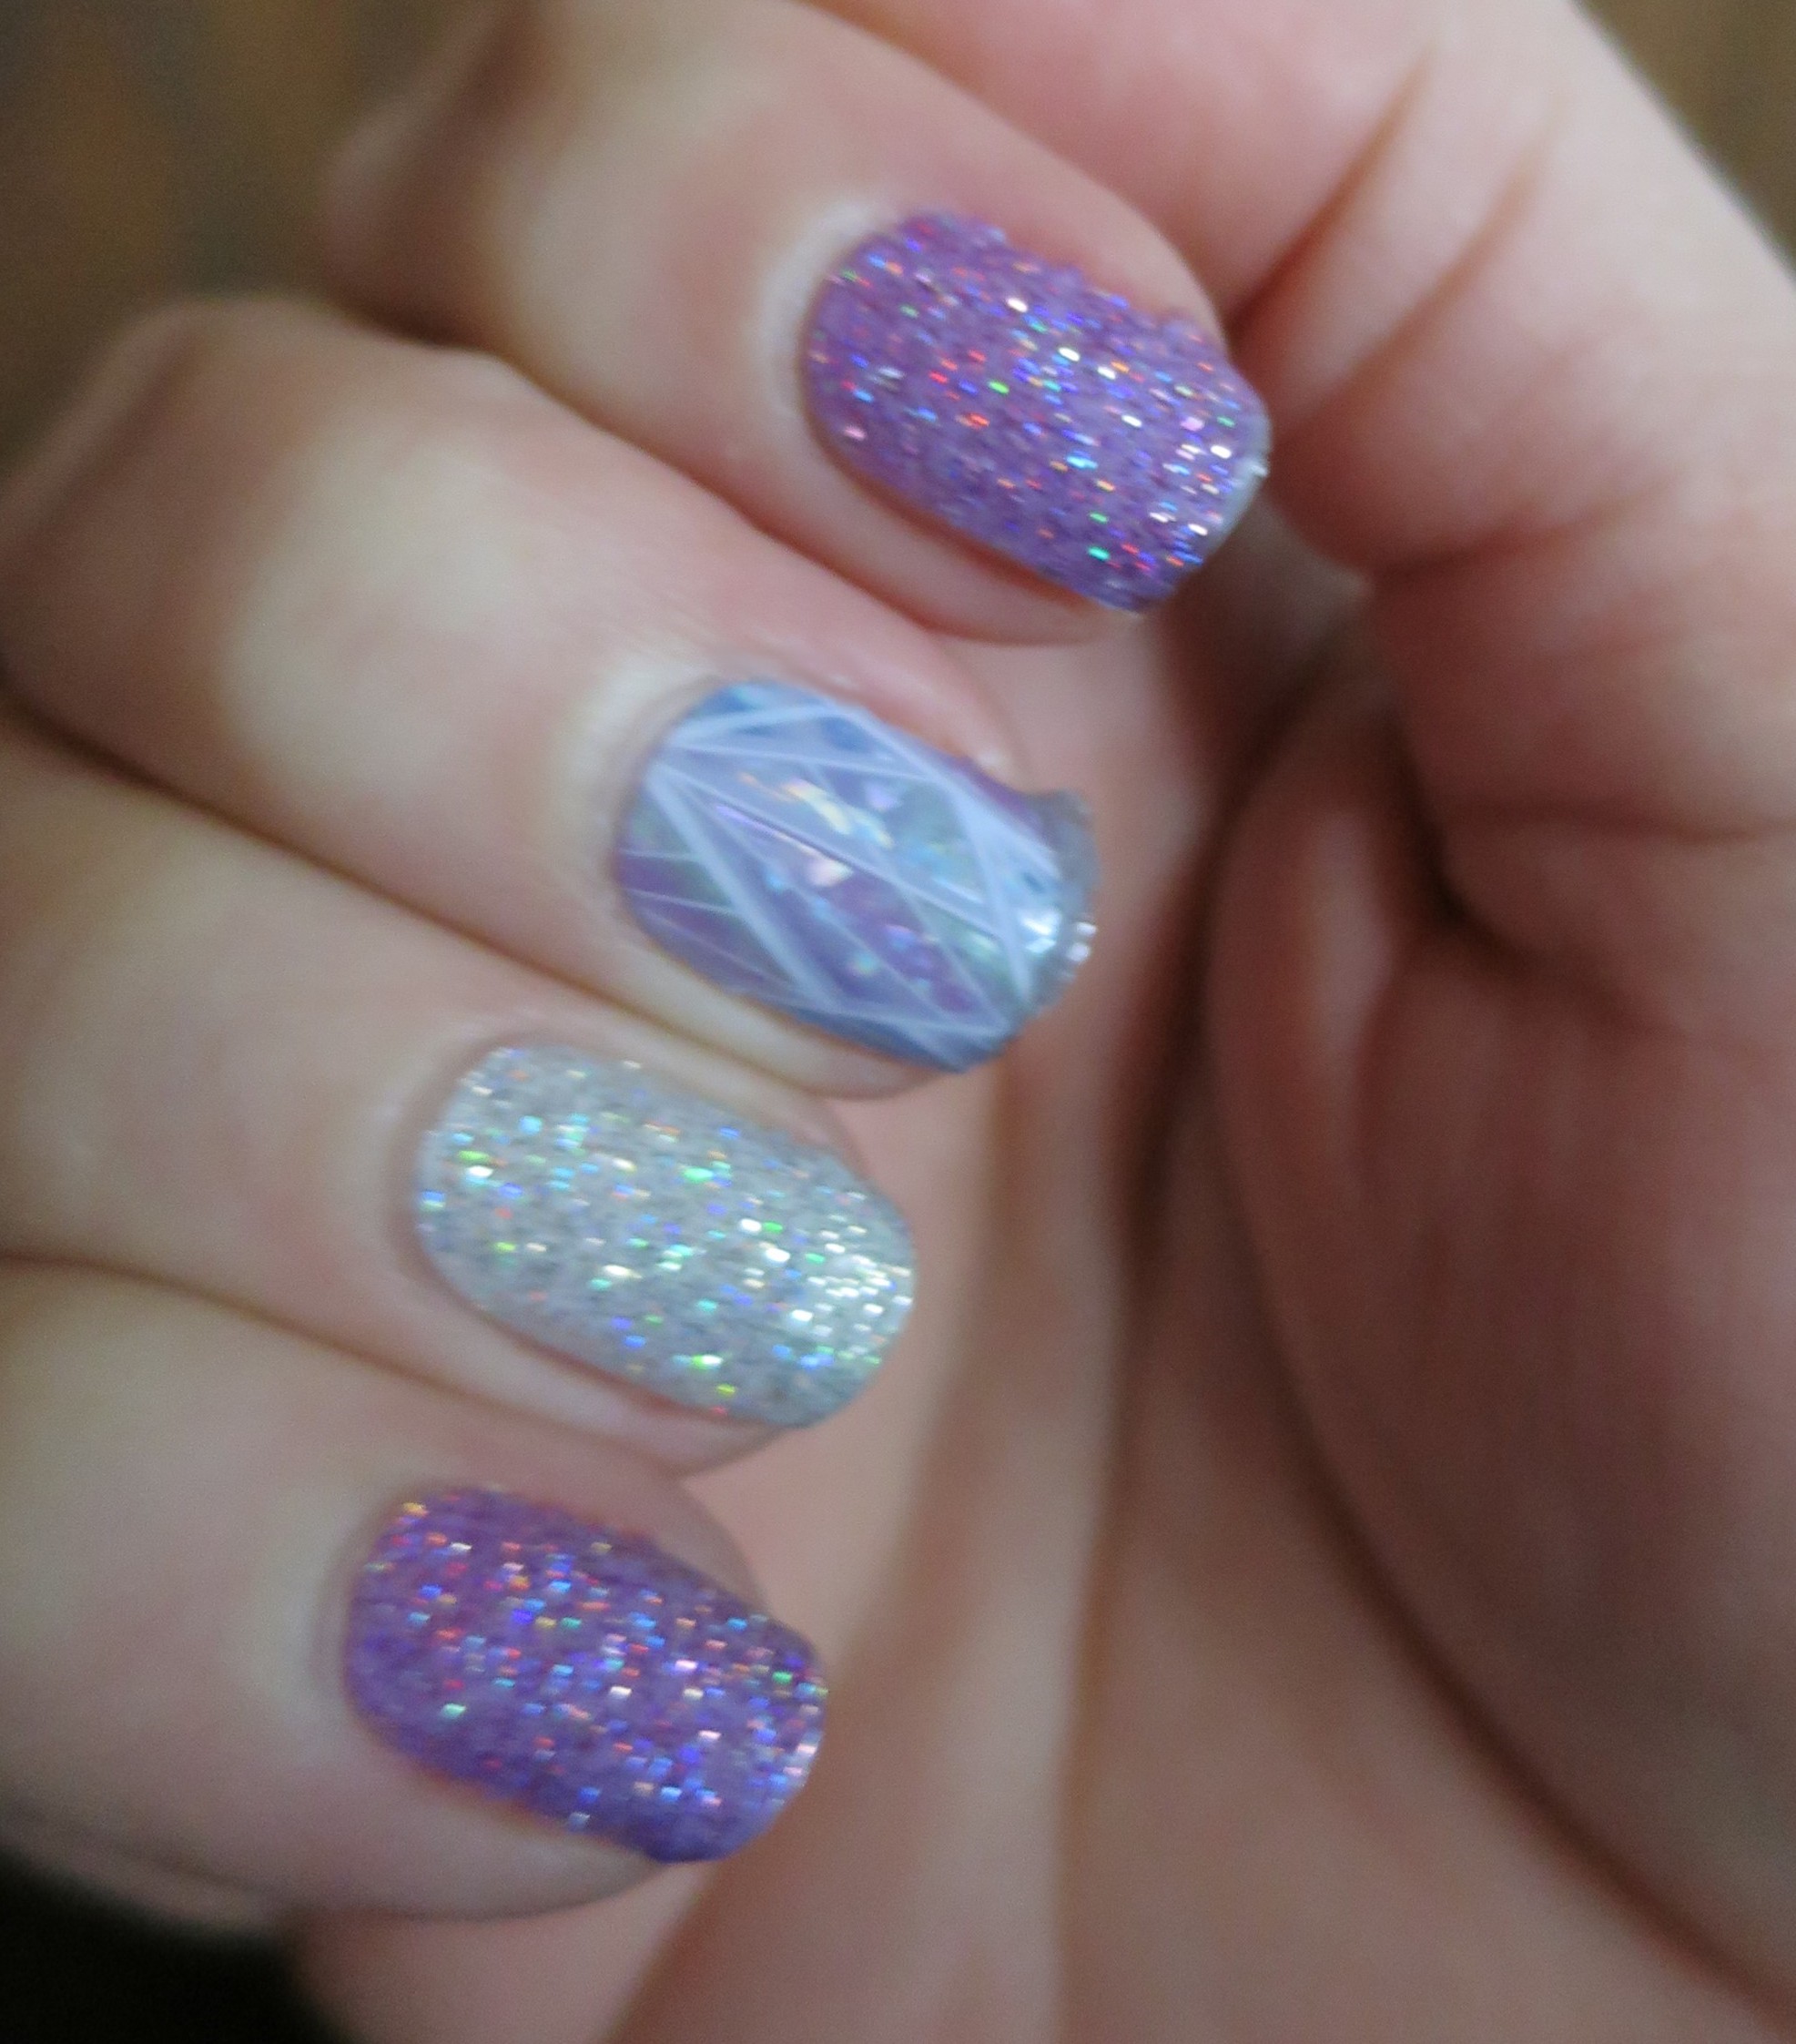
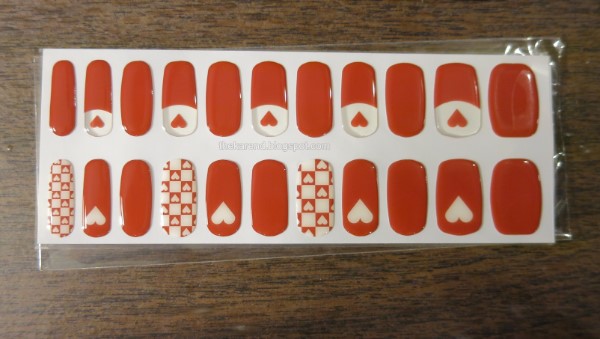
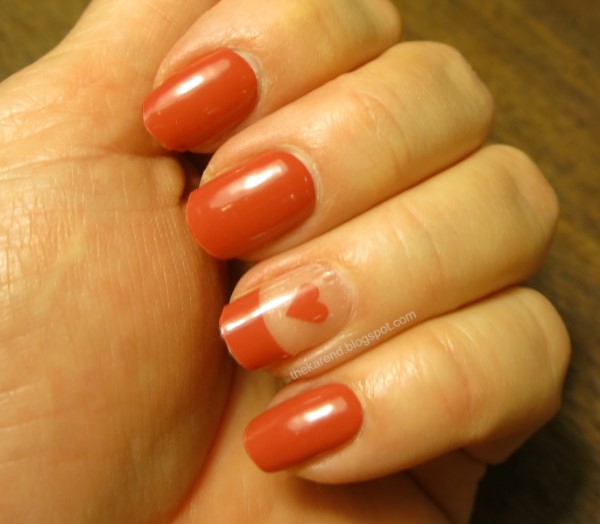
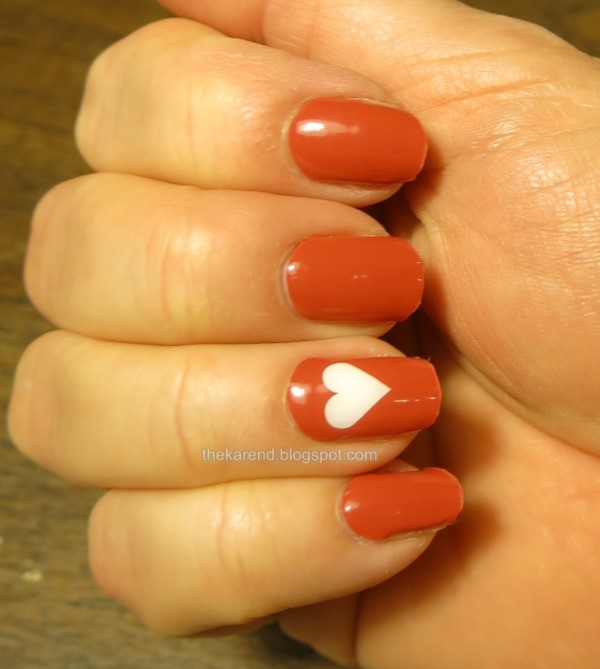
The instructions caution against using these strips continuously (bit a of a warning sign there?), so I waited before trying the next set, My Dear. This has solid red strips, red with white hearts, red with red hearts on a clear background in a sort of reverse French mani arrangement, and red and white checkboards with hearts.
 
Hip Chic Semi-Cured Gel Nail Strips
I did mostly the solid red strips, with one accent nail per hand. I thought maybe I'd overcured the first set; the directions said to use the lamp 2 to 3 times, so I did 3. I did 2 rounds of 60 seconds with these and they held up better. Whether that was because of the reduced curing leaving them a bit more flexible, or the lack of full length clear strips, or what, I'm not sure.
 
Hip Chic Semi-Cured Gel Nail Strips
 
Hip Chic Semi-Cured Gel Nail Strips
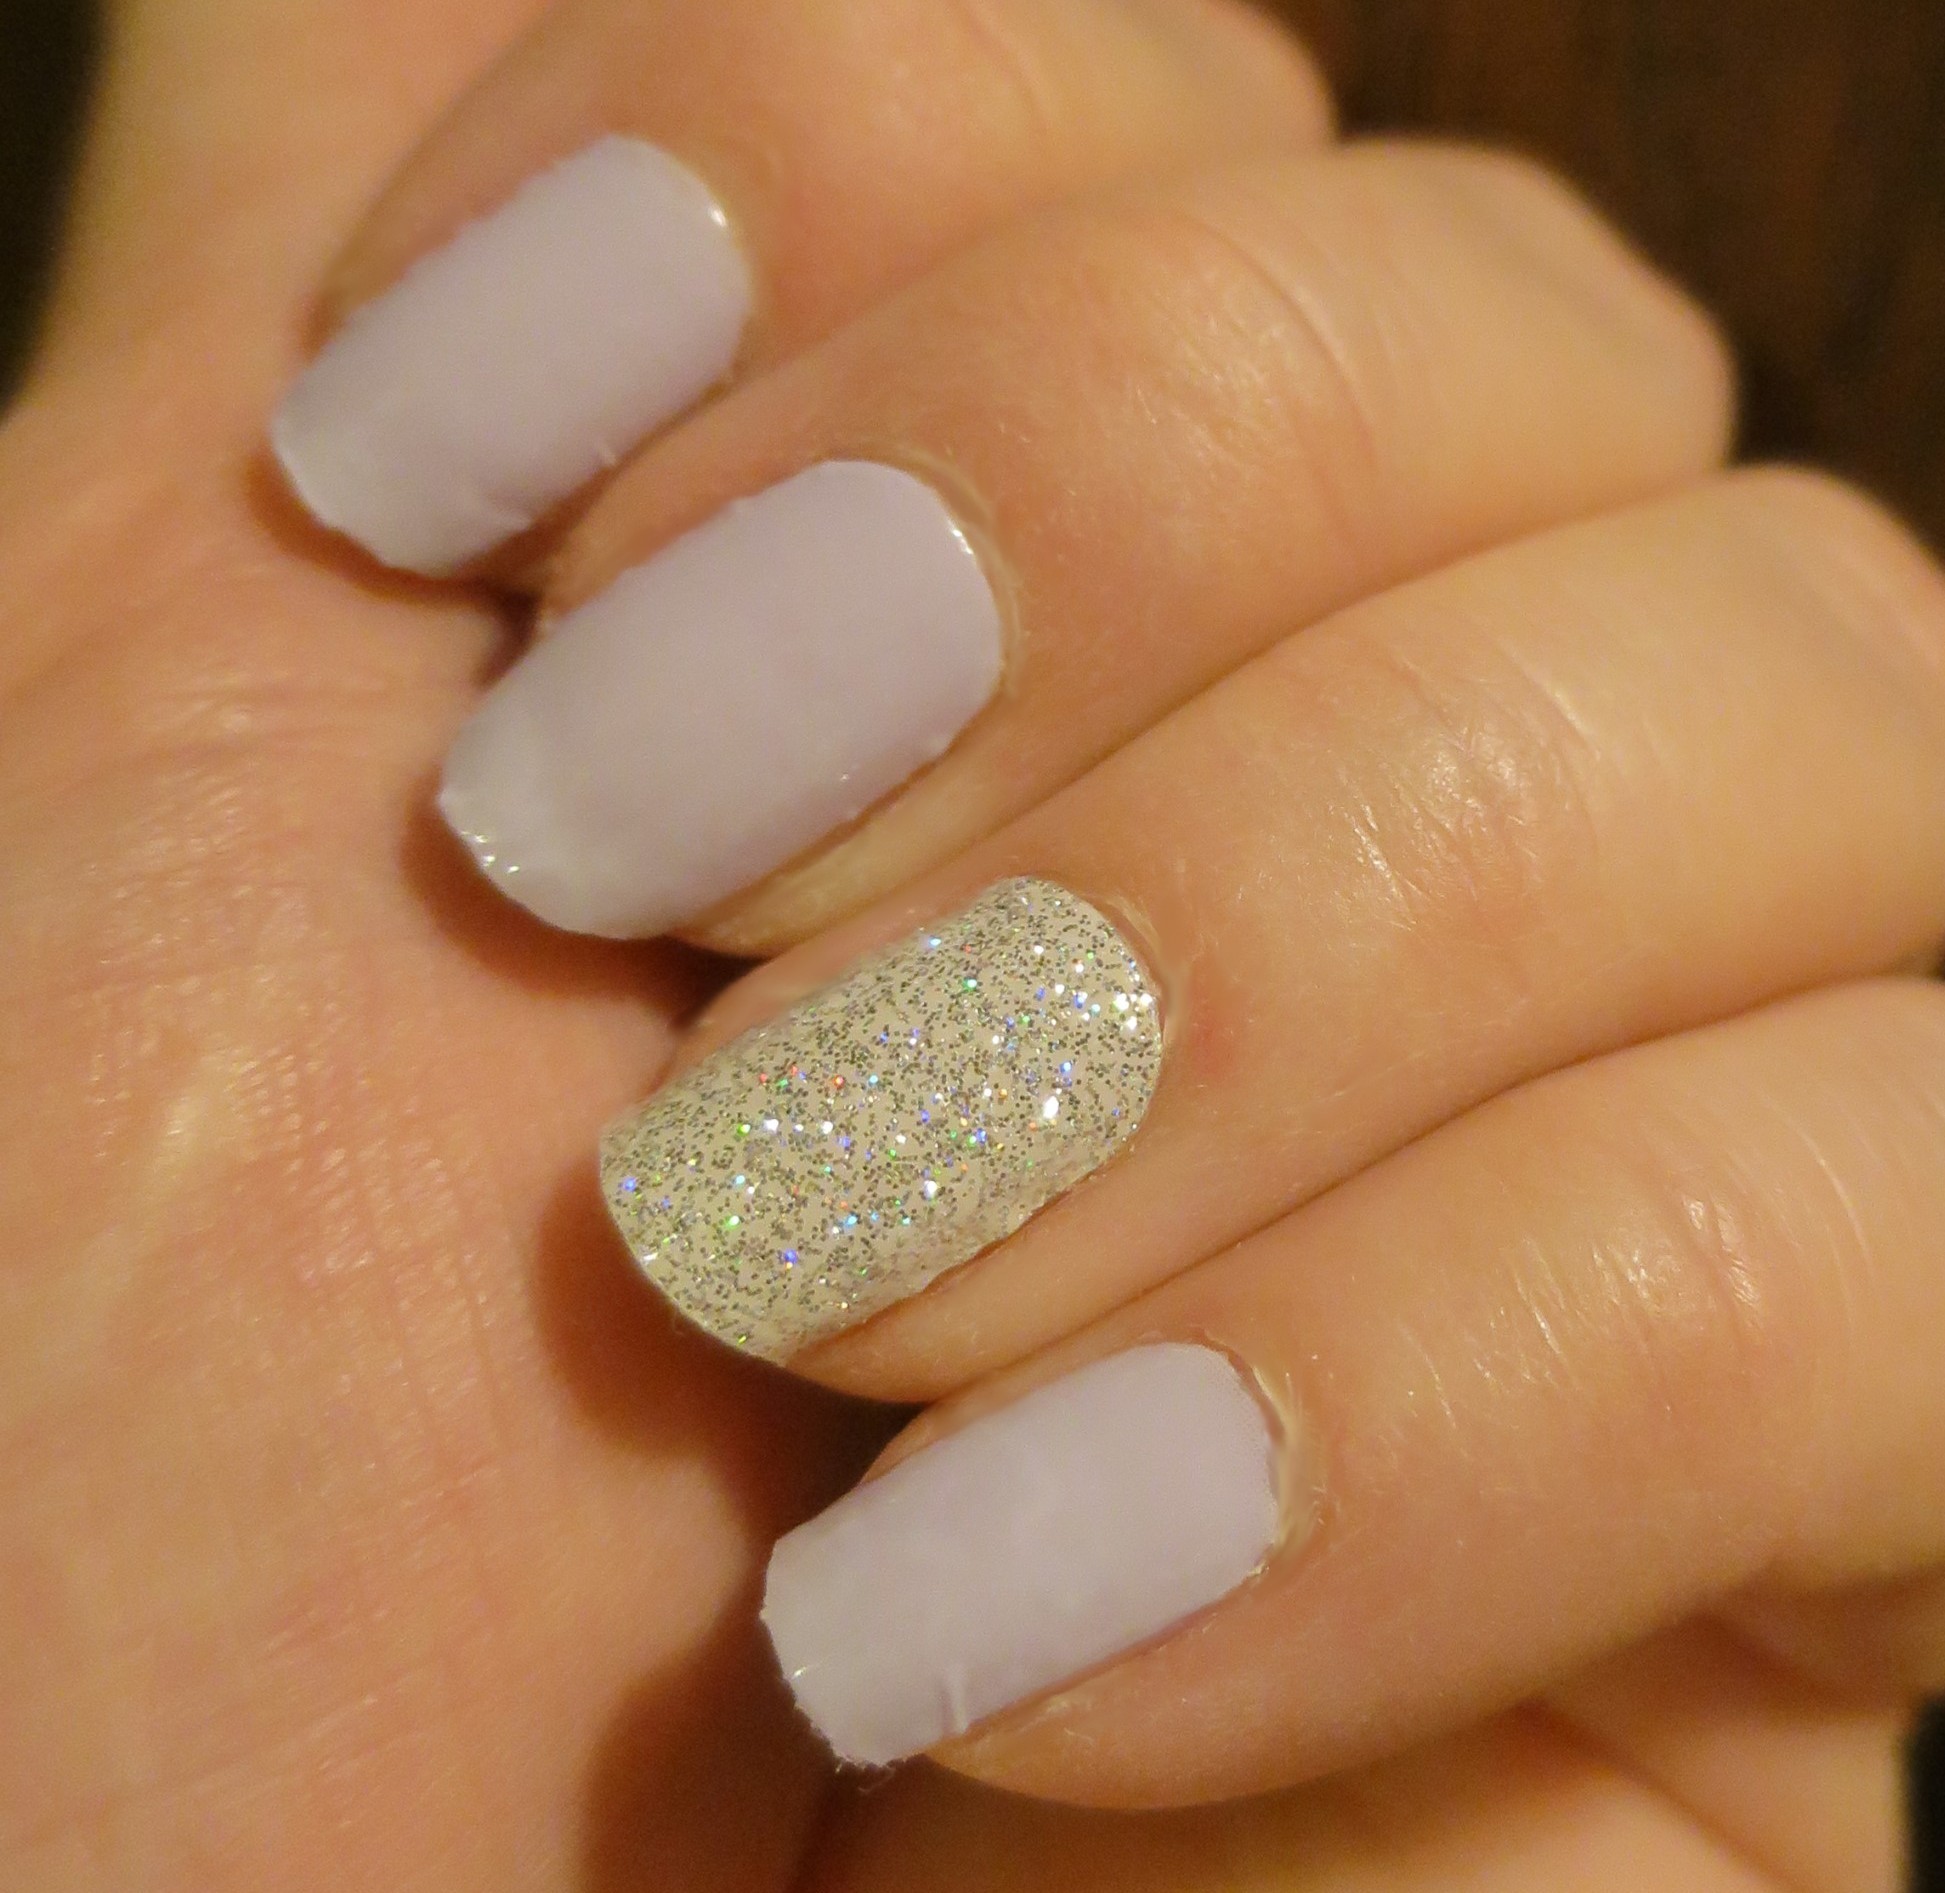
I used the strips from the starter kit most recently. These are called Be Born and are all solid warm beige. I did have issues with these starting to pop off after a few days. Maybe my natural nails are just too thin and flexible to make a good base for these.
 
Hip Chic Semi-Cured Gel Nail Strips
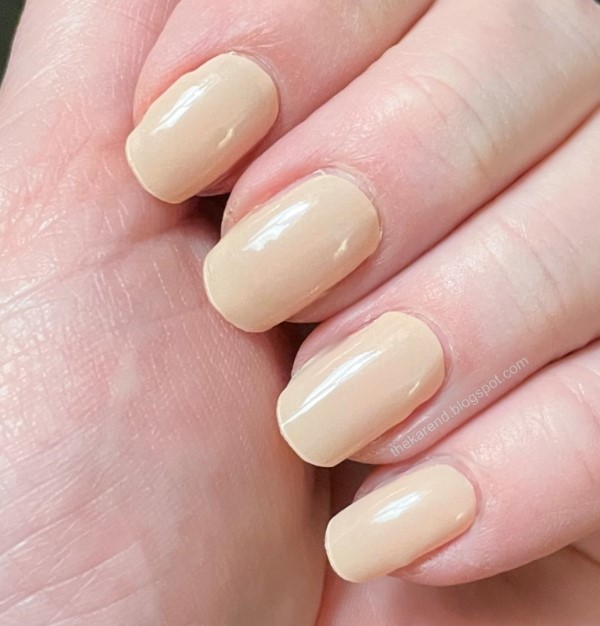
I did have issues with this last set starting to pop off after a few days. Maybe my natural nails are just too thin and flexible to make a good base for these, or maybe I was just too hard on them this time (I was at a craft conference where I was doing a fair bit of macrame). 
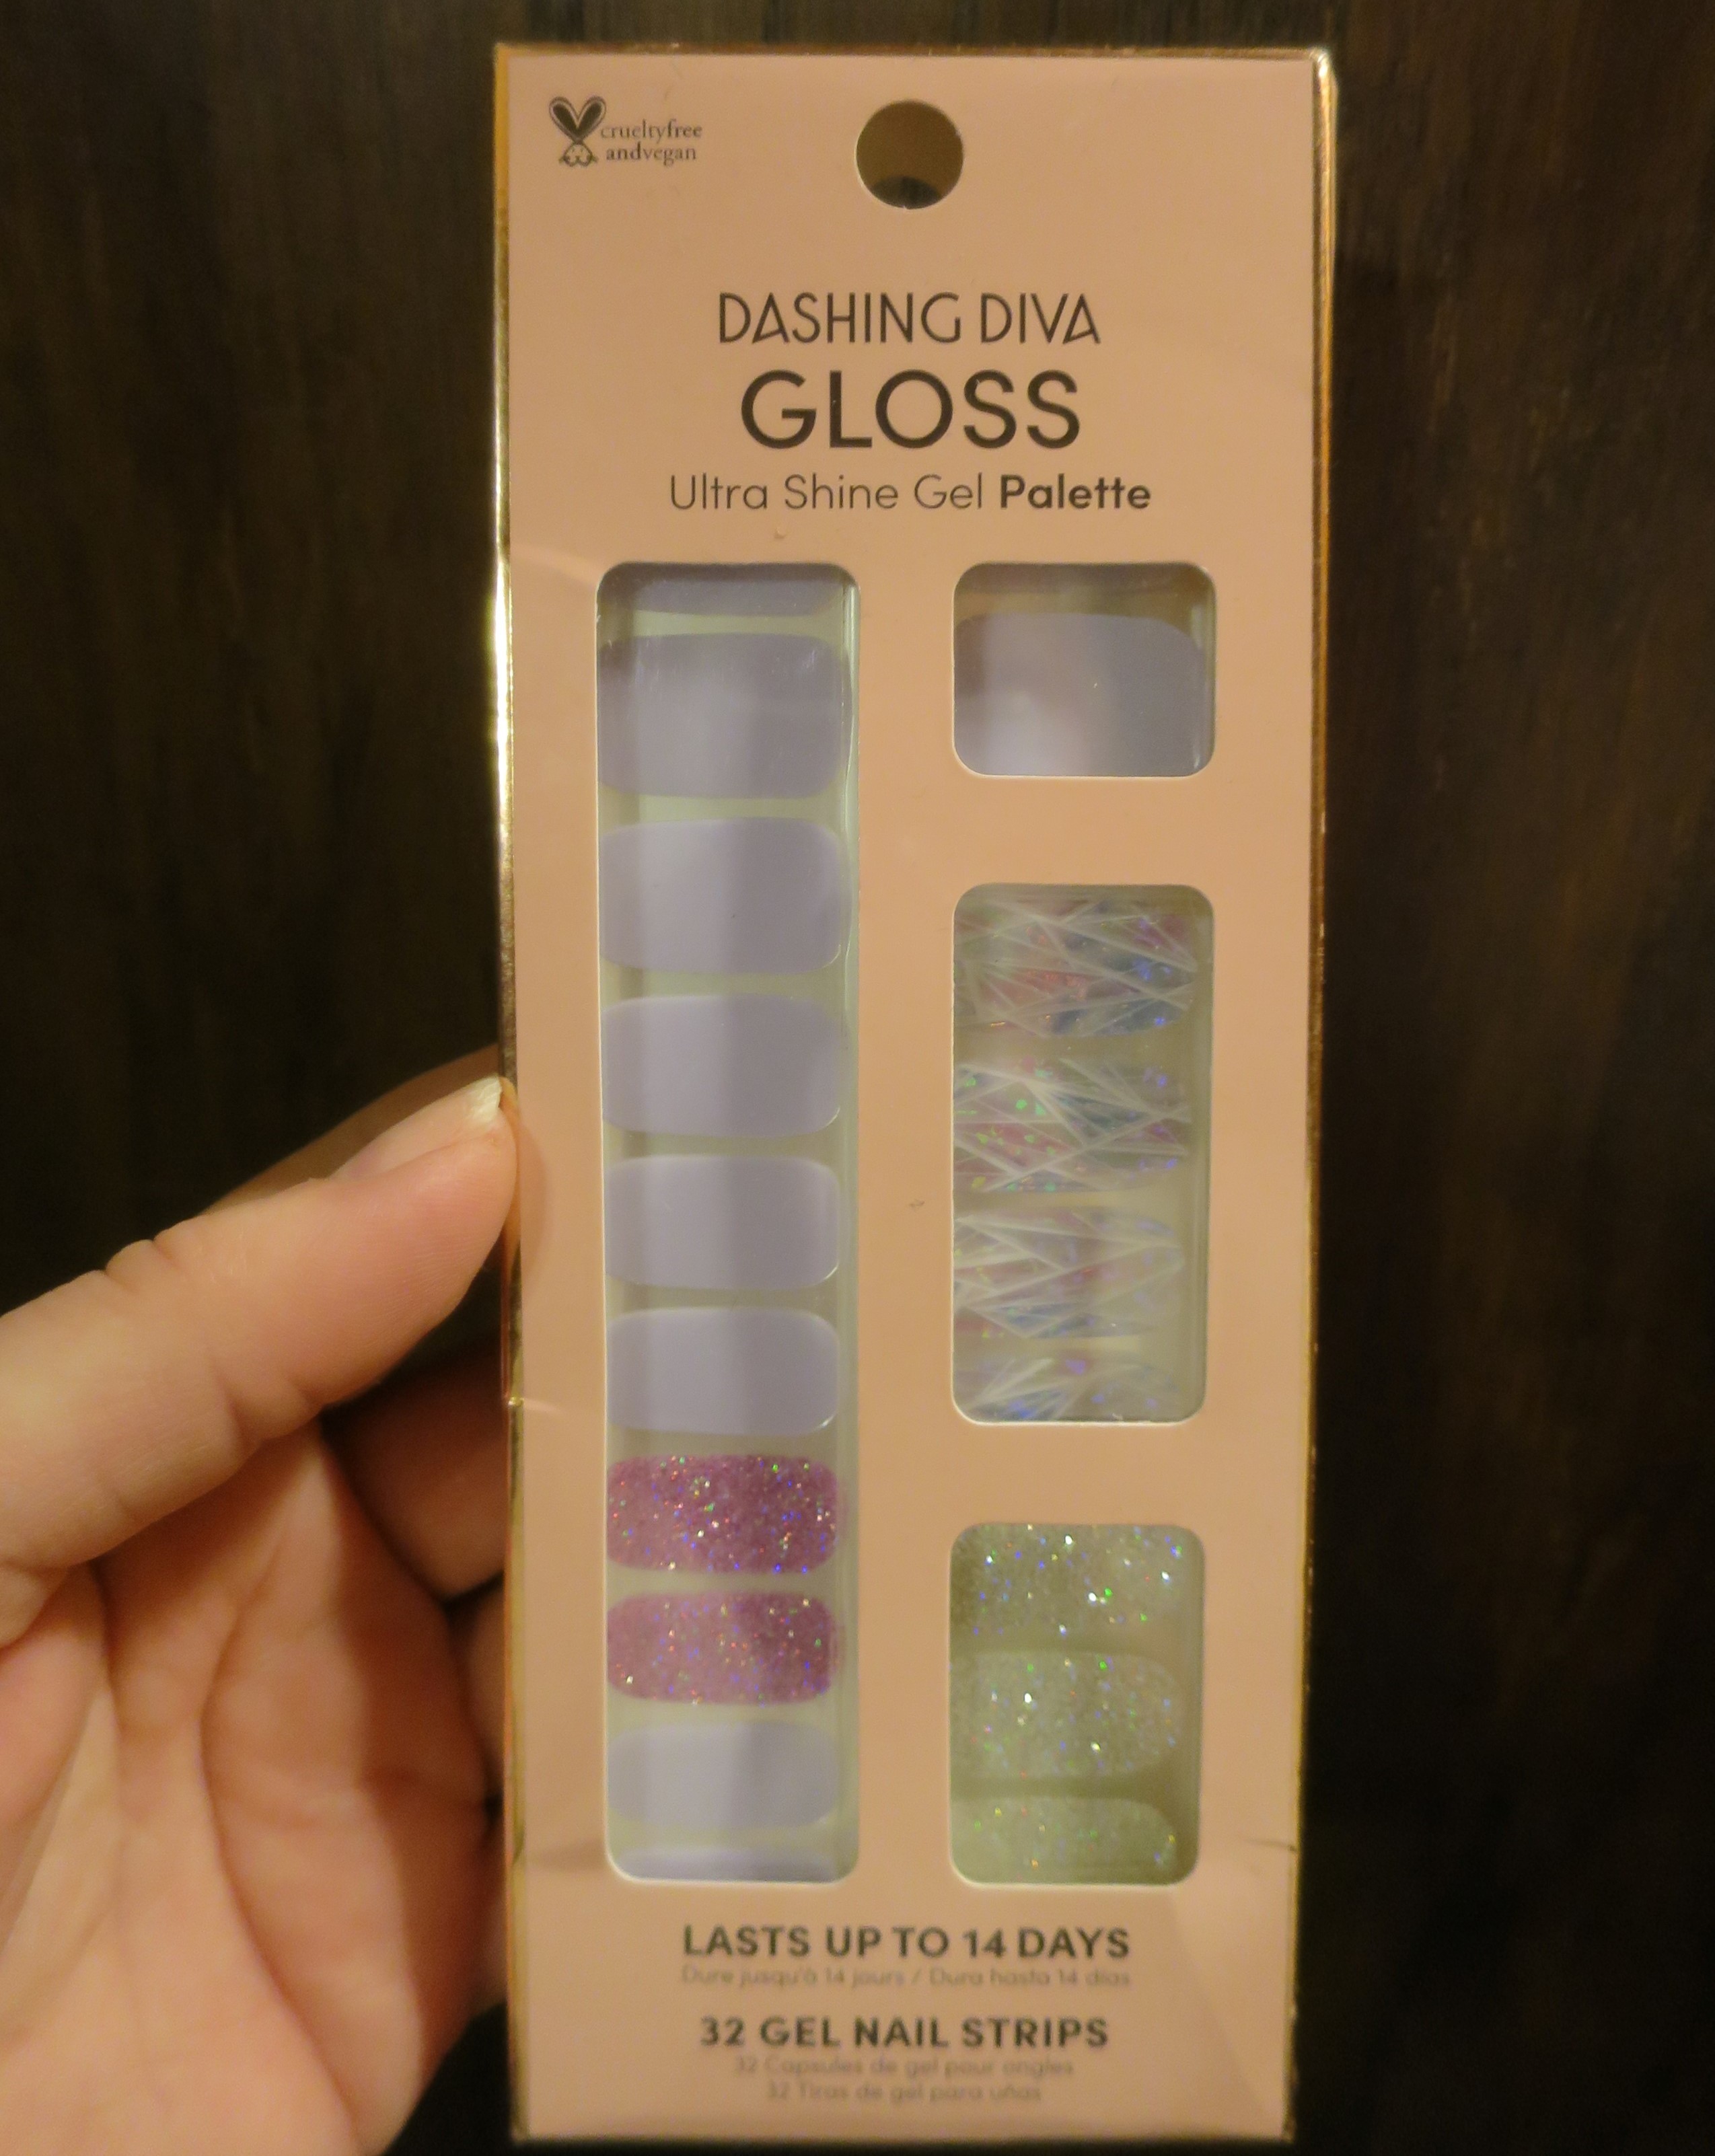
I'd never used this type of strip before. I like the concept; they're easy to apply and with the curing, should hold up better than strips that don't work that way. Similar to the Sally Hansen Salon Insta Gel Strips but without the hassle of a liquid gel topcoat. I do wonder if they're not good for my nails. I'm back to shorties now because when I took the last set of these strips off my natural nails were in rough shape and I had to file them down. I can't be sure that's the strips' fault, though, as I've battled weak nails and peelies what feels like forever. I'm thinking I may try removing them like gel polish next time—roughing up the surface to break the seal then doing the foil method—rather than popping them off and potentially taking the top layer of my nail surface off with the strips.

Friday, April 28, 2023

Sally Hansen Salon Effects Perfect Manicure Nails

Two posts in one week? Believe it! Of course I had to try the Sally Hansen fake nails. The brand I have the longest relationship with comes out with a type of product I've been all over in recent years? A few sets were in my shopping cart so fast. I tried an oval set first, in the solid "creme" color Beet Pray Love.
 
Sally Hansen Perfect Manicure fake nails
These come with both glue and adhesive tabs. I used the tabs. The fit was good for me. The base curve and the c-curve of these matched my natural nails fairly well, and the length was long enough to cover my natural nails in the length I like to keep them without being so long that I felt the need to clip and file them.
 
Sally Hansen Perfect Manicure fake nails
That first set held up nicely, and I didn't have any more pop-offs than with any other brand, so I tried another oval set next: Ombre-lievable, which is a gradient French mani look. Again, I used the adhesive tabs.
 
Sally Hansen Perfect Manicure fake nails
These did not hold up well. Three days after I'd put them on, the white on the tips was wearing off and looked bad. I took them off days before I'd planned to.
 
Sally Hansen Perfect Manicure fake nails
More recently, I tried a square set, What a Star, which has dusty rose stars scattered on a pale pinky peach base color.
 
Sally Hansen Perfect Manicure fake nails
These did not fit my nails nearly as well as the ovals. The length was too short in most cases (and my nails are not long right now), leaving a gap at the base (yes, I could have filed my natural nails down, but I didn't want to lose that length. The base was too square and wide to fit the curve at my base. These are very square indeed.
 
Sally Hansen Perfect Manicure fake nails
I haven't tried the coffin or almond shapes yet, but plan to when I come across them again. I won't do the squares again; those just aren't a good fit for me.

Monday, April 3, 2023

Dashing Diva Gloss Gel Nail Strips Update

After I posted about my NOTD on Friday, I remembered I'd taken a photo of my nails in the sun that I'd forgotten to include. So I was going to just edit the post and add it, but got distracted (no surprise there). Then on Saturday, I had something unexpected happen to the strips so here I am with a two-photo update. First, the strips in the sun on a recent still wintery but not so cold I needed full gloves day. I liked the sparkle and glow a lot.
 
Dashing Diva Gloss Gel Nail Strips in Gleam Queen
Then Saturday I was a party at some friends' place. Helping to clean up, I used a disinfecting wipe from a container they had. Didn't think anything of it until I noticed the tips of my strips had turned dark. Guess the chemicals in the wipes weren't compatible with the chemicals in the strips. Good to know.
 
Dashing Diva Gloss Gel Nail Strips in Gleam Queen
Given how ratty they were looking, I removed the strips yesterday. As per the instructions, I used a bit of oil on my nails and then peeled them off. They all came off cleanly in one piece each and my nails didn't seem to have suffered any damage. I will probably use the Dashing Diva strips again, though I will probably try putting down a ridge filling base coat first. I can buy the strips at Fred Meyer, so that's convenient, though they just had a few designs the last time I was there. Maybe supply chain issues from the pandemic still.

Friday, March 31, 2023

Dashing Diva Gloss Gel Nail Strips

Well hello. I had a good break from nail blogging. I've still been paying attention to a couple of polish groups on Facebook and looking for displays when I have the opportunity. Last month, I saw a mainstream collection that inspired me to not just photograph it, but buy all the colors and I've used two of them already (on my toes, so won't be sharing those here because that's a whole thing). I hope to at least get a display post with those in it up next week. Now, though, Ij ust couldn't let all of March go by without posting something, so here I am with the first nail look I've done in ages that didn't involve press on fake nails (not that there's anything wrong with fake nails).

Late last week I found a set of Dashing Diva Gloss Gel Nail Strips when I was looking for a new set of fake nails to put on (yes, the organization of my nail stuff is an ongoing issue). I'd had a few too many nails pop off from set I was wearing so thought why not try the strips. Those aren't going to end up on the floor of someone else's house the way my fake nails had the other week (twice at the same party, even). I put them on late at night at home, so please forgive the wonky lighting in these next several pics. This set is called Gleam Queen and has mostly lilac creme strips, with three different accent options: purpley pink microglitter, silver microglitter, and lilac and pink "stained glass" with white leading.
 
Dashing Diva Gloss Gel Nail Strips in Gleam Queen
The directions for applying these are similar to my beloved and long discontinued Sally Hansen Salon Effects nail polish strips: prep the nail, choose a size, smooth from base to tip when applying, file off excess. Removal is different: these can be peeled off rather than needing nail polish remover.
 
Dashing Diva Gloss Gel Nail Strips in Gleam Queen
I did lilac on most of my nails, with silver glitter as an accent on my ring finger. In comparison to the nail polish strips, these are thicker, feeling sort of rubbery. That's good in that it makes them easier to handle: they don't tear or flop over onto themselves the way the very thin polish strips can. That's bad in that it's harder to smooth them out at the edges (my pronouced C-curve makes that harder) and harder to remove the excess at the tip (forget about the sides ... you can't cut these with the sharp end of manicure stick like you can regular polish strips). You can see some little wrinkles on a couple of my nails and some fuzziness at the ends where I had trouble filing them smoooth. The set does come with a fairly good sized one-sided file to use, but I still had trouble. The glitter strips were thicker than the plain ones, which meant they looked better since they didn't form those wrinkles at the sides and camoflauged irregularities in my nails better than the plain strips.
 
Dashing Diva Gloss Gel Nail Strips in Gleam Queen
In the light of day the next morning, I wasn't super happy with how the plain strips looked, what with the wrinkles and the showing of every ridge underneath. The ridges aren't so obvious in this photo as they were to the naked eye. I also noticed some "fuzzies" stuck on the ends of some nails, likely clinging to the adhesive on the bits of strips I'd struggled to file off the night before.
 
Dashing Diva Gloss Gel Nail Strips in Gleam Queen
Since I liked the glitter nail, I decided to just put accent strips over the plain strips. Much better.
 
Dashing Diva Gloss Gel Nail Strips in Gleam Queen
There weren't any thumb-sized accent strips, so I just laid one of the stained glass ones down the center, hoping that would distract from the wrinkles at the sides. It looked pretty good, I thought.
 
Dashing Diva Gloss Gel Nail Strips in Gleam Queen
I've now had them on for six days. There's been some slight lifting of the strips at the tips and corners of a few of my nails, perhaps because of the double thickness. The stained glass ones on my middle fingers are showing the most raggedy-ness, probably because I tend to bump those fingers into things more since they're longest.
 
Dashing Diva Gloss Gel Nail Strips in Gleam Queen
I'd use these again, just stick to glitter sets rather than plain ones, or do a ridge filling base coat first, though I don't know how that would affect their sticking power.