Showing posts with label c: multi. Show all posts

Tuesday, June 27, 2023

Sally Hansen Salon Effects Perfect Manicure Nails, Part 2

I shared a while back about my experiences with the oval and square shapes of the Sally Hansen Perfect Manicure fake nail. Today I have a set of the almond shaped ones called Sweet as Candy, which has nails in five pastel creme shades: lavender, peach, yellow, blue, and pink.
 
Sally Hansen Salon Effects Perfect Manicure Nails in Sweet as Candy
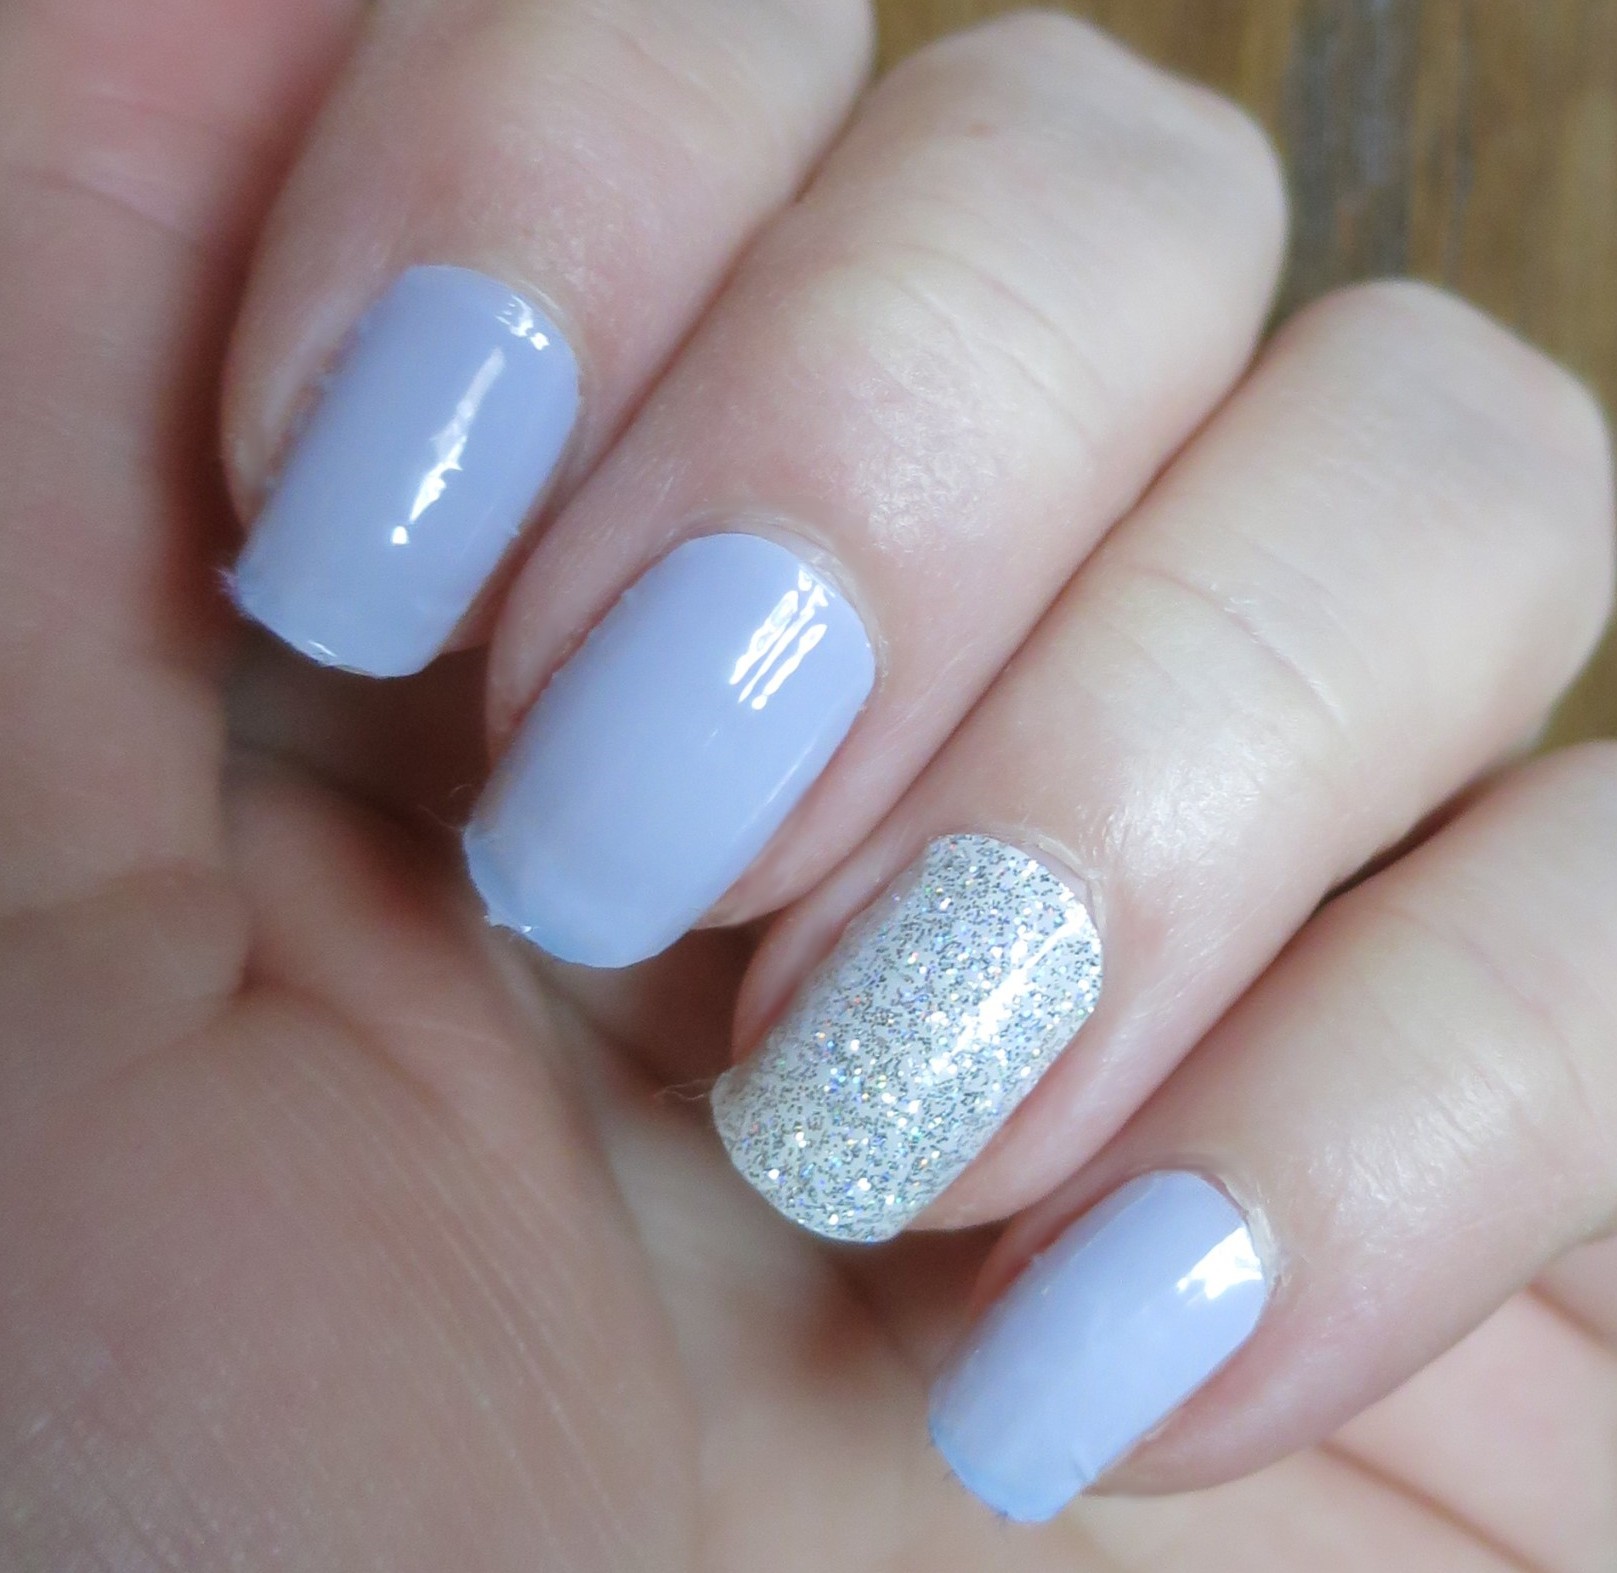
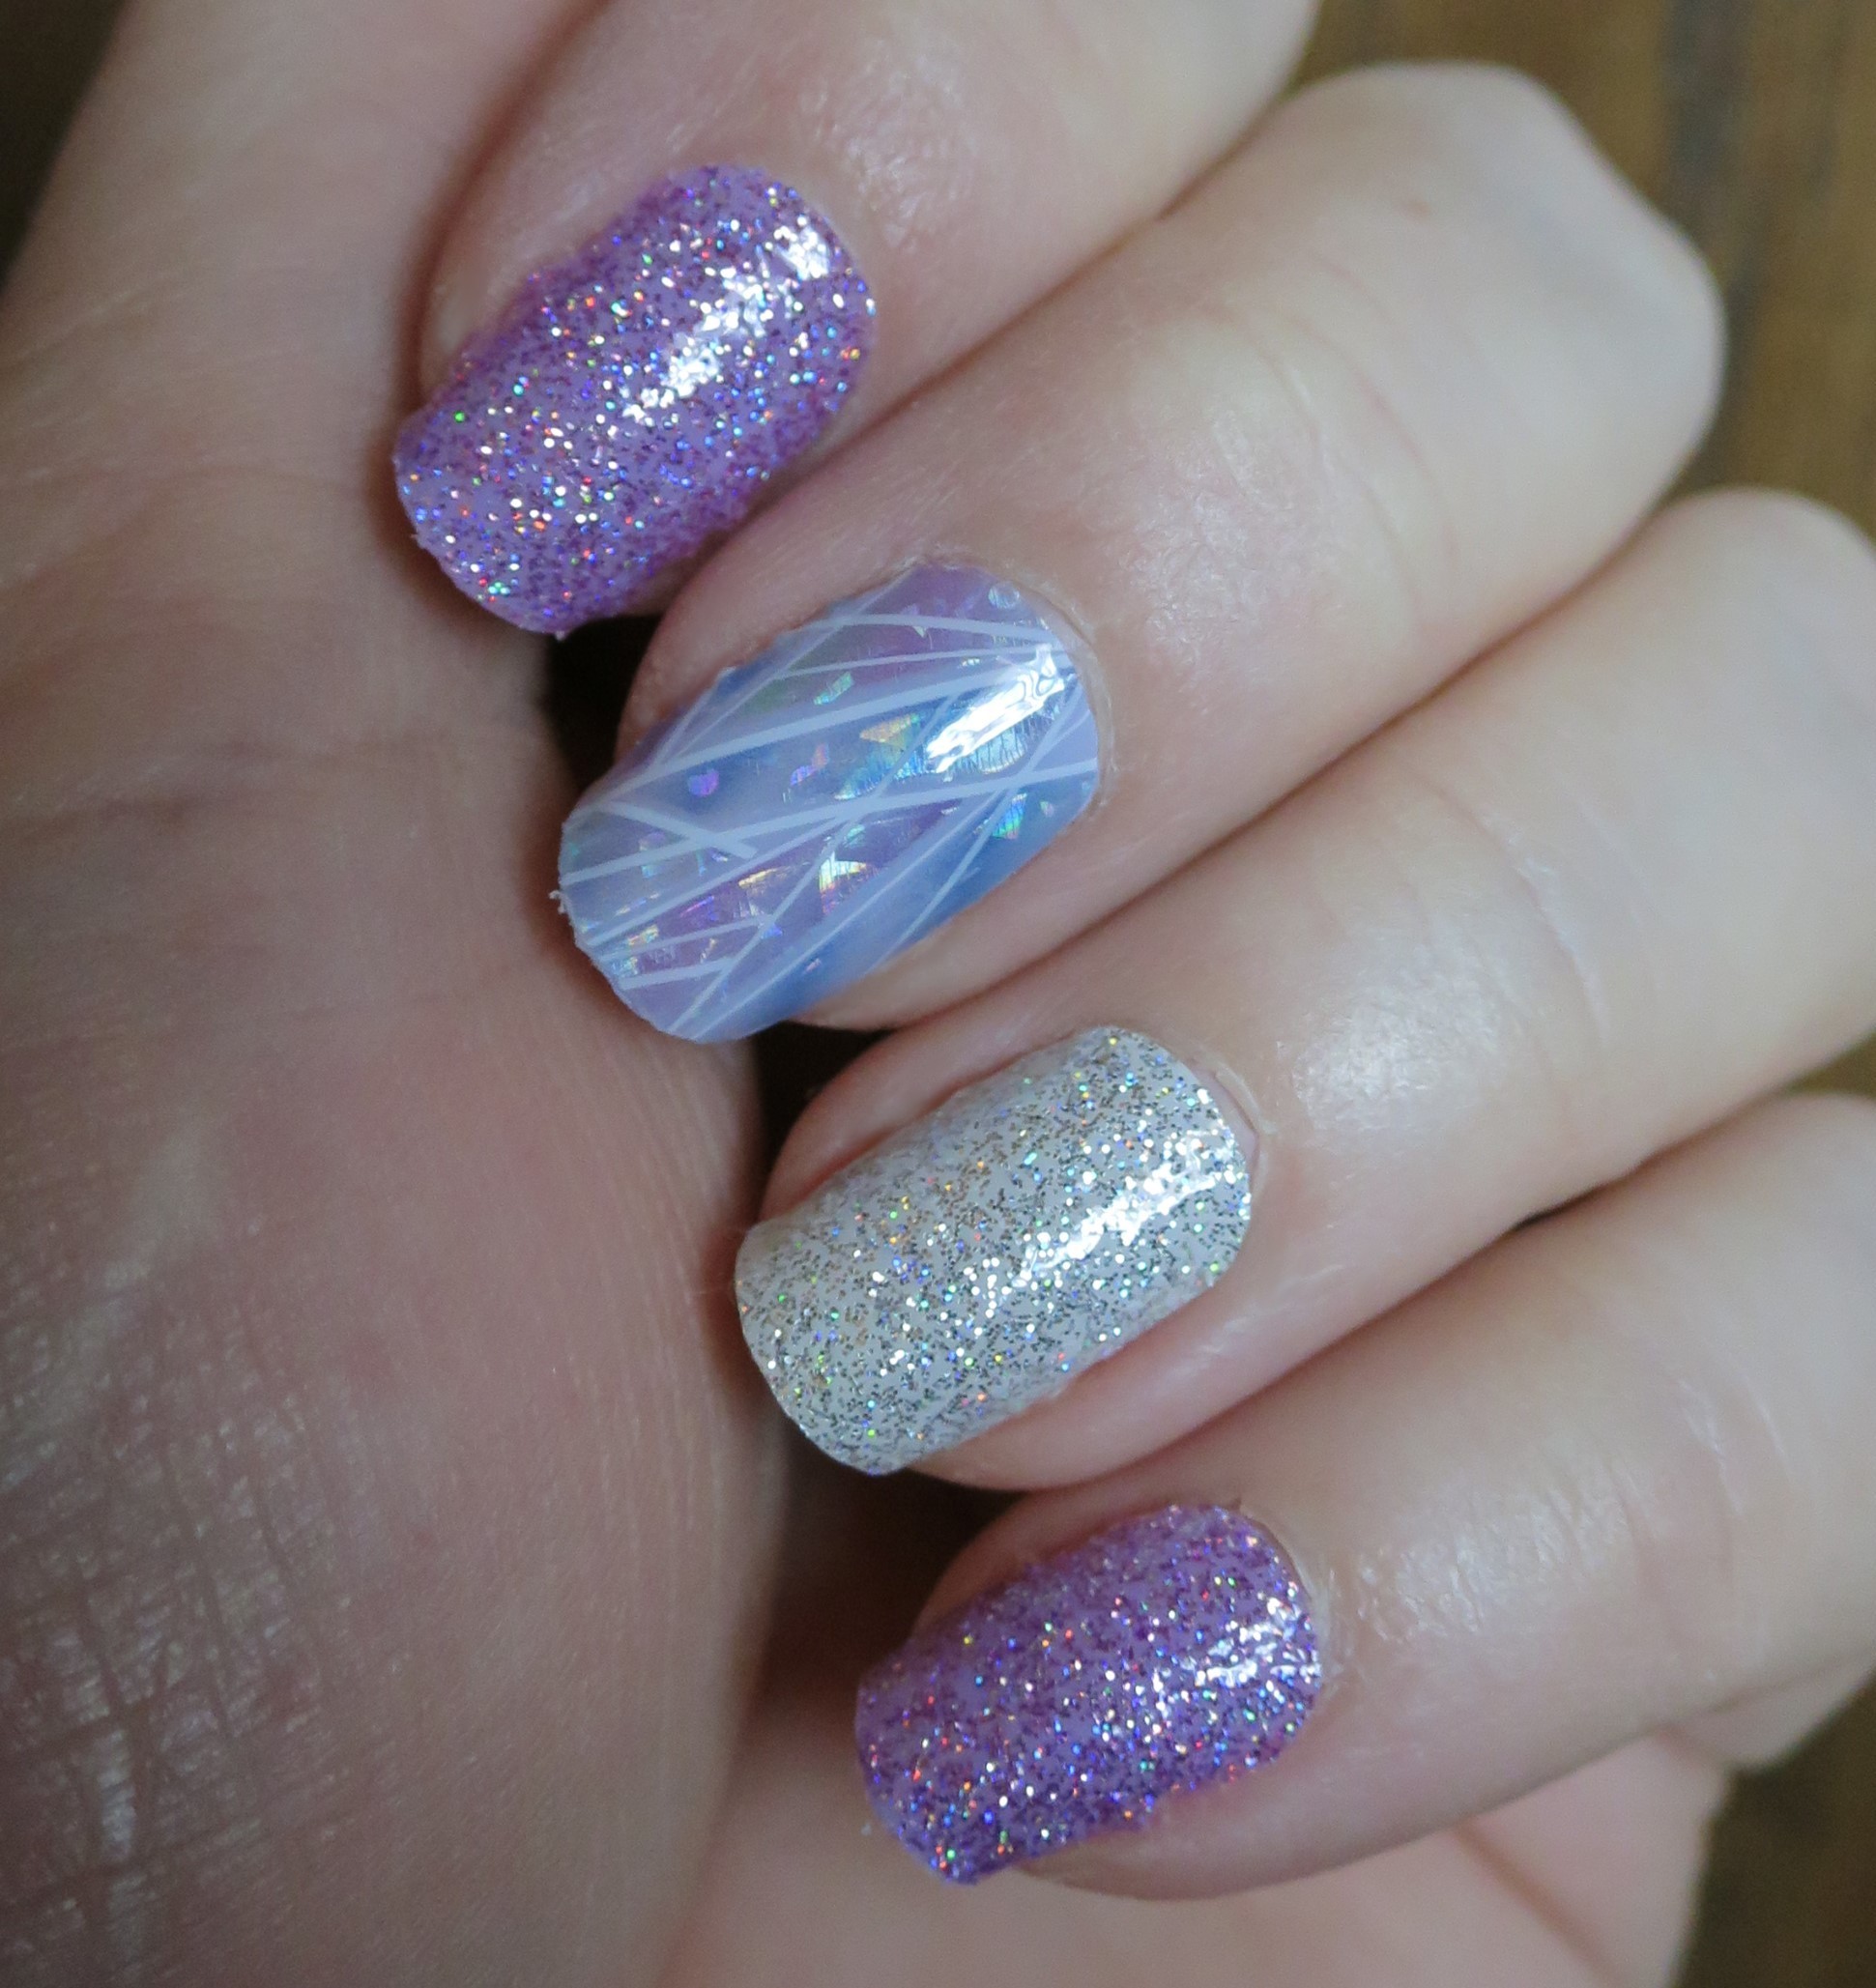
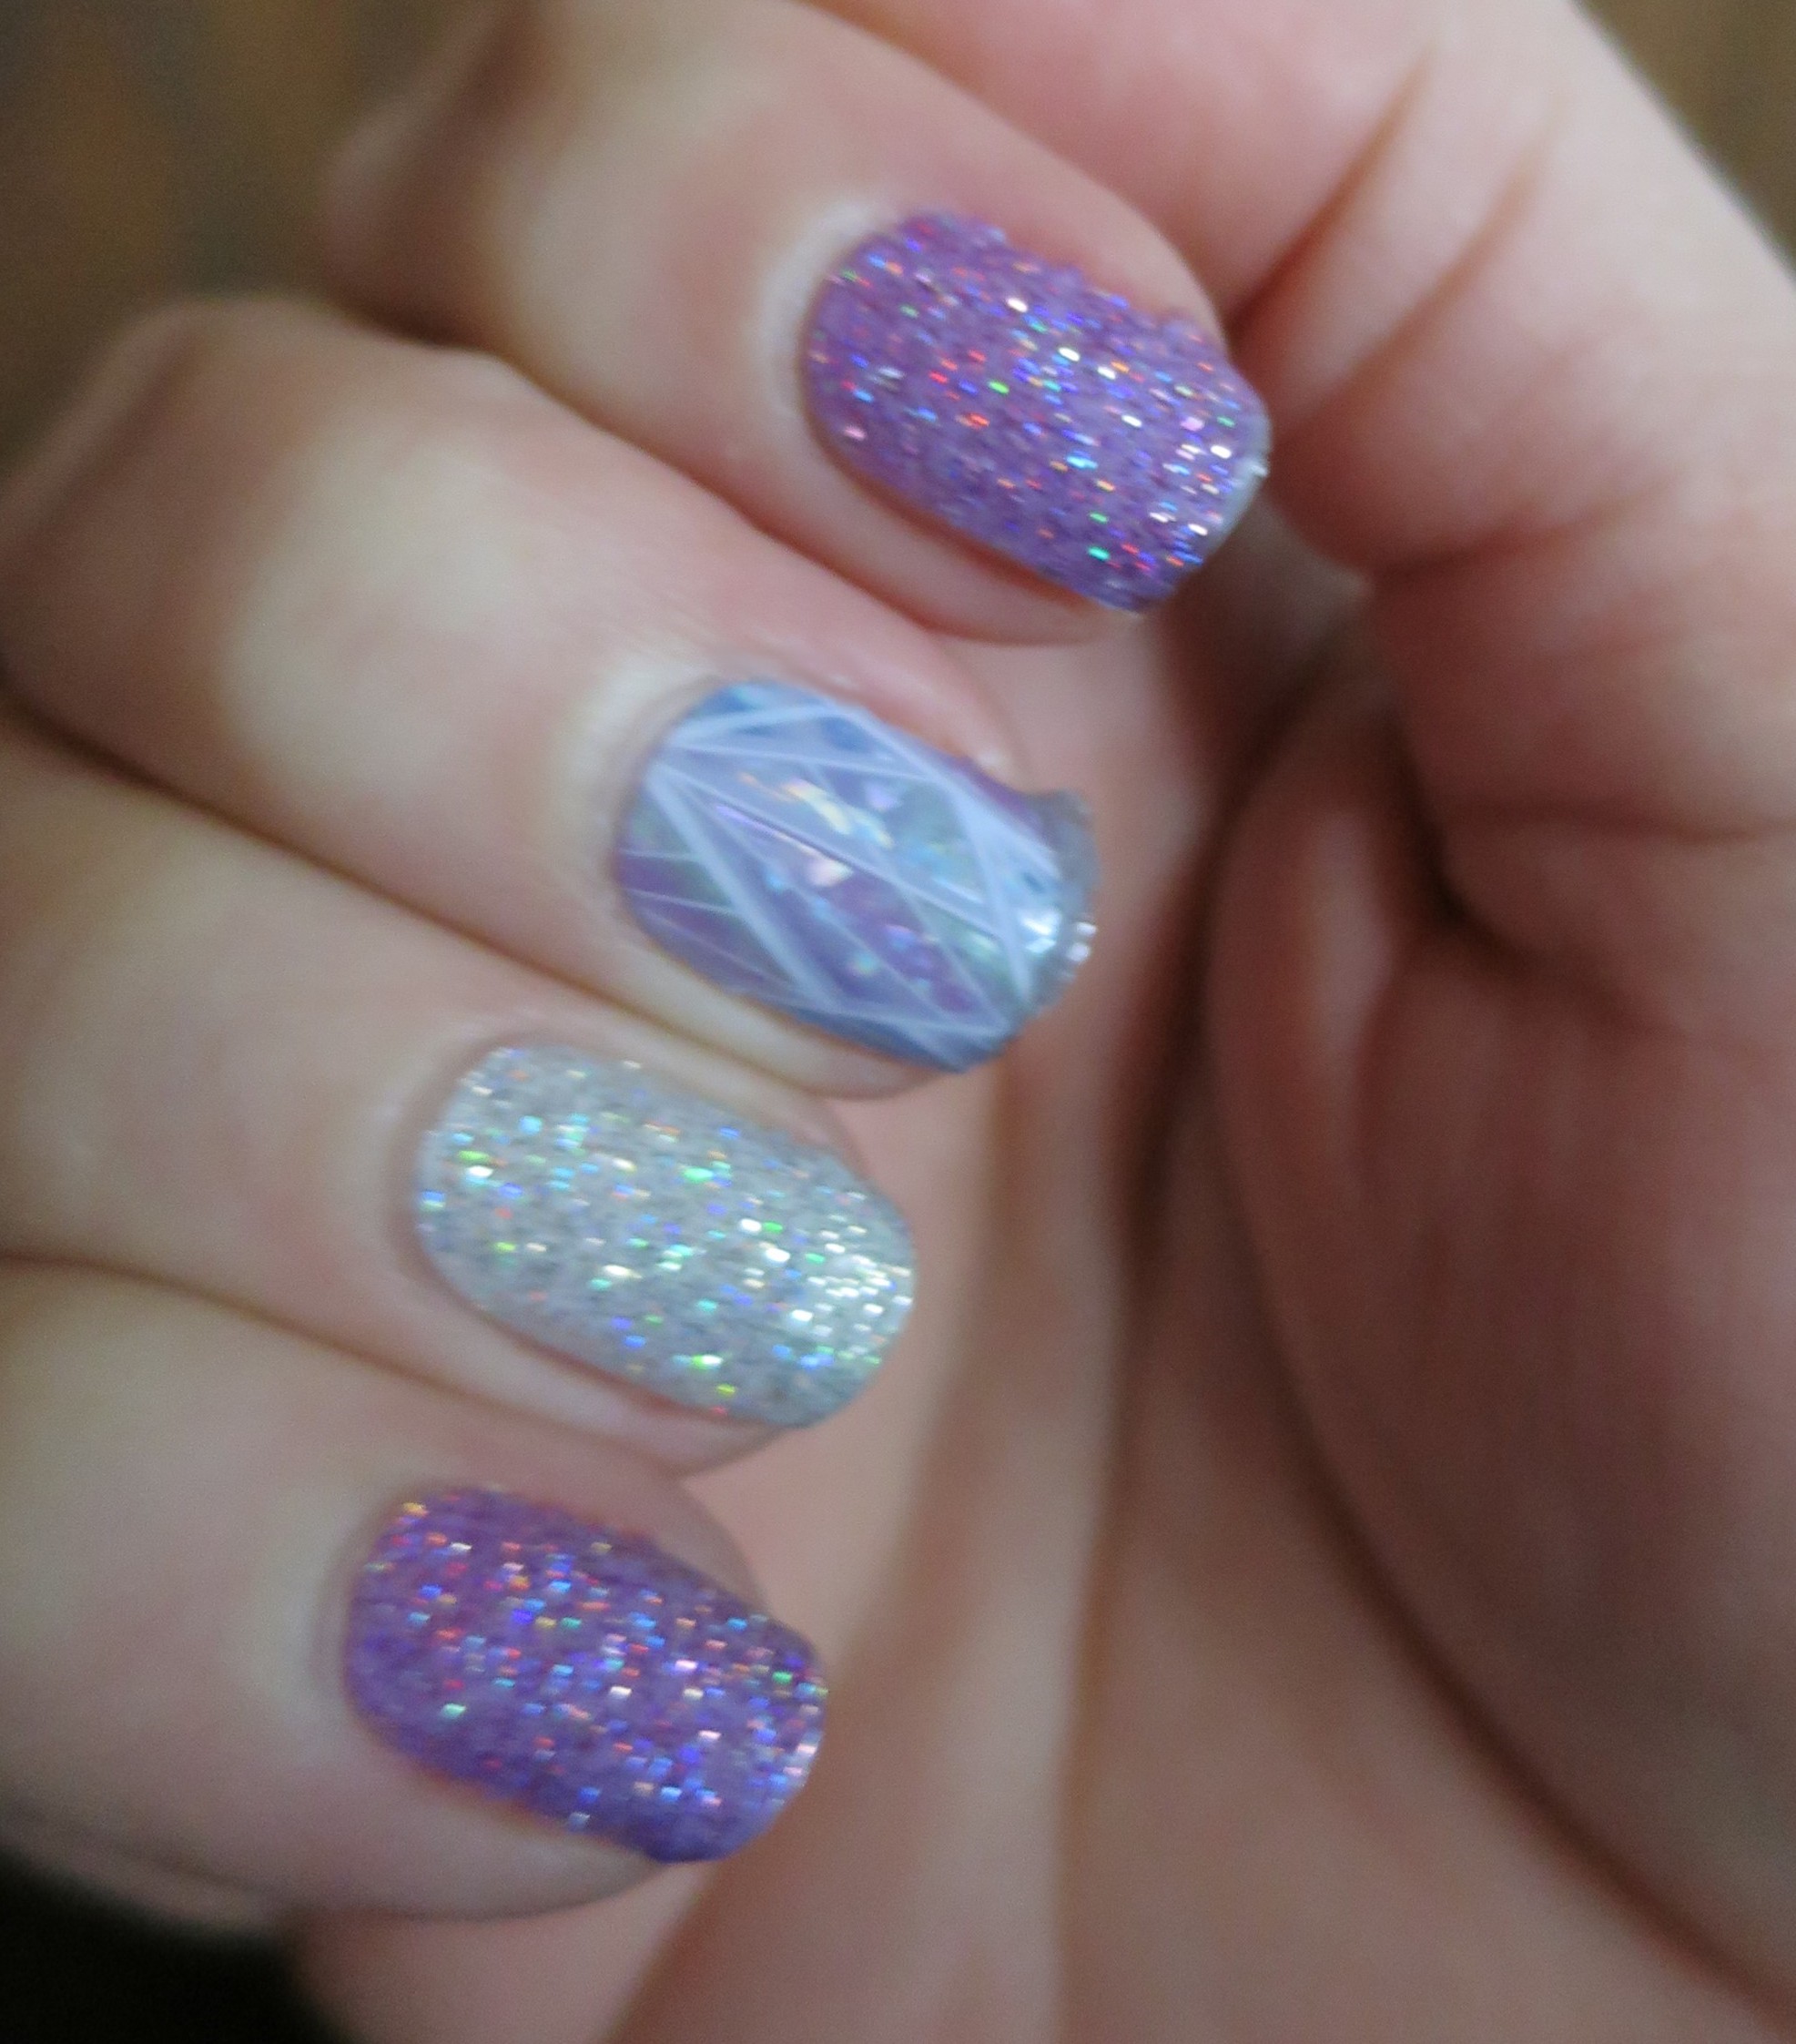
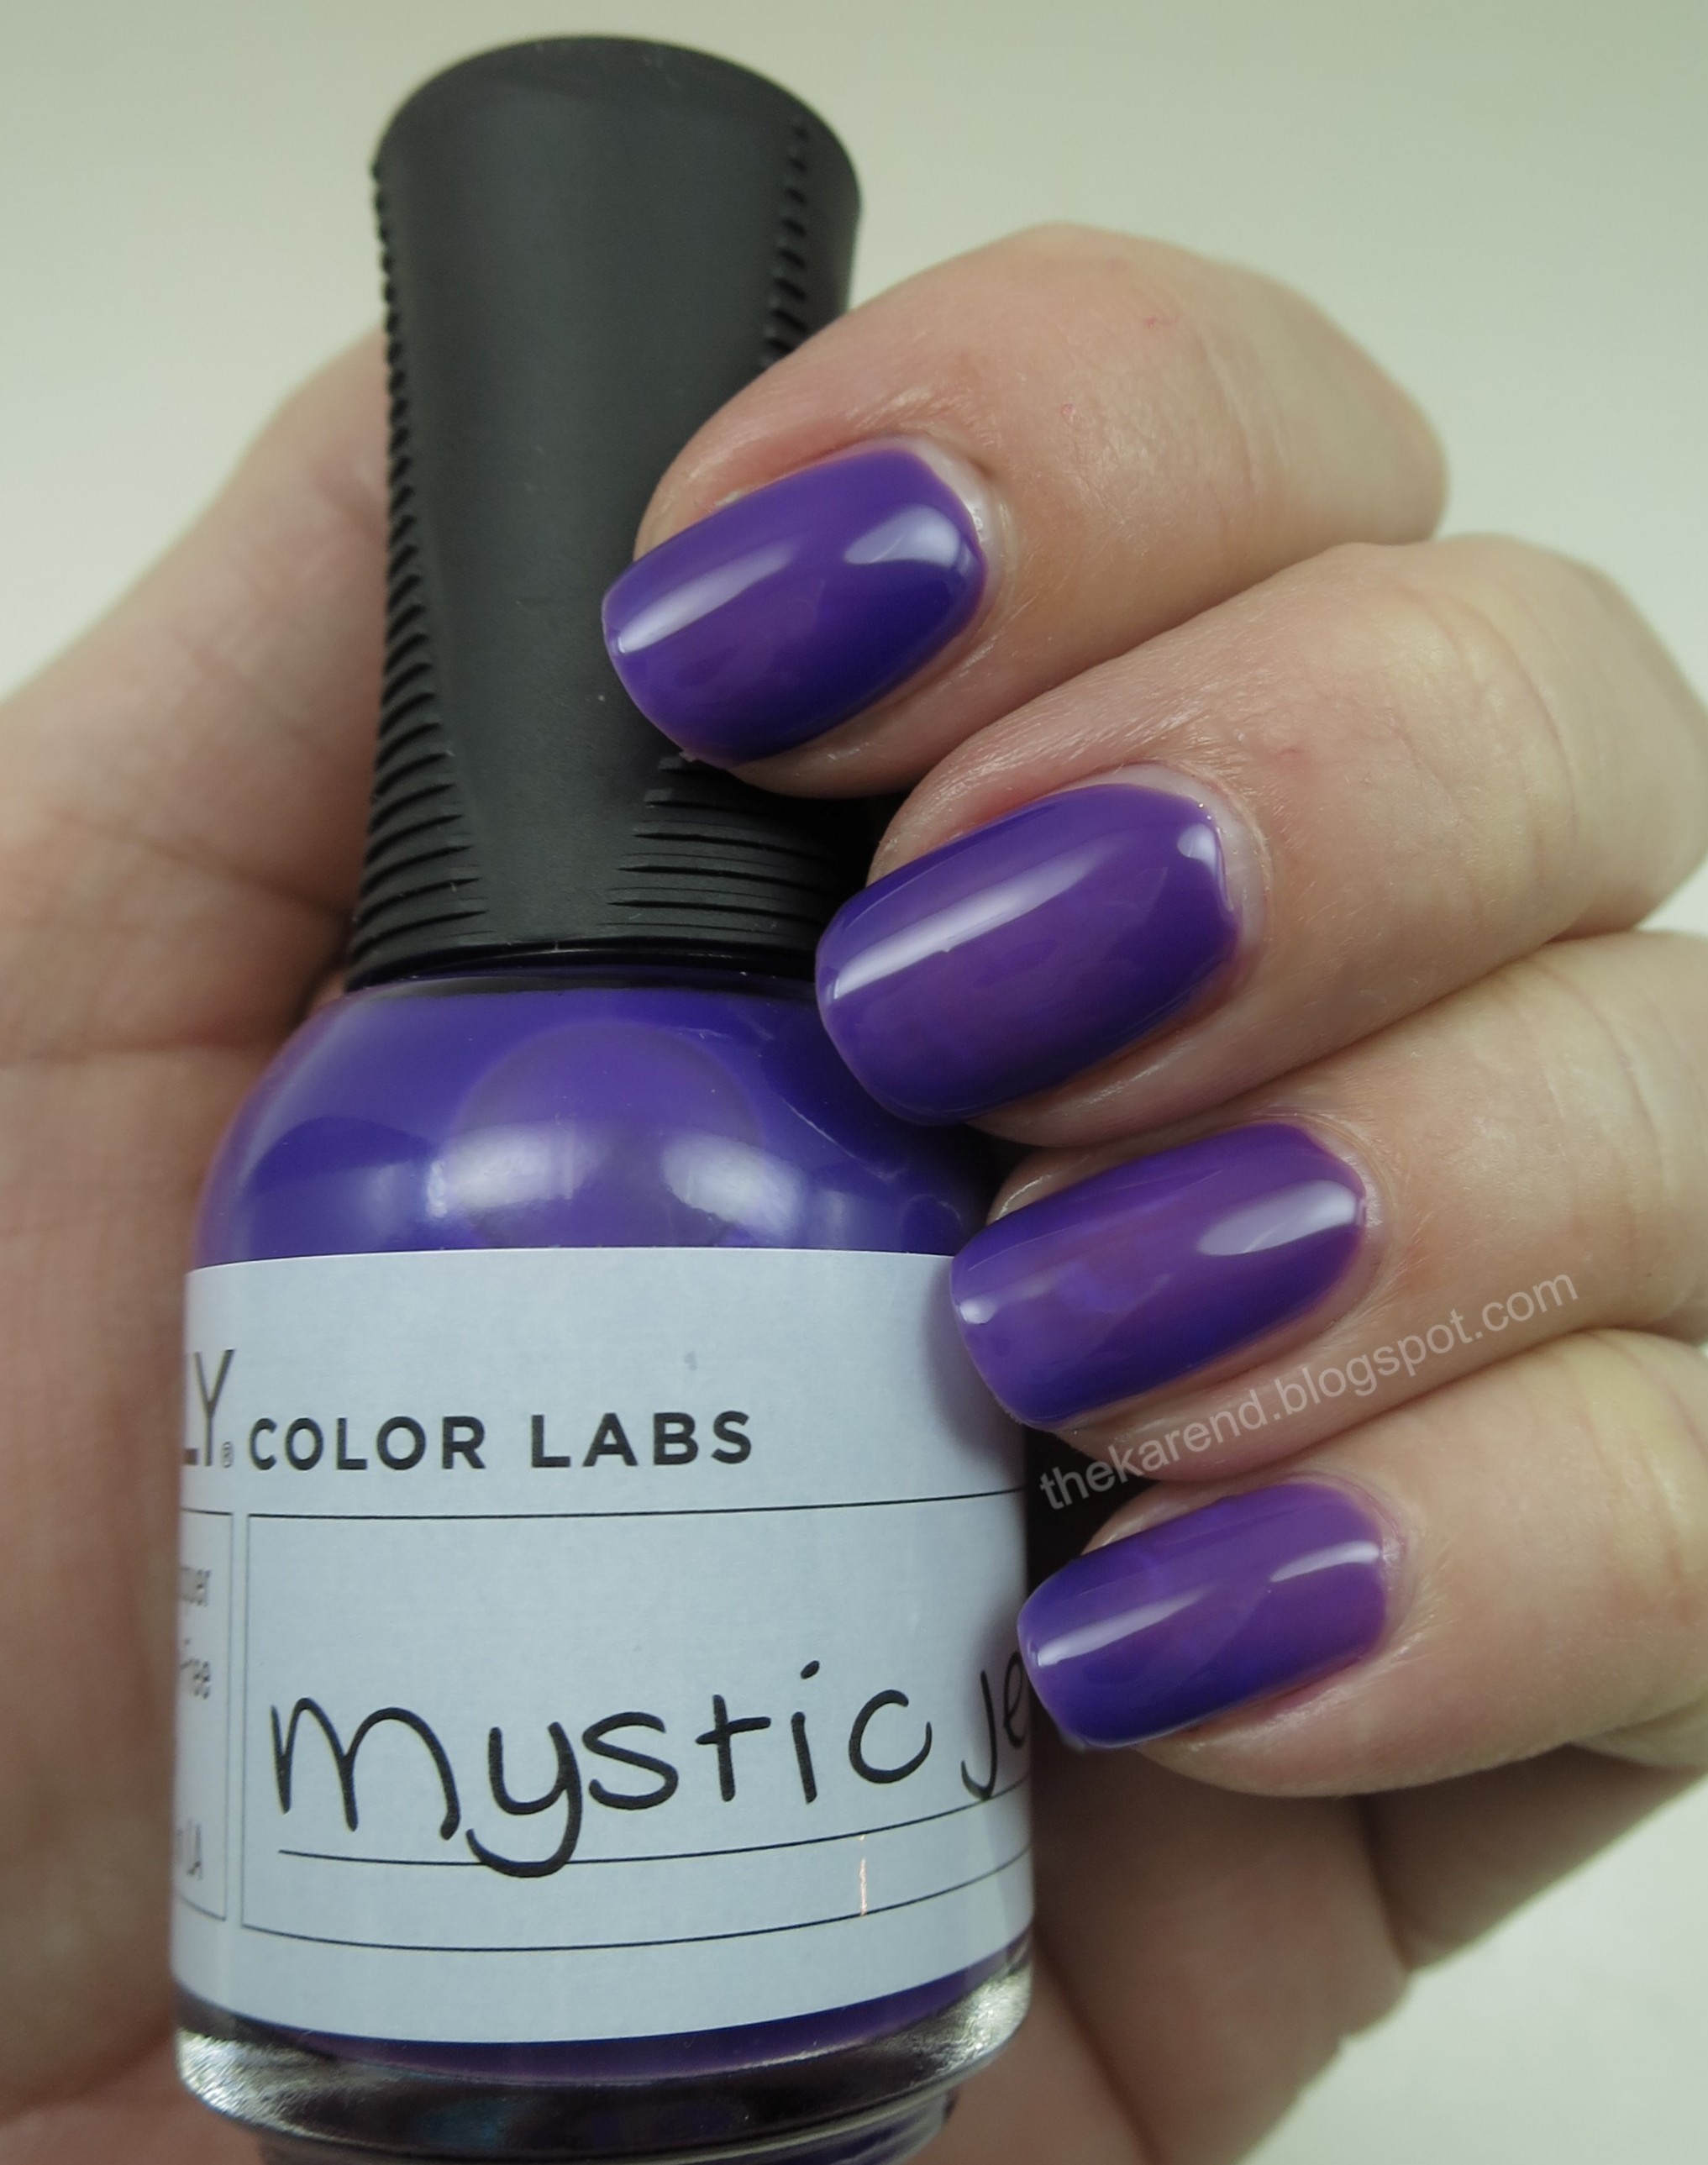
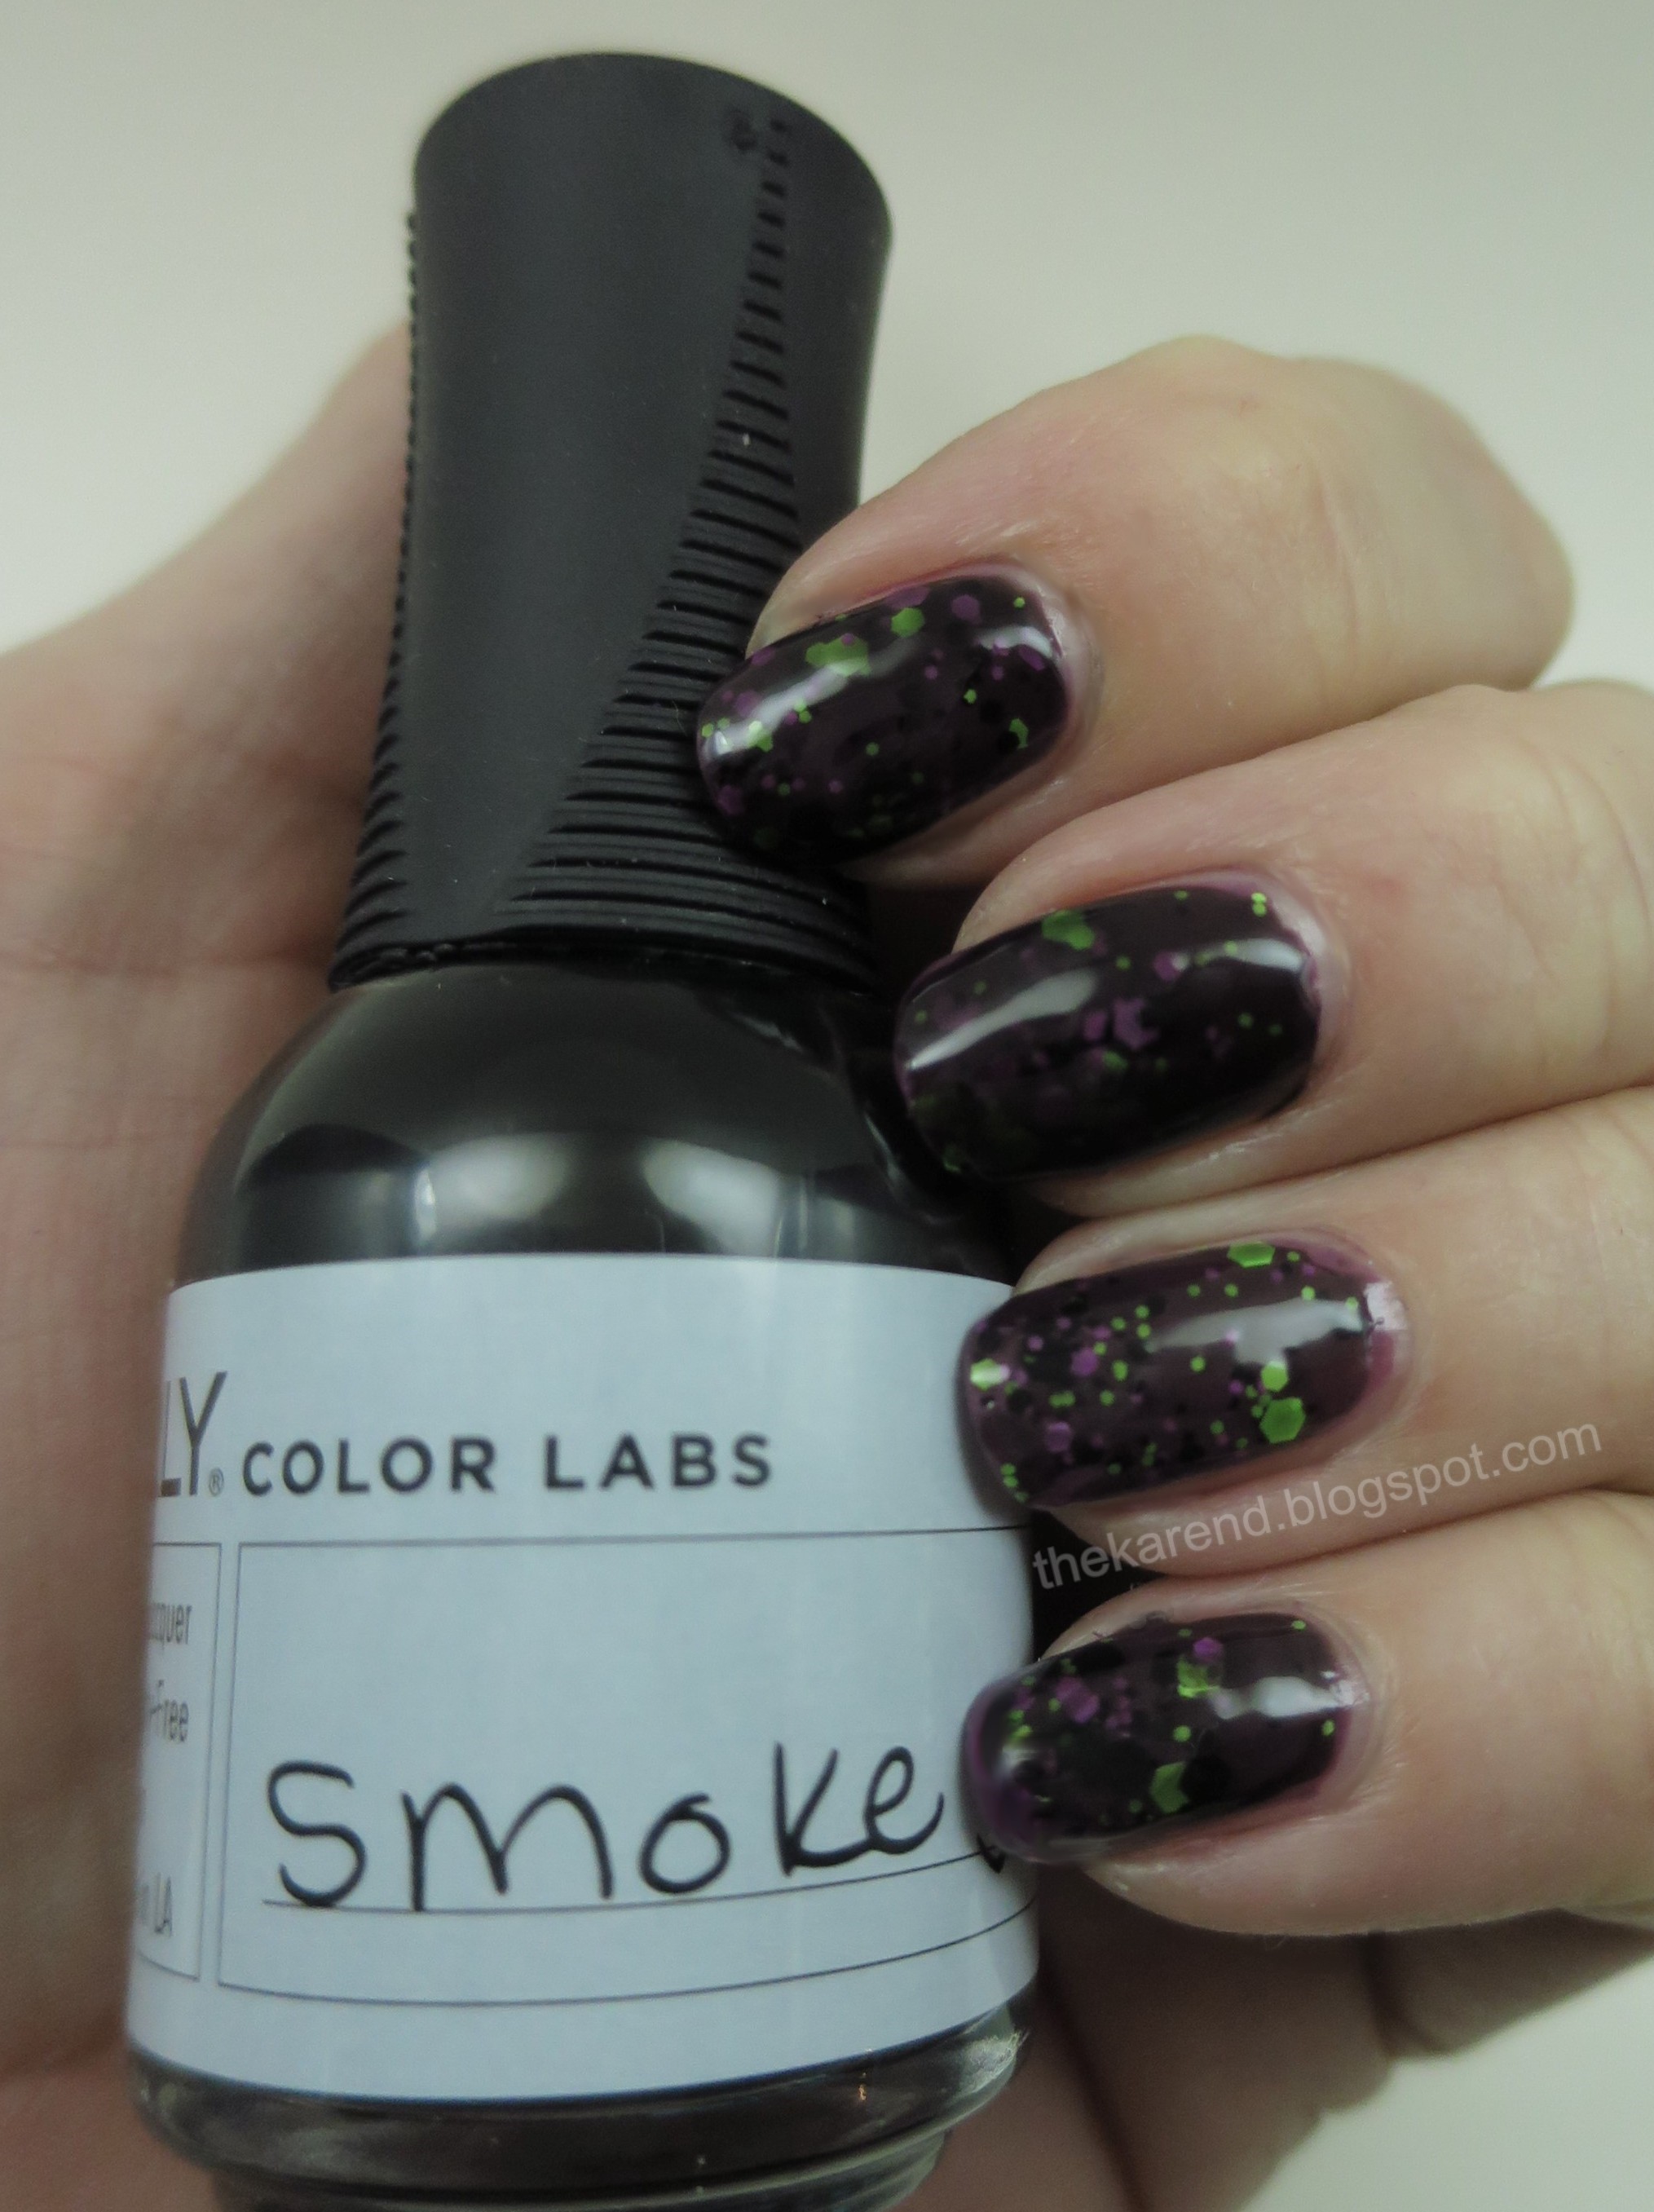
When I got to selecting nails that fit me, I was surprised to see that nails in the same size weren't necessarily the same color as each other. I noticed it with the three or four biggest sizes. That's a bit unusual; in most sets, if there are only two of a size, they'll match. So I couldn't make my hands match each other, which is fine, especially for a Skittles set like this. Here's my right hand (the thumbnail is lavender):
 
Sally Hansen Salon Effects Perfect Manicure Nails in Sweet as Candy
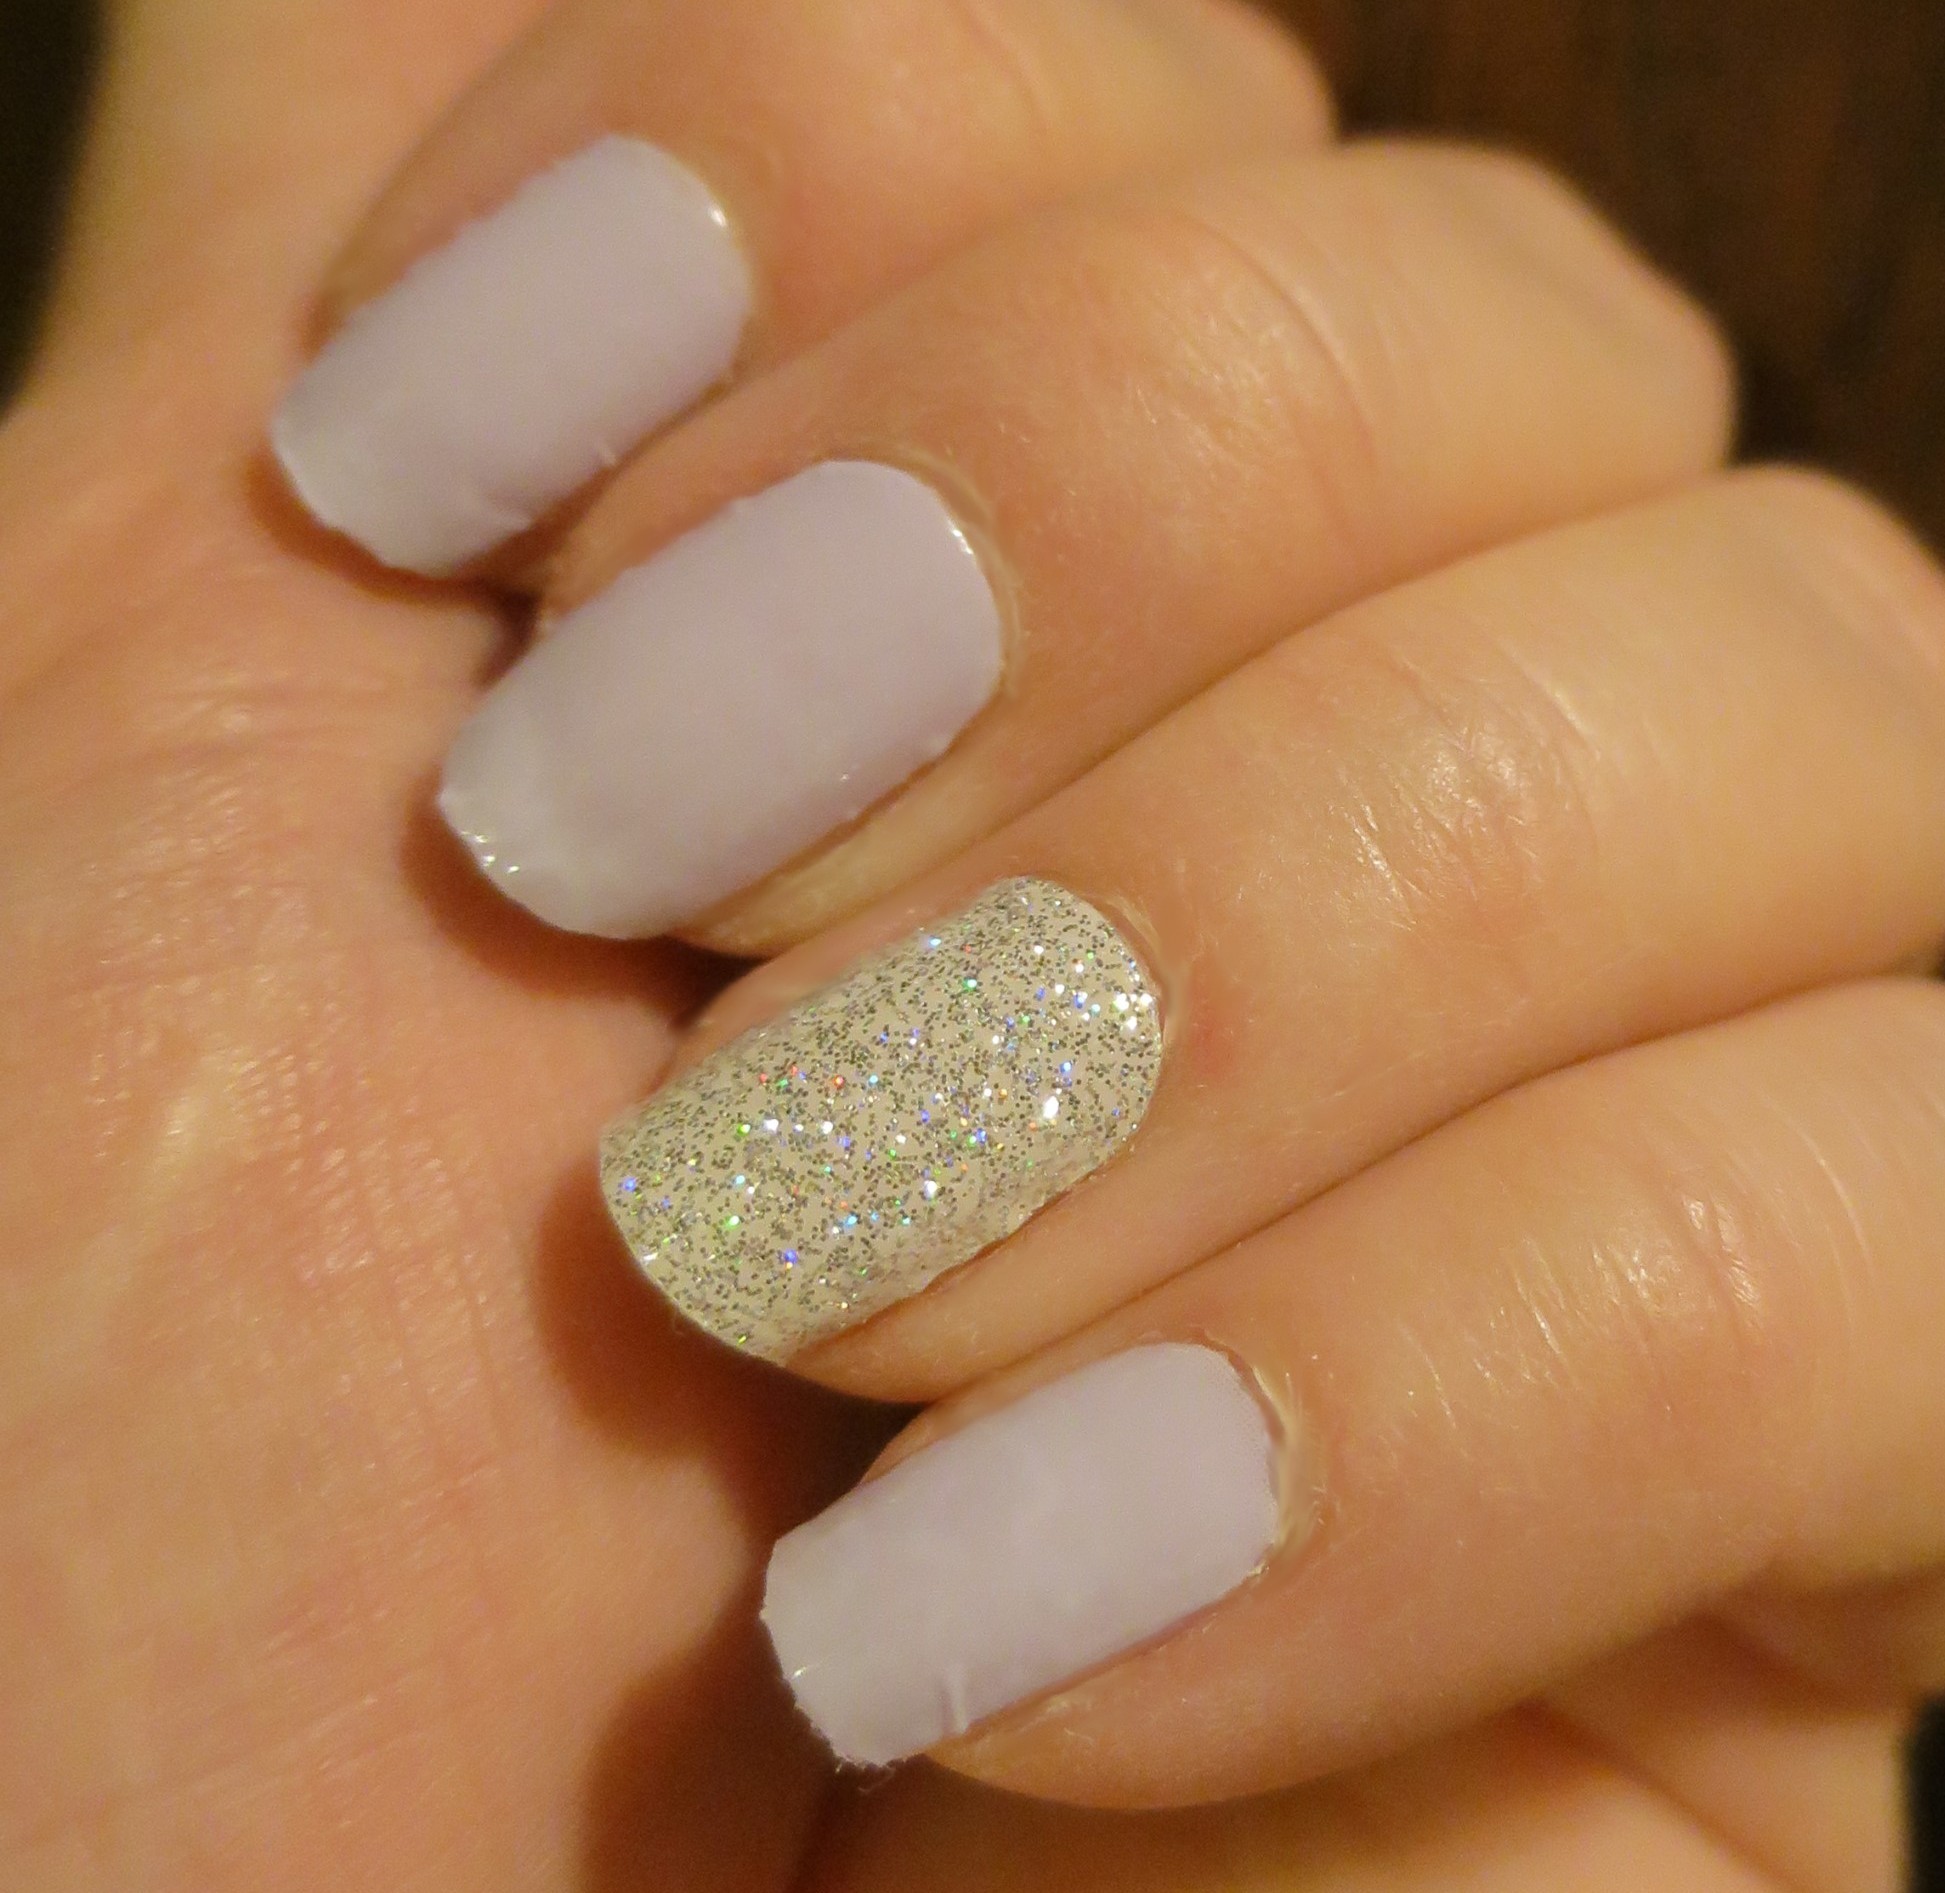
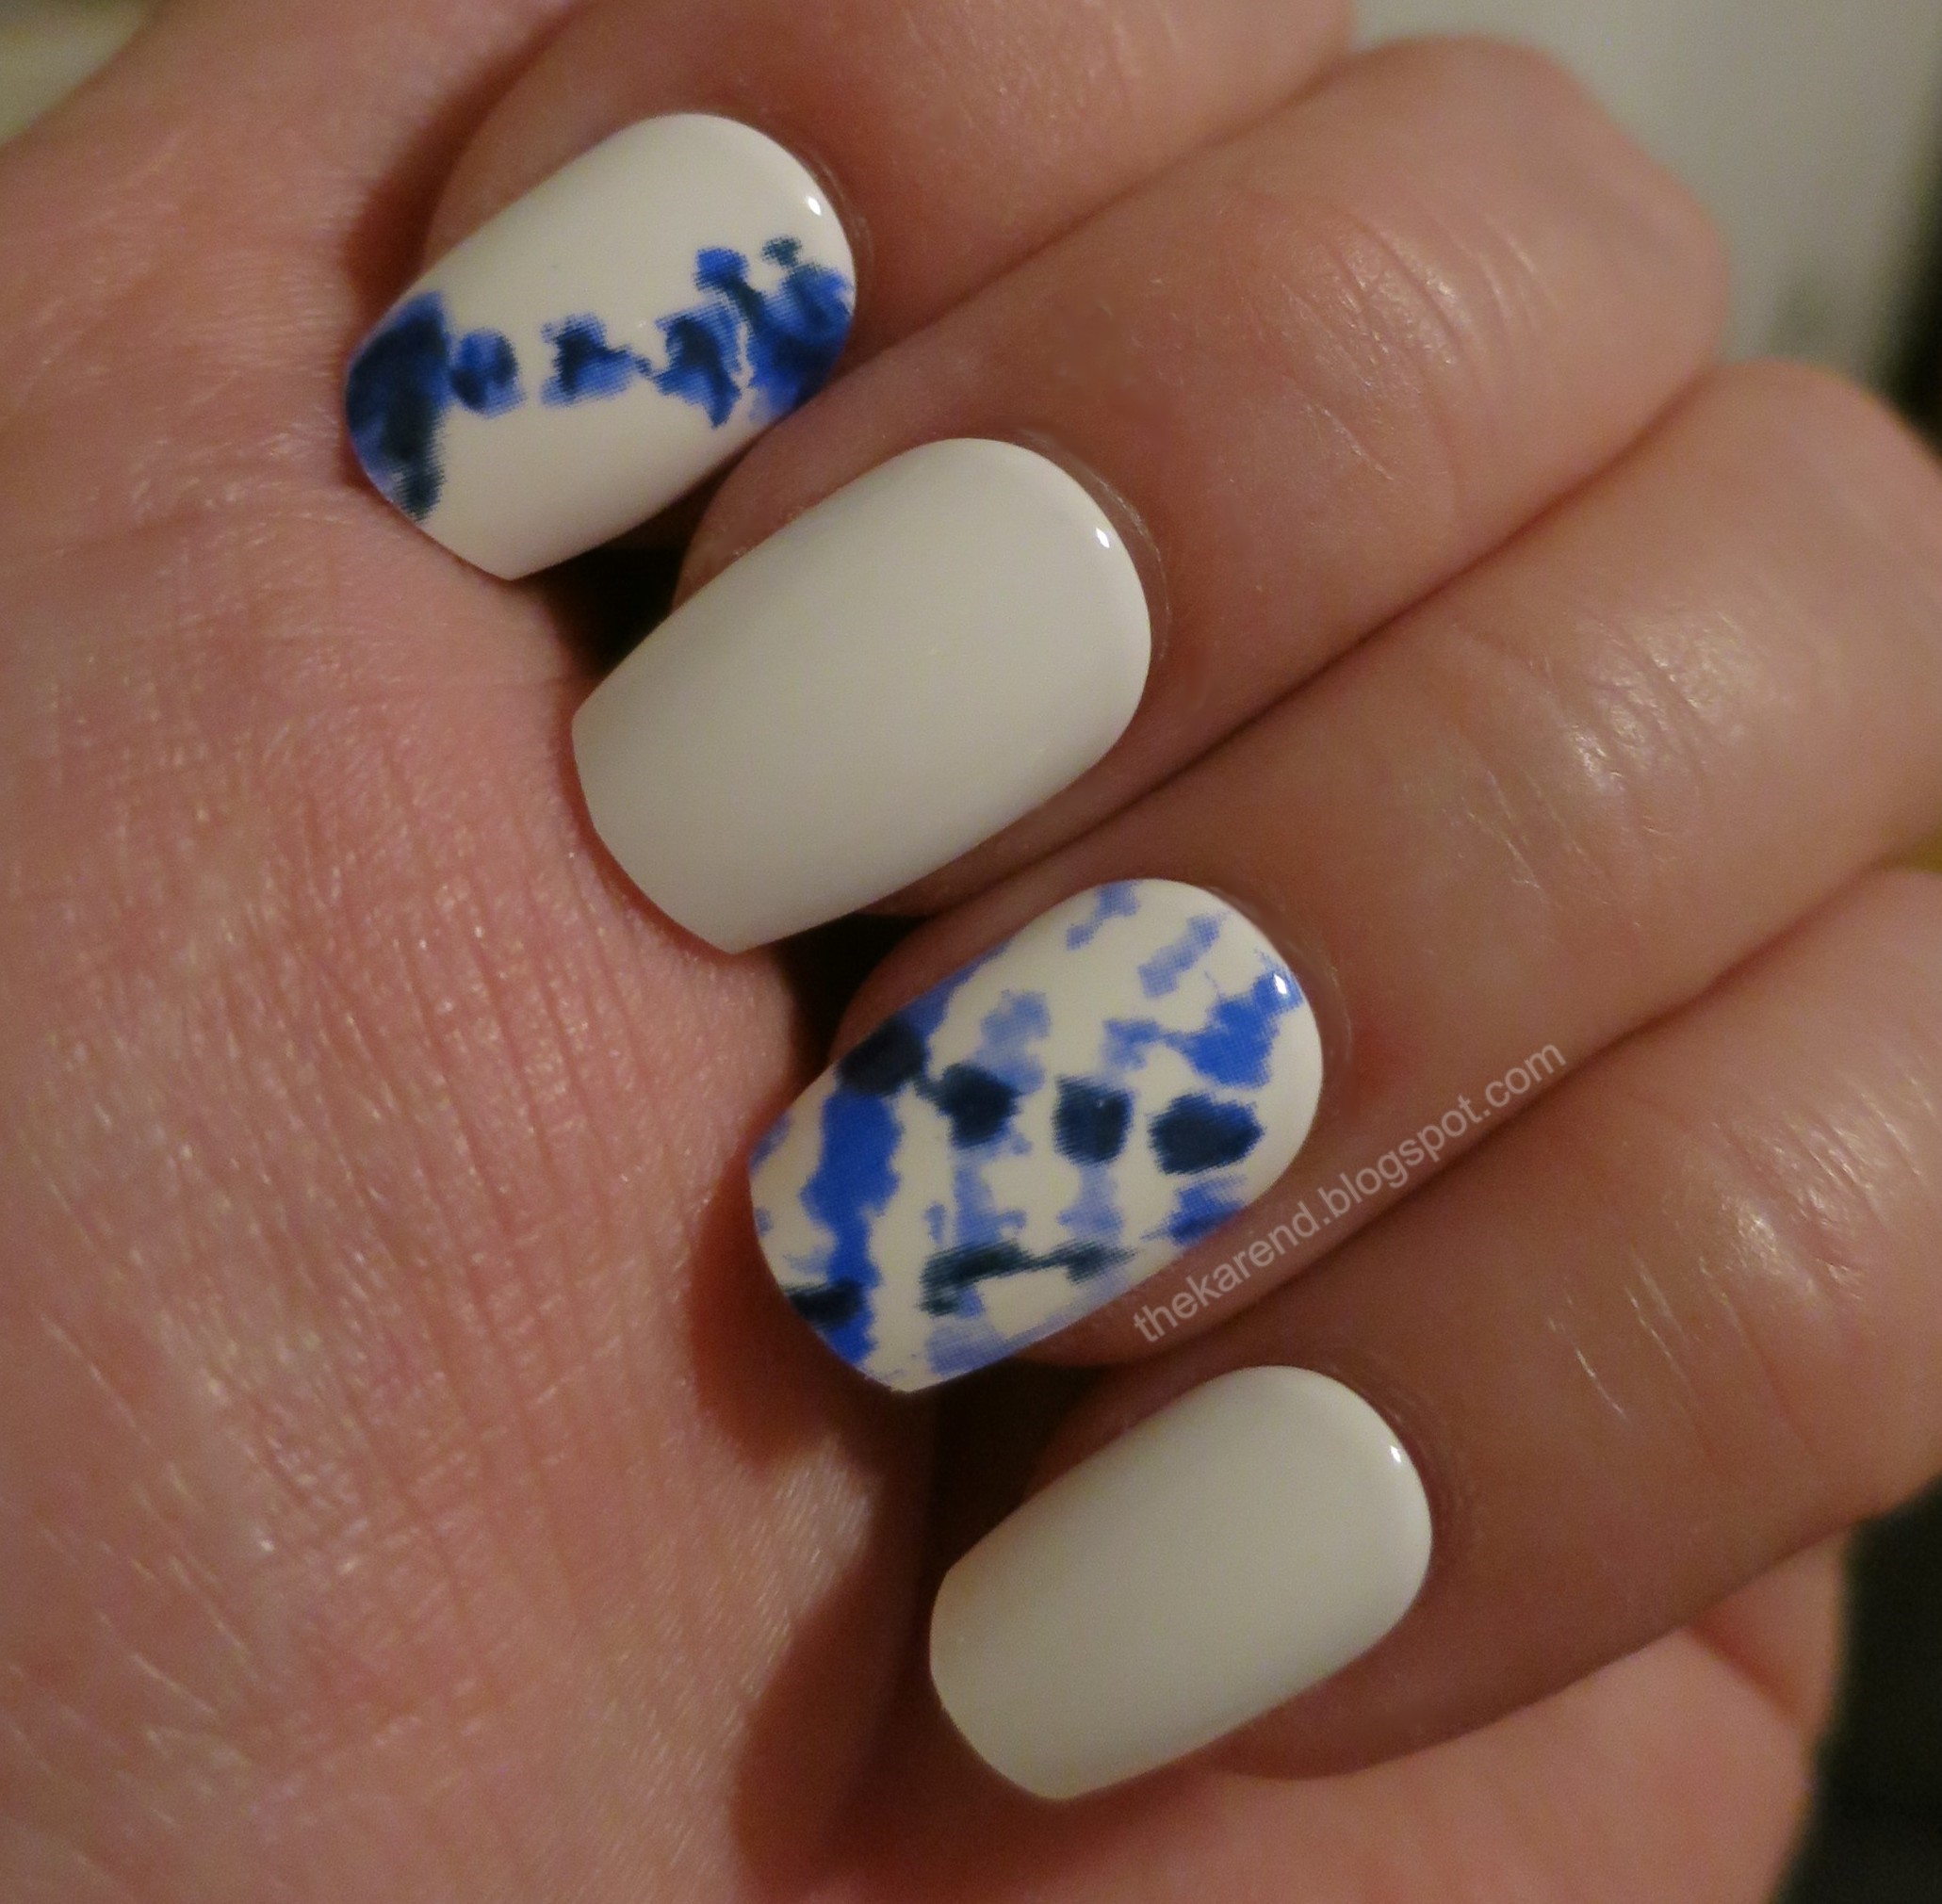
And my left (the thumbnail is peach):
 
Sally Hansen Salon Effects Perfect Manicure Nails in Sweet as Candy
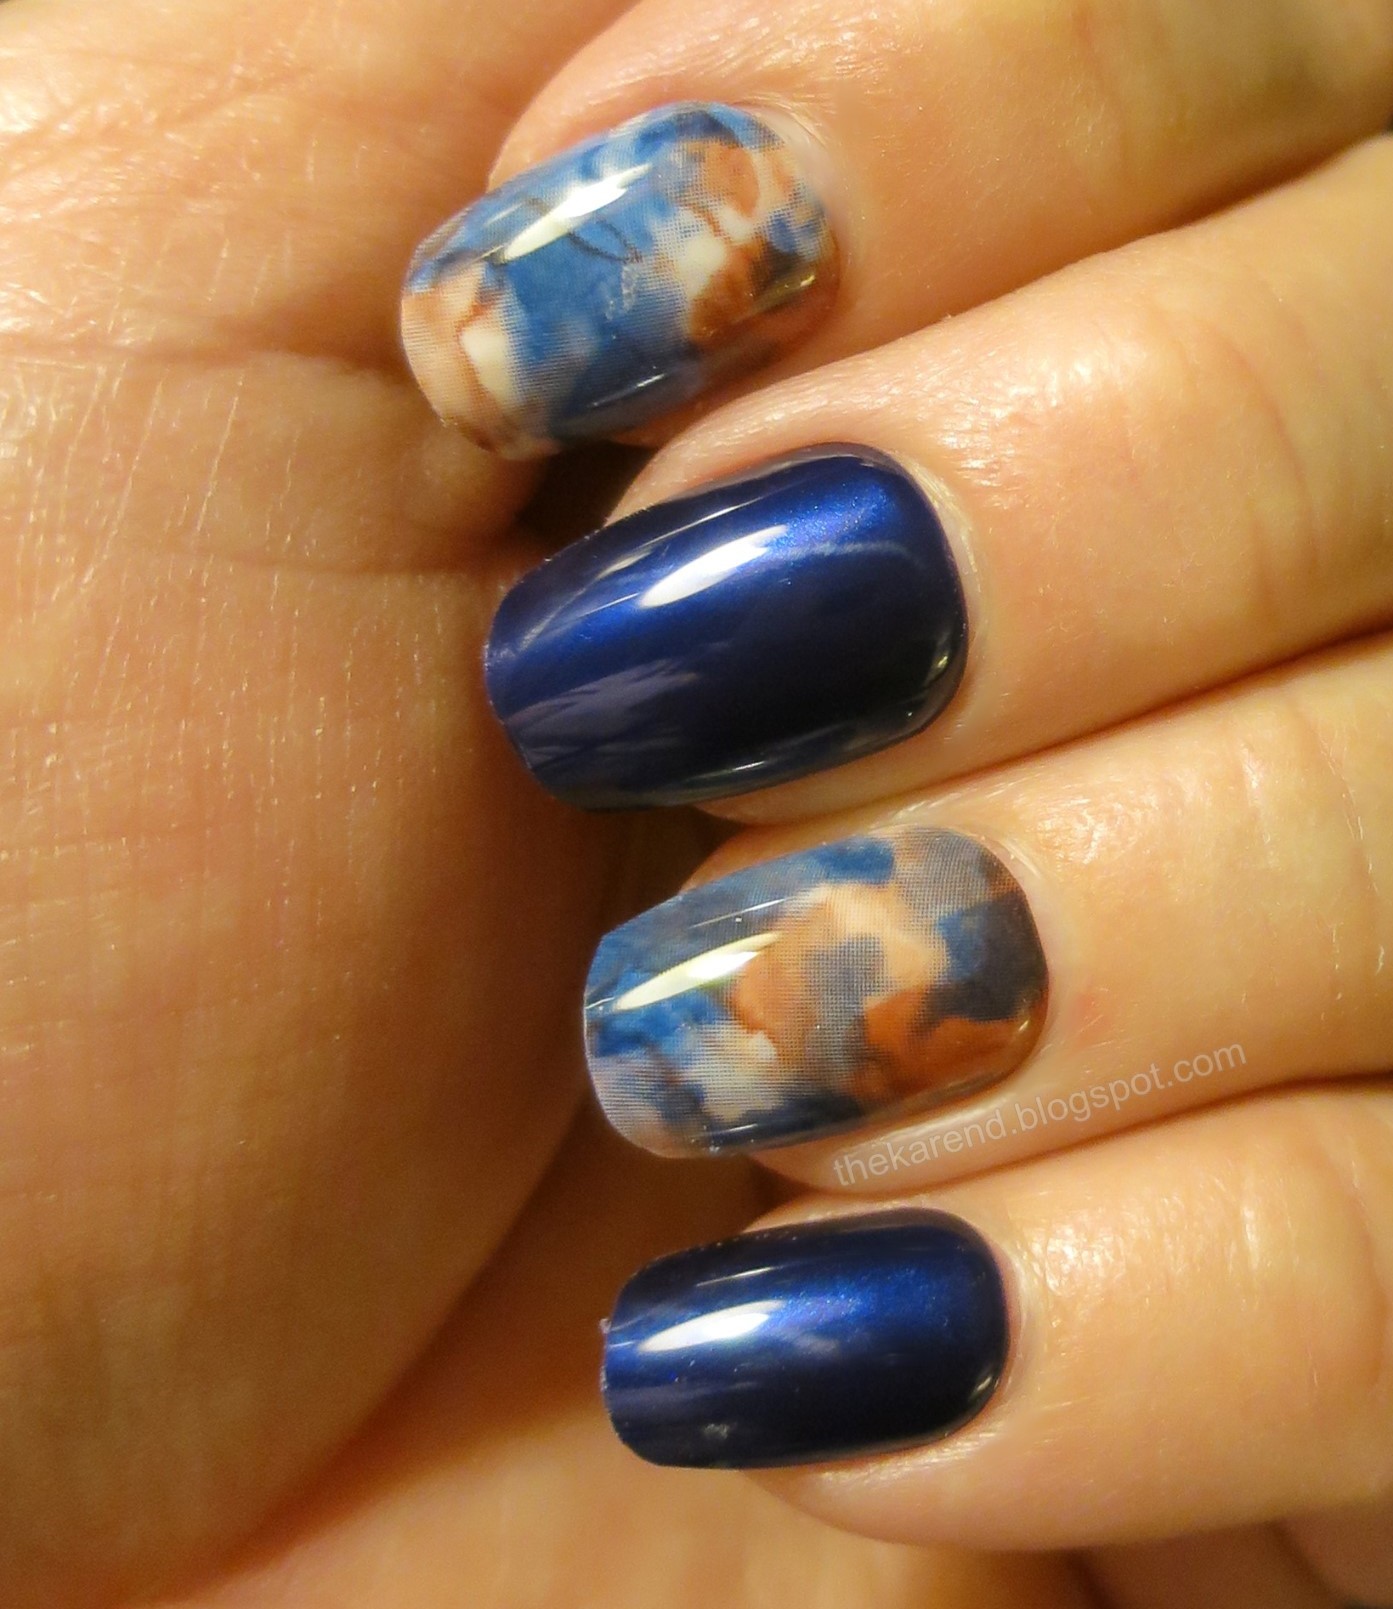
I wish I'd swapped the middle and thumb colors left to right, so there would have been more warm/cool balance on my non-thumb digits, but that probably wouldn't bother most people. As far as fit goes, these were pretty good for me, though I wished the bases were a bit narrower especially on the size that was the closest match to my middle finger. The shape is not my favorite, what with the scratchy point (even after I smoothed with the included file). The tip also curves down, maybe to make the point less likely to stab something.
 
Sally Hansen Salon Effects Perfect Manicure Nails in Sweet as Candy
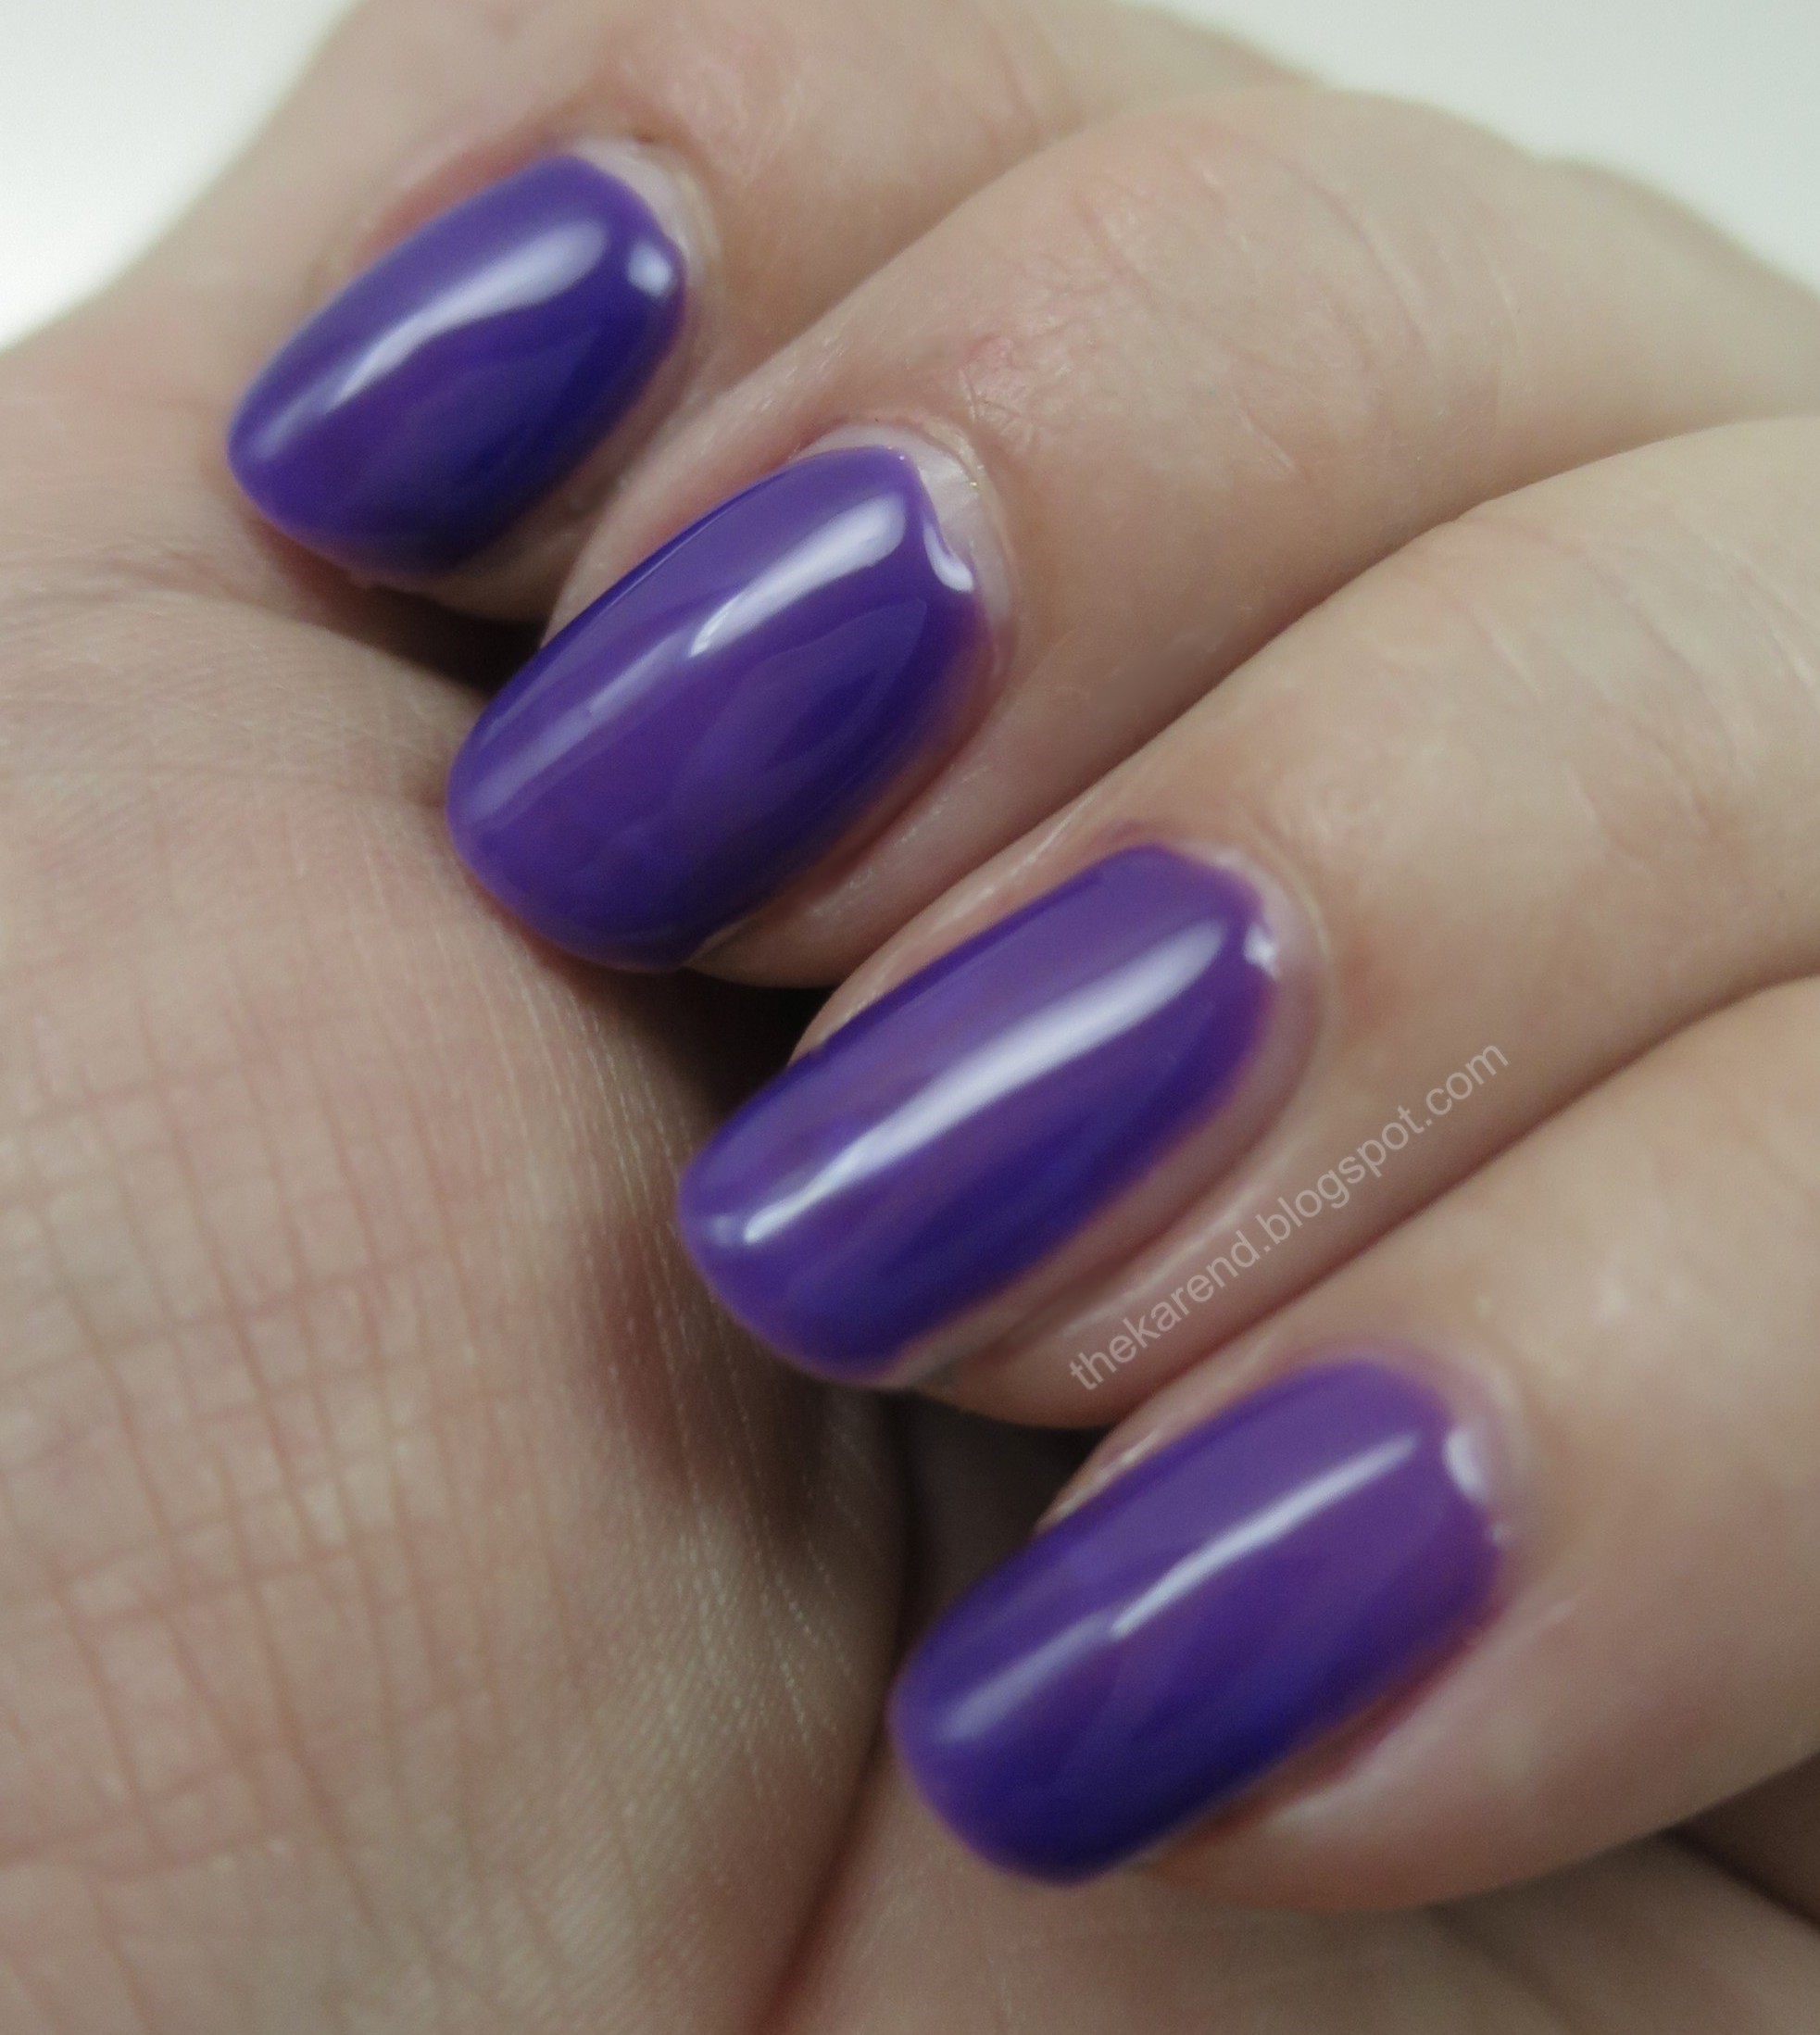
I know I could probably get used to the shape and the length—indeed, I did type on my laptop with them on—but after a few hours, I clipped and filed them into more of an oval shape. Ah, much better for my lifestyle.
 
Sally Hansen Salon Effects Perfect Manicure Nails in Sweet as Candy
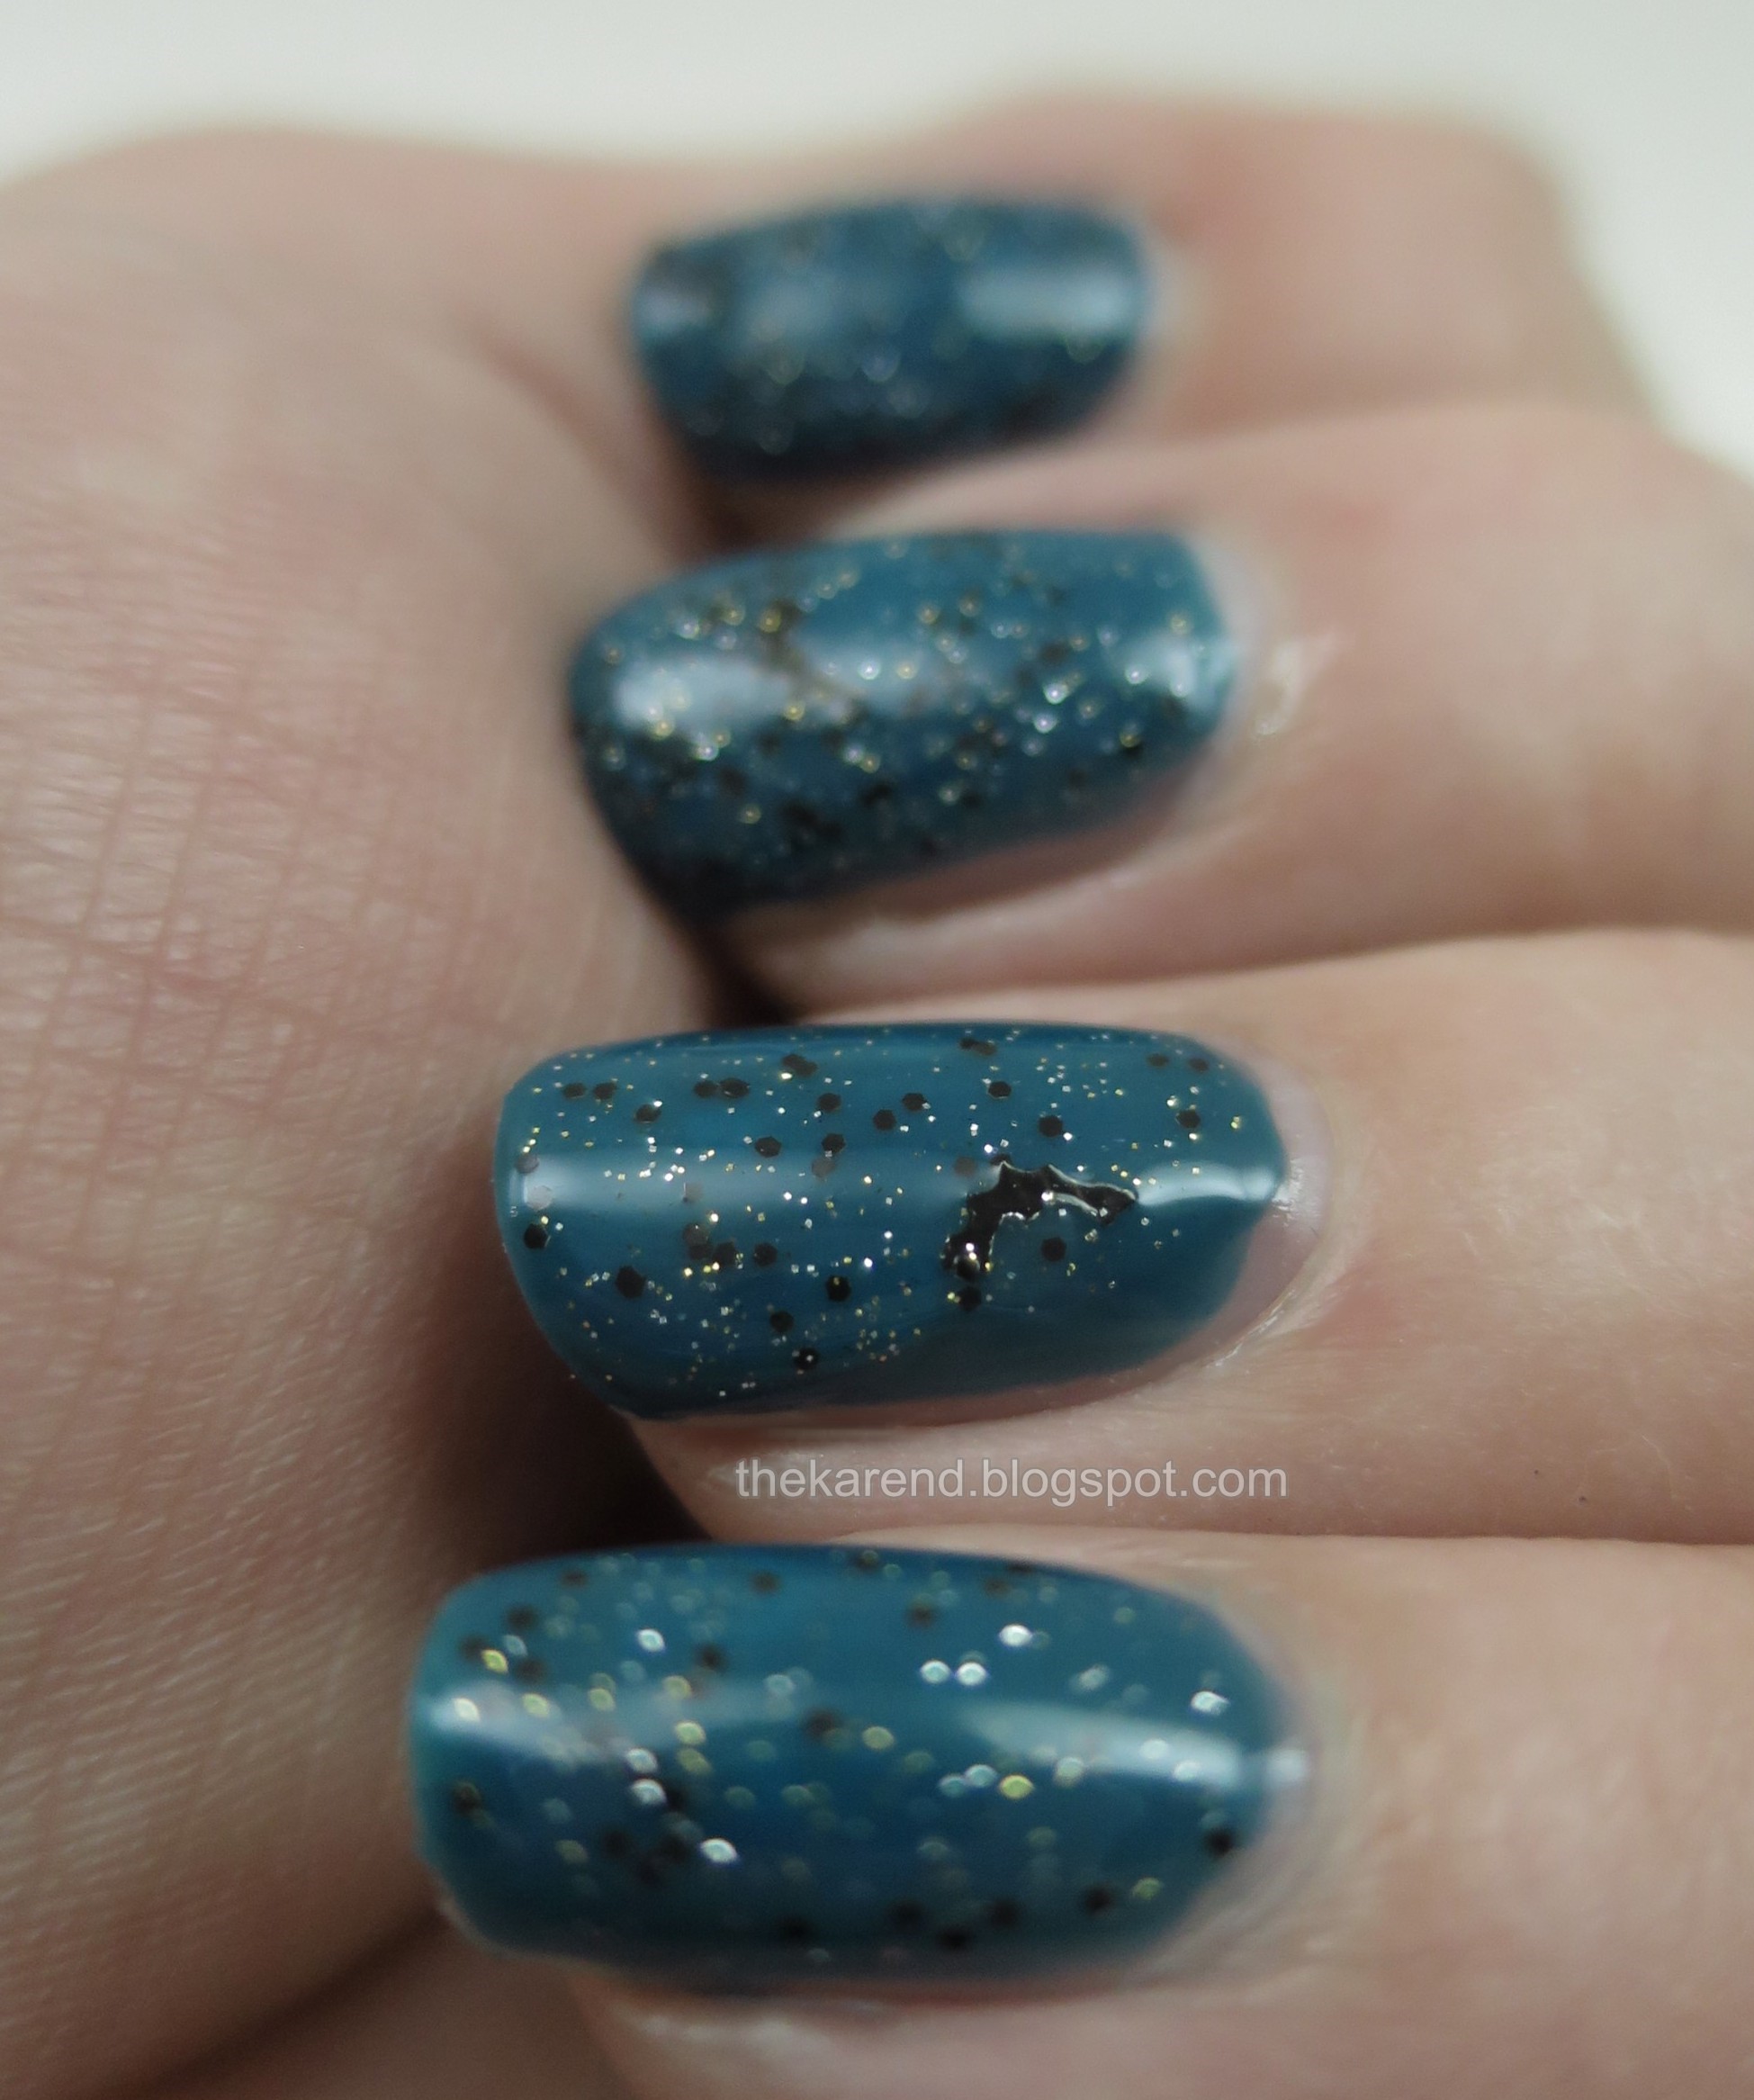
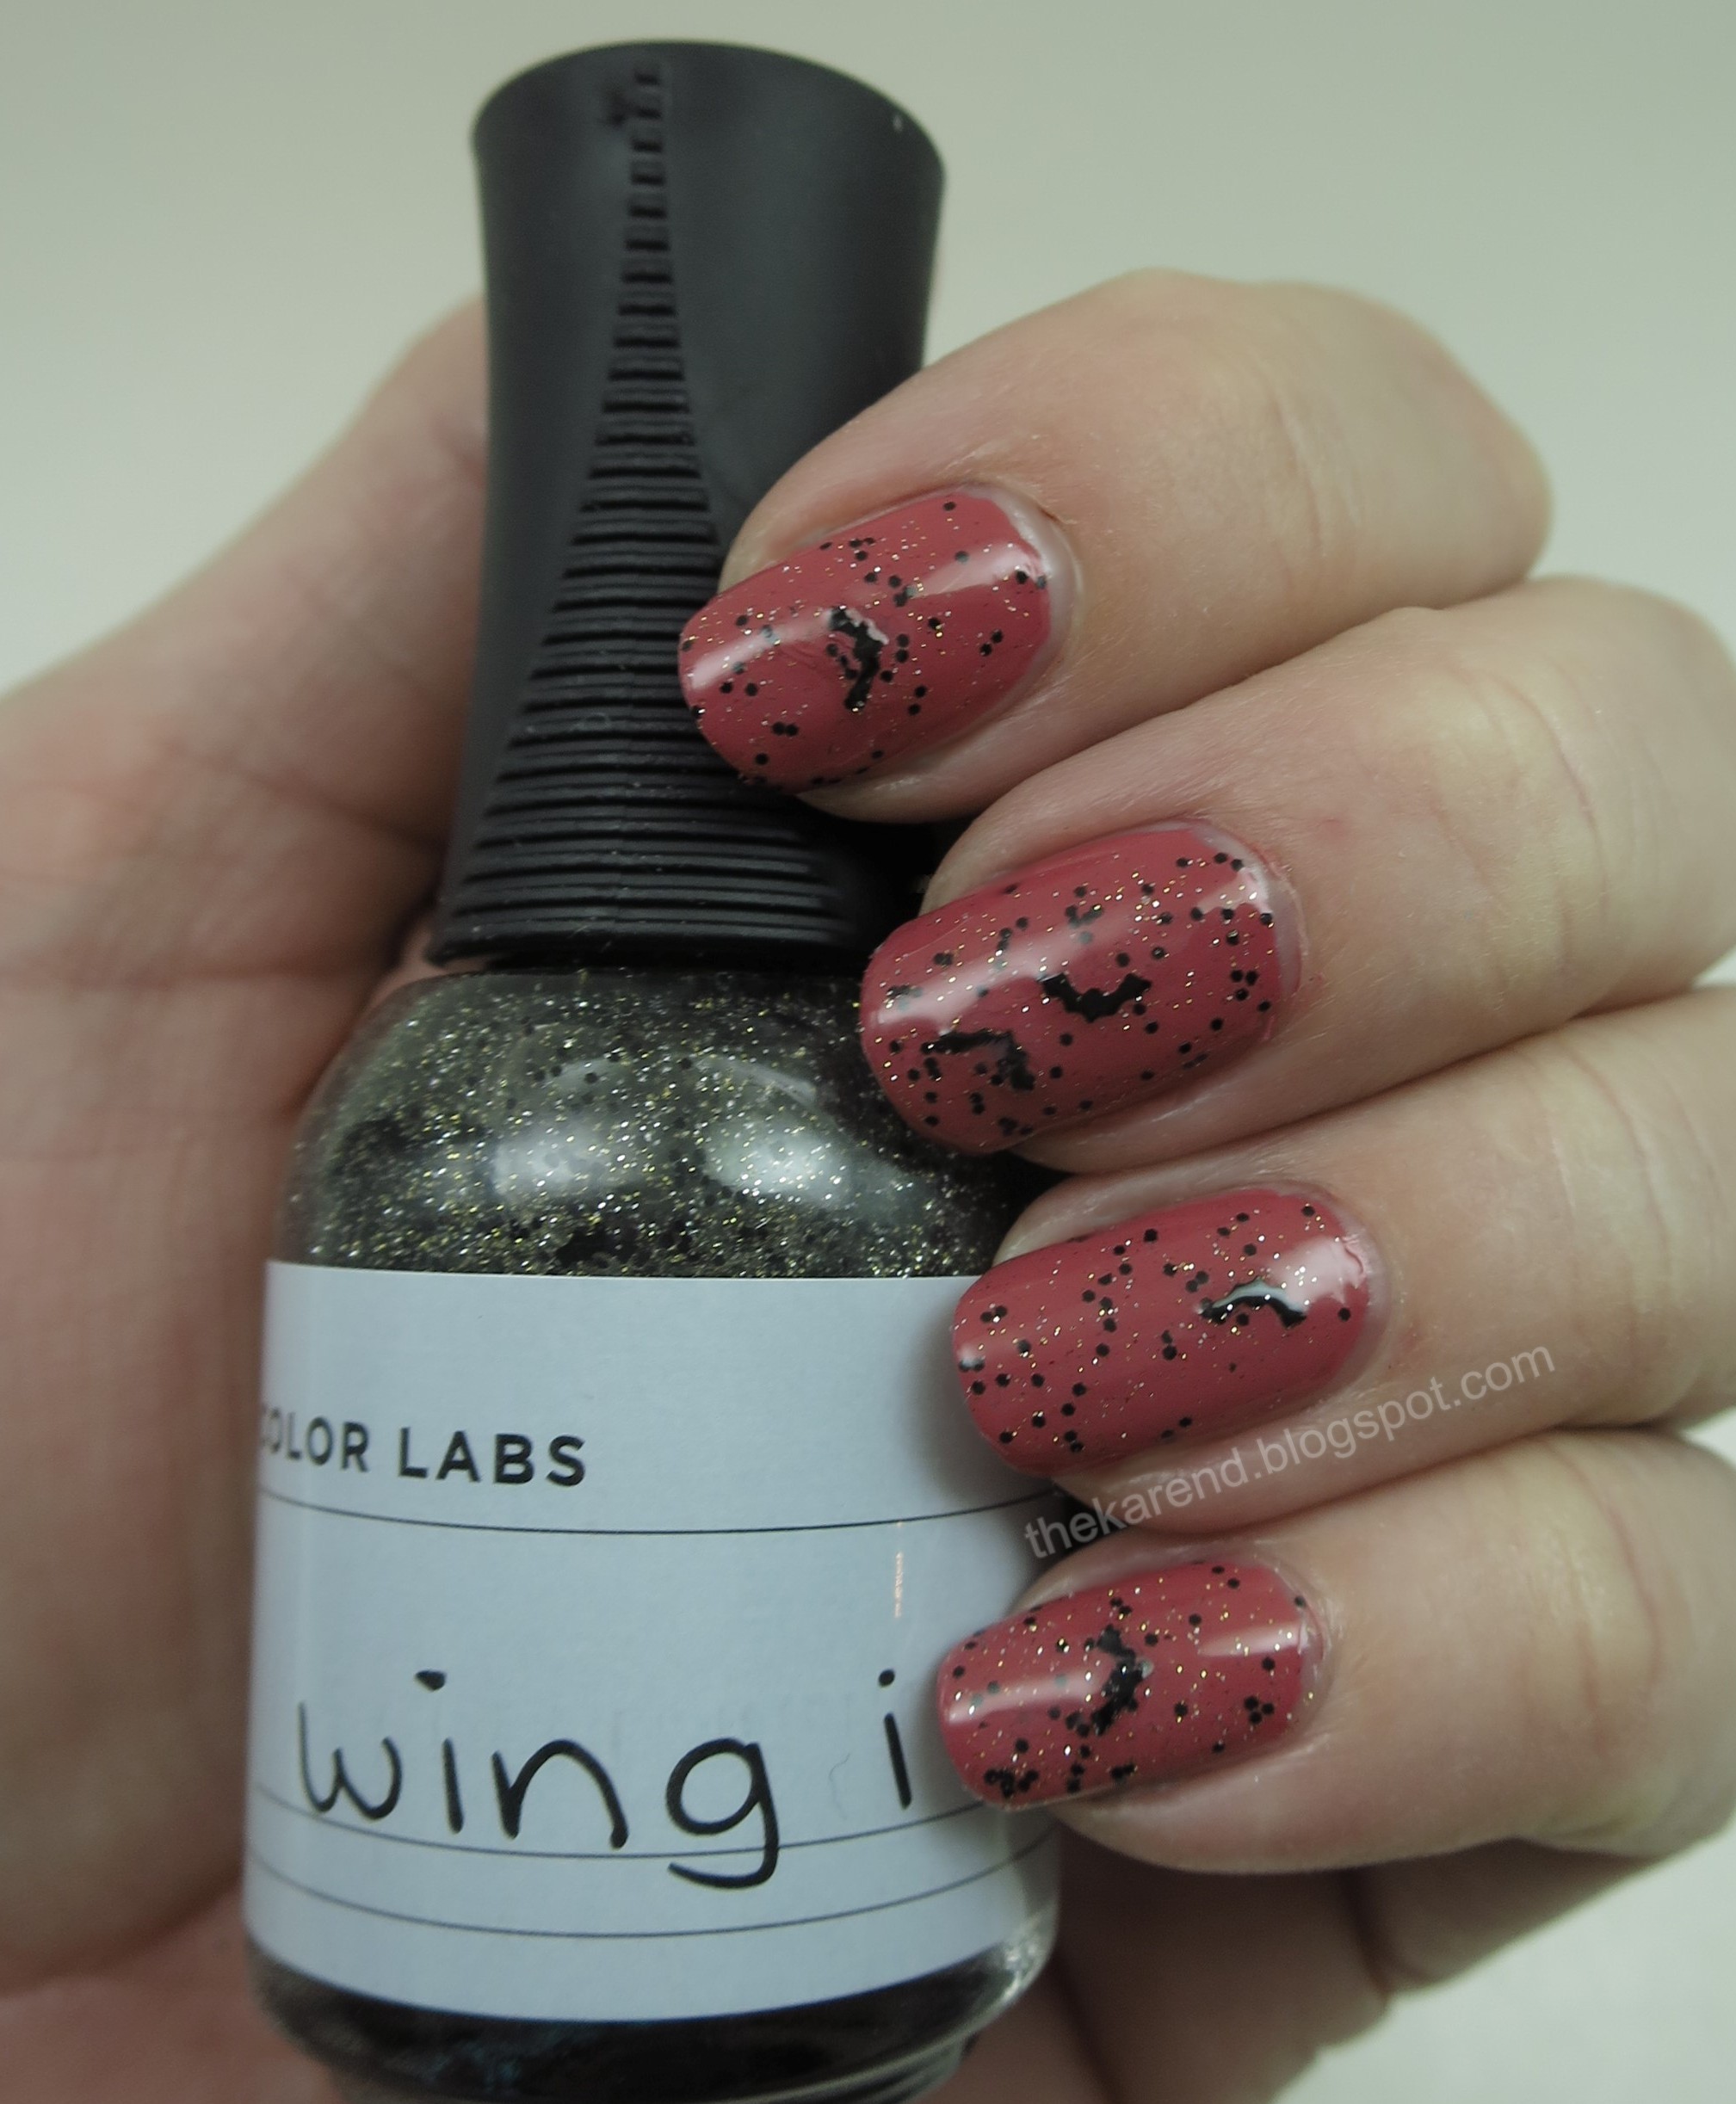
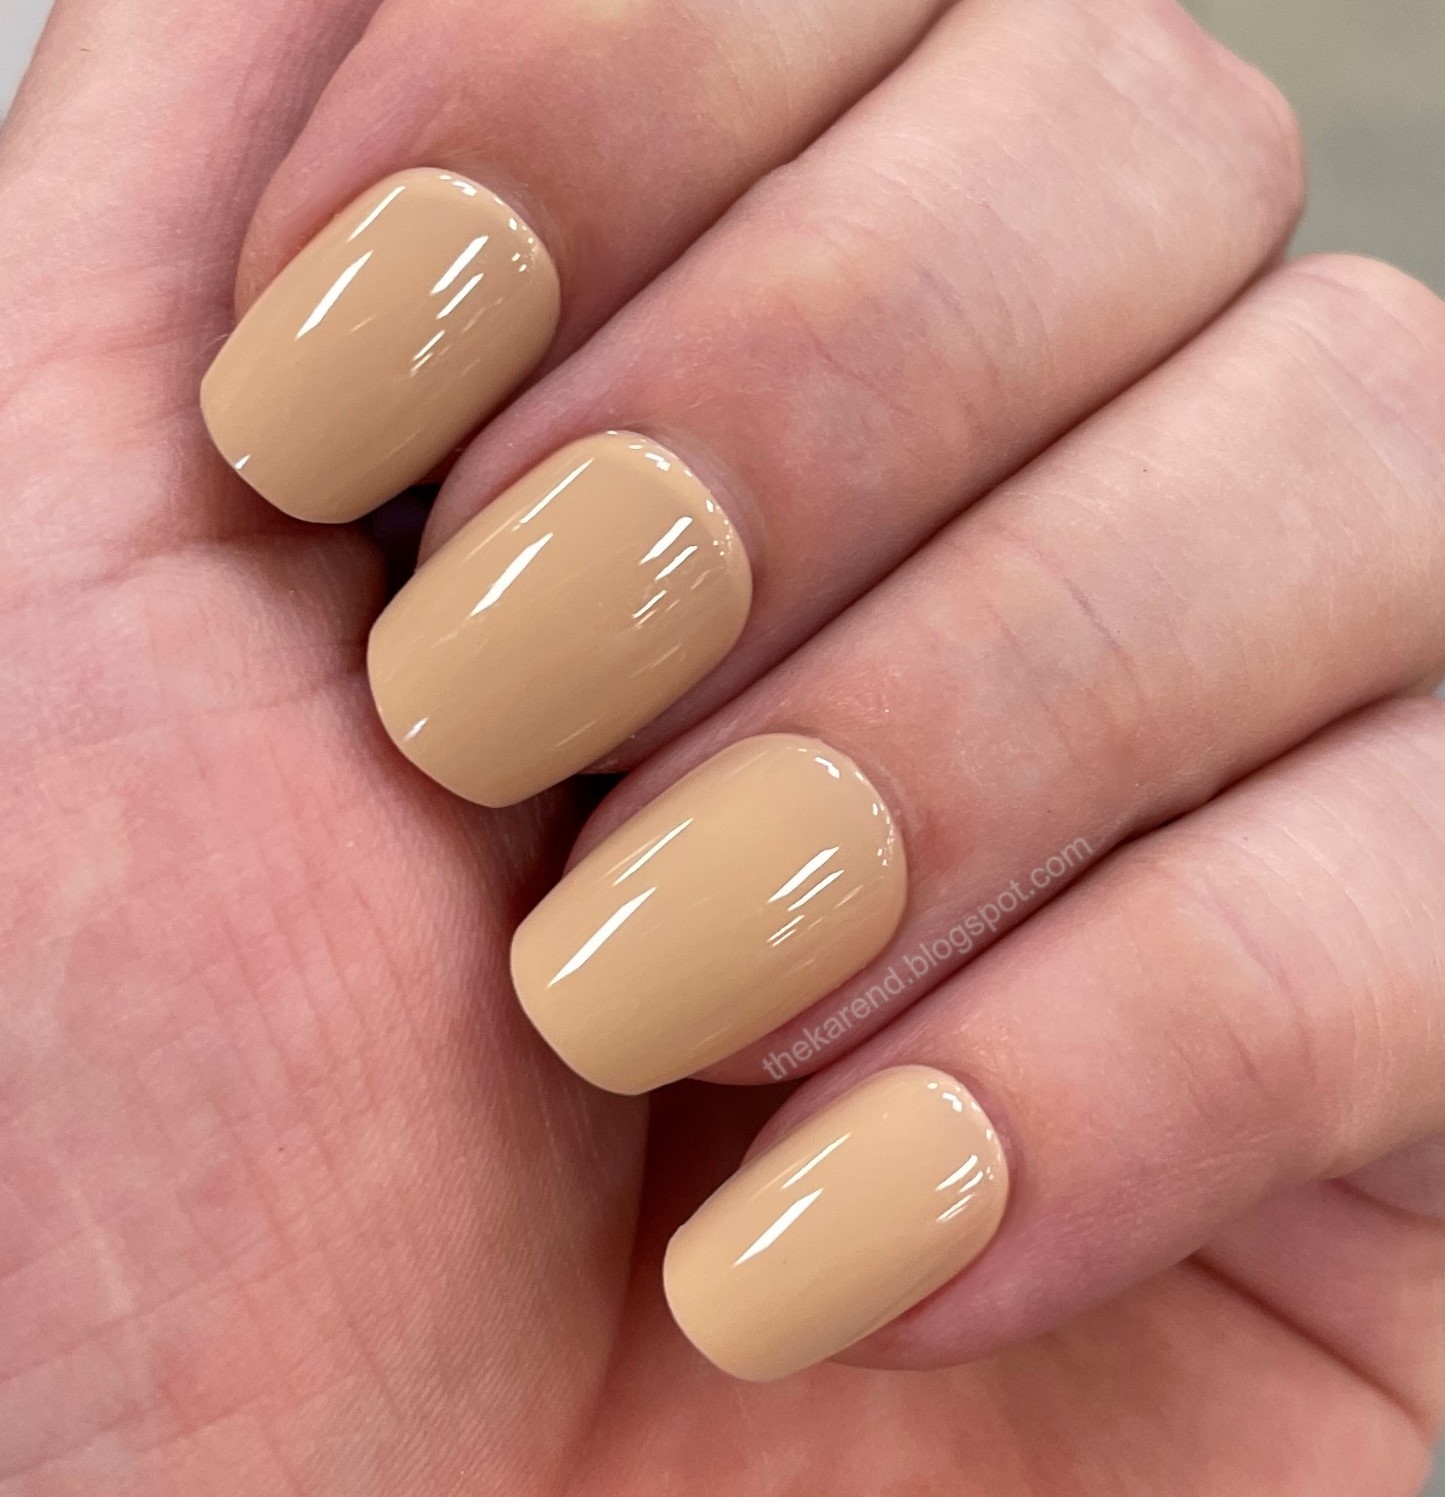
As with the previous sets, I used the adhesive tabs, and the nails stayed on decently well. What they didn't do was wear well. The colors don't go all through the nails but are applied on a white base, and after four days, the color was wearing off the tips of the nails and letting the white show. This was most noticeable on the fingers I use the most for grabbing things and such, but it was there on on all them to some extent by day five. Perhaps this was caused or at least made worse by my clipping and filing them to a new shape, except the color scraped off a small section of my index nail nowhere near the edge, so maybe not.
 
Sally Hansen Salon Effects Perfect Manicure Nails in Sweet as Candy
So far I've liked the solid color oval nails from Sally Hansen the best. Those didn't need clipping and filing to fit my life or nails and they wore well. I'm glad I tried these almond ones but I don't see myself getting more of them.

Friday, March 31, 2023

Dashing Diva Gloss Gel Nail Strips

Well hello. I had a good break from nail blogging. I've still been paying attention to a couple of polish groups on Facebook and looking for displays when I have the opportunity. Last month, I saw a mainstream collection that inspired me to not just photograph it, but buy all the colors and I've used two of them already (on my toes, so won't be sharing those here because that's a whole thing). I hope to at least get a display post with those in it up next week. Now, though, Ij ust couldn't let all of March go by without posting something, so here I am with the first nail look I've done in ages that didn't involve press on fake nails (not that there's anything wrong with fake nails).

Late last week I found a set of Dashing Diva Gloss Gel Nail Strips when I was looking for a new set of fake nails to put on (yes, the organization of my nail stuff is an ongoing issue). I'd had a few too many nails pop off from set I was wearing so thought why not try the strips. Those aren't going to end up on the floor of someone else's house the way my fake nails had the other week (twice at the same party, even). I put them on late at night at home, so please forgive the wonky lighting in these next several pics. This set is called Gleam Queen and has mostly lilac creme strips, with three different accent options: purpley pink microglitter, silver microglitter, and lilac and pink "stained glass" with white leading.
 
Dashing Diva Gloss Gel Nail Strips in Gleam Queen
The directions for applying these are similar to my beloved and long discontinued Sally Hansen Salon Effects nail polish strips: prep the nail, choose a size, smooth from base to tip when applying, file off excess. Removal is different: these can be peeled off rather than needing nail polish remover.
 
Dashing Diva Gloss Gel Nail Strips in Gleam Queen
I did lilac on most of my nails, with silver glitter as an accent on my ring finger. In comparison to the nail polish strips, these are thicker, feeling sort of rubbery. That's good in that it makes them easier to handle: they don't tear or flop over onto themselves the way the very thin polish strips can. That's bad in that it's harder to smooth them out at the edges (my pronouced C-curve makes that harder) and harder to remove the excess at the tip (forget about the sides ... you can't cut these with the sharp end of manicure stick like you can regular polish strips). You can see some little wrinkles on a couple of my nails and some fuzziness at the ends where I had trouble filing them smoooth. The set does come with a fairly good sized one-sided file to use, but I still had trouble. The glitter strips were thicker than the plain ones, which meant they looked better since they didn't form those wrinkles at the sides and camoflauged irregularities in my nails better than the plain strips.
 
Dashing Diva Gloss Gel Nail Strips in Gleam Queen
In the light of day the next morning, I wasn't super happy with how the plain strips looked, what with the wrinkles and the showing of every ridge underneath. The ridges aren't so obvious in this photo as they were to the naked eye. I also noticed some "fuzzies" stuck on the ends of some nails, likely clinging to the adhesive on the bits of strips I'd struggled to file off the night before.
 
Dashing Diva Gloss Gel Nail Strips in Gleam Queen
Since I liked the glitter nail, I decided to just put accent strips over the plain strips. Much better.
 
Dashing Diva Gloss Gel Nail Strips in Gleam Queen
There weren't any thumb-sized accent strips, so I just laid one of the stained glass ones down the center, hoping that would distract from the wrinkles at the sides. It looked pretty good, I thought.
 
Dashing Diva Gloss Gel Nail Strips in Gleam Queen
I've now had them on for six days. There's been some slight lifting of the strips at the tips and corners of a few of my nails, perhaps because of the double thickness. The stained glass ones on my middle fingers are showing the most raggedy-ness, probably because I tend to bump those fingers into things more since they're longest.
 
Dashing Diva Gloss Gel Nail Strips in Gleam Queen
I'd use these again, just stick to glitter sets rather than plain ones, or do a ridge filling base coat first, though I don't know how that would affect their sticking power.

Monday, January 16, 2023

Wet 'n' Wild Potassium-Rich and Miami Mami

Today I have some photos from ages ago that I never got around to posting, of two of the Wet 'n' Wild Fast Dry AF colors. Potassium-Rich (yes, the name has a hyphen; no, I do not know why), a mustard yellow creme, and Miami Mami, glitter topper with pastel matte hex glitter in various sizes and colors: yellow, orange, blue, and pink. I did three coats of the creme and topped with one of the glitter on all but my index finger.
 
Wet 'n' Wild nail polish in Potassium-Rich and Miami Mami
 
Wet 'n' Wild nail polish in Potassium-Rich and Miami Mami
 
Wet 'n' Wild nail polish in Potassium-Rich and Miami Mami
Mustard is not one of the most flattering colors on me but I keep buying it because I am drawn to the odd and unusual.

Monday, January 9, 2023

Orly Holo Jellies and Friends

Despite having a goal to continue buying less polish than I did in my stash expansion heyday, I'm still signed up for all sorts of brand newsletters and text alerts, including Orly's. I saw they were having a sale and went to look and noticed it included the shades from the Holo Jellies collection released this past summer. No better time then for me to share swatches of the bottles I bought a while back, along with two glitter toppers I ordered at the same time. Left to right: Party Animal, As If, Peace Out, Chill Pill, Like Totally, and Dancing Queen.
 
Orly nail polish bottles: Party Animal, As If, Peace Out, Chill Pill, Like Totally, and Dancing Queen.
I first Skittled the Holo Jellies, doing three coats plus topcoat. They're not quite opaque at three coats, but close enough. All have a generous helping of silver holo glitter in a jelly base. As If is a soft orange. Peace Out is lime green. Chill Pill is a blue between turquoise and sky. Like Totally is purple, such a pretty purple, not too red and not too blue. I like these; the formula is good, with the jelly base being buildable, not too opaque so it hides the glitter.
 
Manicure with Orly nail polish in As If, Peace Out, Chill Pill, and Like Totally.
 
Manicure with Orly nail polish in As If, Peace Out, Chill Pill, and Like Totally.
 
Manicure with Orly nail polish in As If, Peace Out, Chill Pill, and Like Totally.
I then reached for the glitter toppers, grouping them each with the Holo Jellies shade(s) they were most compatible with. Party Animal has pink, orange, and yellow matte hex glitter in various sizes plus silver holo microglitter in a clear base. I layered one coat of it over As If, finishing with clear topcoat.
 
Manicure with Orly nail polish in As If and Party Animal
 
Manicure with Orly nail polish in As If and Party Animal
 
Manicure with Orly nail polish in As If and Party Animal
Dancing Queen has lime, purple, and sky blue matte hex glitter plus silver holo microglitter in a clear base. It seems made for the remaining shades of Holo Jellies. I did a gradient over a creme base that matched my skintone, then Peace Out on my middle finger, Chill Pill on my ring, and Like Totally on my pinky, topping the three non-gradient nails with one coat of Dancing Queen plus clear topcoat. This whole look made me happy. I really should take the time to do manis like this again because they do make me smile.
 
Manicure with Orly nail polish in Peace Out, Chill Pill, and Like Totally topped with Dancing Queen
 
Manicure with Orly nail polish in Peace Out, Chill Pill, and Like Totally topped with Dancing Queen
 
Manicure with Orly nail polish in Peace Out, Chill Pill, and Like Totally topped with Dancing Queen
I don't regret getting these at all despite having more polish than probably all the nail salons in town put together. They're mood lifters for me. And I'm proud of myself for resisting the plain jellies that Orly came out with sometime after Holo Jellies. Maybe I don't have exactly those shades of blue, pink, and yellow in exactly that consistency, but I do have blue, pink, and yellow jellies in my stash. If you don't, those are also in the sale going on now on the Orly website. Five dollars a bottle is a deal. Dancing Queen and Party Animal are available still at full price. I'd pay it because I'm a fool for glitter still, even though the nail world has mostly moved on to other things for now.

Monday, October 17, 2022

Orly x Kelli Marissa Witching Hour

I have slowed my stash expansion quite a bit from the dizzying heights they once reached, yet I do still have my weaknesses. When an online ad for the new Orly and Kelli Marissa Halloween collaboration came across my screen with three glitter toppers, I pondered for just a while before ordering the whole set, glitters and jellies both. They came in a nicely decorated box with skulls and snakes and other spookiness.
 
Orly x Kelly Marissa Witching Hour
As you might have guessed from the dimensions of the box, there are six shades here. Left to right: Wild Card, Mystic Jelly, Spellbound, Oasis Jelly, Wing It, Smoke Jelly.
 
Orly x Kelly Marissa Witching Hour
 
Orly x Kelly Marissa Witching Hour
I started with Oasis Jelly, a deep blue-leaning teal. At three coats, it's pretty much opaque, though definitely still squishy.
 
Orly x Kelly Marissa Witching Hour Oasis Jelly
 
Orly x Kelly Marissa Witching Hour Oasis Jelly
I used one coat of Wing It on top of Oasis then added clear topcoat. Wing It has black hex glitters, black bat glitters, and small silver and gold glitter in a clear base. The bats did mostly come out of the bottle on their own.
 
Orly x Kelly Marissa Witching Hour Oasis Jelly and Wing It
 
Orly x Kelly Marissa Witching Hour Oasis Jelly and Wing It
I thought the bats got a bit lost against the darkish teal, so I also tried Wing It over Orly Pink Chocolate. The bats did pop more against that dusty rose base.
 
Orly x Kelly Marissa Witching Hour Wing It over Pink Chocolate
 
Orly x Kelly Marissa Witching Hour Wing It over Pink Chocolate
Mystic Jelly, a cool vibrant purple, was up next. I used three coats of this jelly as well, and it seemed just slightly less opaque but equally squishy. Also shiny even without topcoat.
 
Orly x Kelly Marissa Witching Hour Mystic Jelly
 
Orly x Kelly Marissa Witching Hour Mystic Jelly
I topped Mystic with Spellbound, which has black, white, and orange satin hexes plus tiny silver holo glitter in a clear base. I did one thick coat of the glitter and didn't think it needed topcoat.
 
Orly x Kelly Marissa Witching Hour Mystic Jelly and Spellbound
 
Orly x Kelly Marissa Witching Hour Mystic Jelly and Spellbound
Smoke Jelly came next. Three coats of this one as well, and it was opaque and squishy and shiny.
 
Orly x Kelly Marissa Witching Hour Smoke Jelly
 
Orly x Kelly Marissa Witching Hour Smoke Jelly
Wild Card finally got its turn over Smoke. This is a clear base with black, lime, and vibrant purple hex glitters in various sizes.
 
Orly x Kelly Marissa Witching Hour Smoke Jelly and Wild Card
 
Orly x Kelly Marissa Witching Hour Smoke Jelly and Wild Card
Obviously the black glitter in Wild Card got lost on Smoke, so I tried it over Orly Color Blast Mulberry Madness.
 
Orly x Kelly Marissa Witching Hour Mulberry Madness and Wild Card
 
Orly x Kelly Marissa Witching Hour Wild Card over Mulberry Madness
I did also try Smoke over this last combination, to see if this would work for jelly sandwiches. If one is careful and does a thin coat over the glitter it could work, but there are other jellies better suited to the task, I think.
 
Orly x Kelly Marissa Witching Hour Wild Card over Mulberry Madness topped with Smoke
This is a fine collection overall. I love the glitters, can see using Wing It year round, just putting the bats back in the bottle. I do with the jellies were slightly less opaque so they were more versatile, but I have others I can use for sandwiches and other layering.

Monday, October 10, 2022

Some Nails of the Day

So yeah, hi. I did disappear from here for September. As often happens, I didn't plan to, just put other things ahead of nail stuff on my priority list either due to necessity (nail stuff can be put off in a way that getting my car repaired cannot) or due to travel (I returned last week from last long trip of the year), and the longer I don't blog, the harder it feels to get back to it. Which is why I'm going to come back with a little NOTD post rather than trying to clear my backlog of display photos. I hope that if I can get this post done and published, working on the display one won't feel so daunting. When my nails grow out to what I consider my ideal length, the short length of imPress fakes don't provide the coverage I need, so I have to go with the medium length. Those have a more limited selection of designs, but I can still find things I like, such as the white with blue accents set called Riviera Paradise. I do find the medium length a bit long, so I clip and file them a bit so they feel right for me (and don't interfere with typing on my laptop).
 
imPress press on nails in Riviera Paradise, a white and blue design
I followed up that set with one called Indigo Autumn. Here they are out of the box, before I clipped and filed:
 
imPress press on nails in Indigo Autumn, a navy with brown/blue/cream accents
And after clipping and filing to reshape to look more like my natural nails:
 
imPress press on nails in Indigo Autumn, a navy with brown/blue/cream accents
For a palate cleanser, I used imPress Color in Sweet Love. These are clipped and filed to be less coffin-y:
 
imPress press on nails in Sweet Love, a plain light camel brown
On my nails right now I have a set of Kiss Gel Fantasy in a pink and silver glitter design. I don't have to clip this length shape that much; usually I just do my thumbs and middle fingers since those see disproportionately long for some reason (maybe because those are the fingers I tend to break the nails on most when I'm not wearing fakes). I like this more square shape since it protects the sides and corners of my natural nails better but they're harder to find in medium length than the coffins and other pointy shapes.
 

I haven't given up on regular polish, it's just the fakes are so easy to deal with when traveling or short on time at home. And no chipping to worry about, just losing nails once in a while and replacing them is fast and easy (less so when I actually lose the nail and have to clip and file the replacement, but still, easier than dealing with redoing liquid polish away from home.